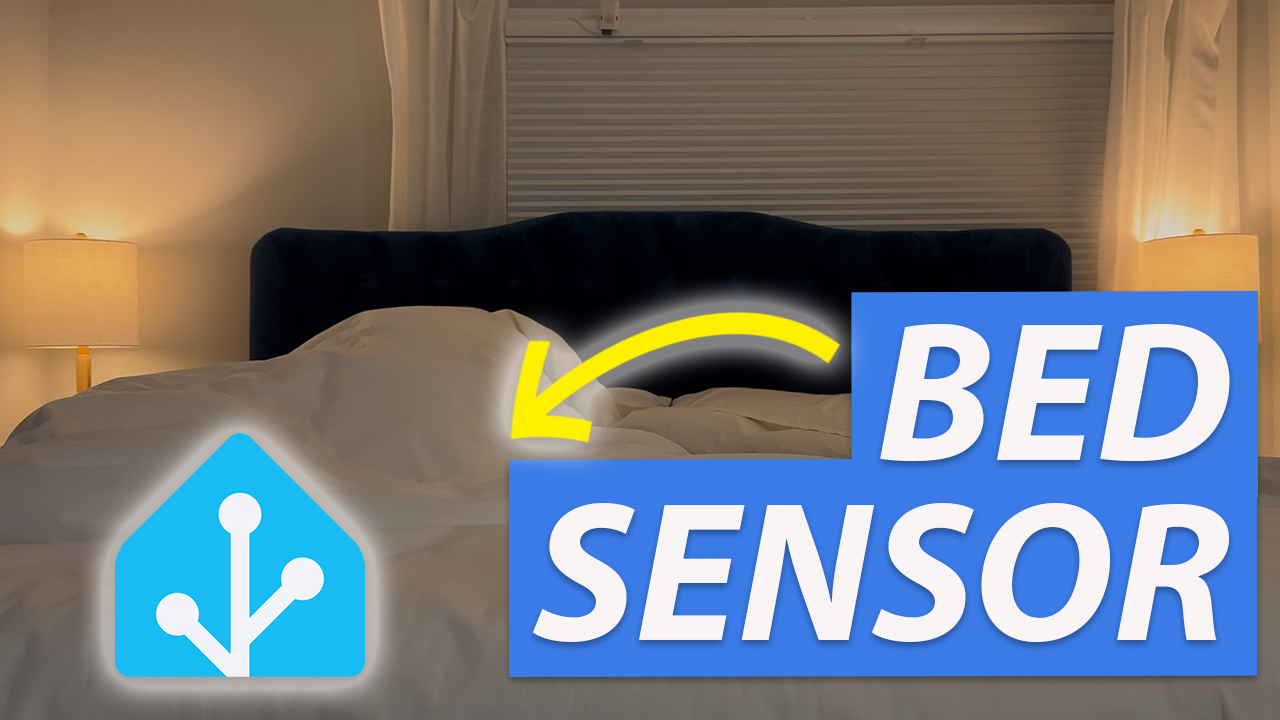
How to Automate Your Morning and Bedtime Routine with Bed Presence Sensors
Review of the Bed Presence MK1 by Elevated Sensors, including the features, setup and installation, home automation examples, and more.
Introduction
If you have a morning or bedtime routine, chances are there are things about it that you can automate. Why go around flipping off all the lights, closing the blinds, adjusting the thermostat, or setting the alarm if it can all just happen automatically. Sure, you can set a schedule for these actions to occur at the same time every day, but what if your schedule changes?
That’s where a bed occupancy sensor can come in handy. It knows when the bed is occupied or not, and even which side of the bed, so you can tailor automatons for you and whomever you share a bed with.
I’m taking a look at the Bed Presence MK1, a bed occupancy sensor from Elevated Sensors that works plug-and-play with Home Assistant. It unlocks all kinds of new home automation possibilites. I’ll walkthrough the features, setup and installation, home automation examples, and more.
Main Points
Features
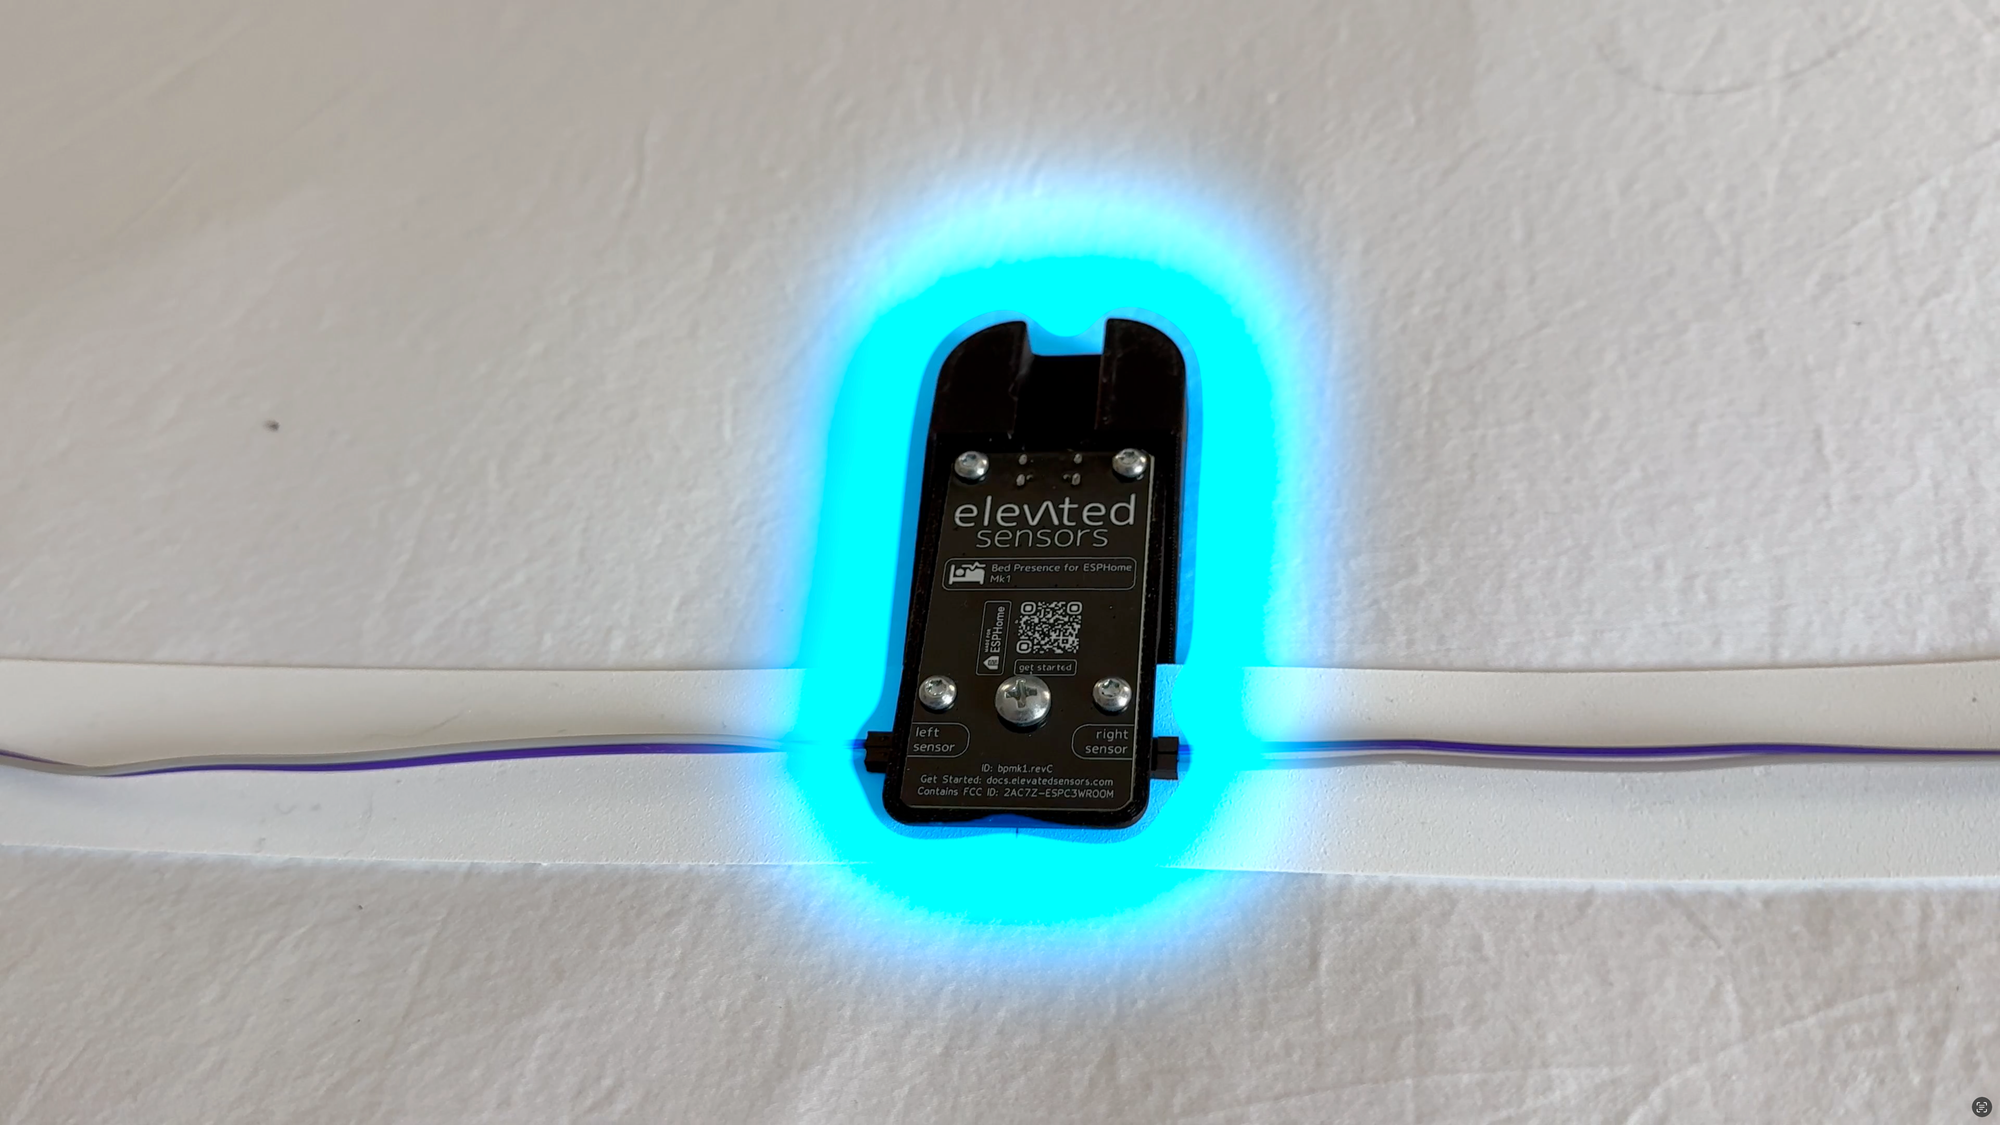
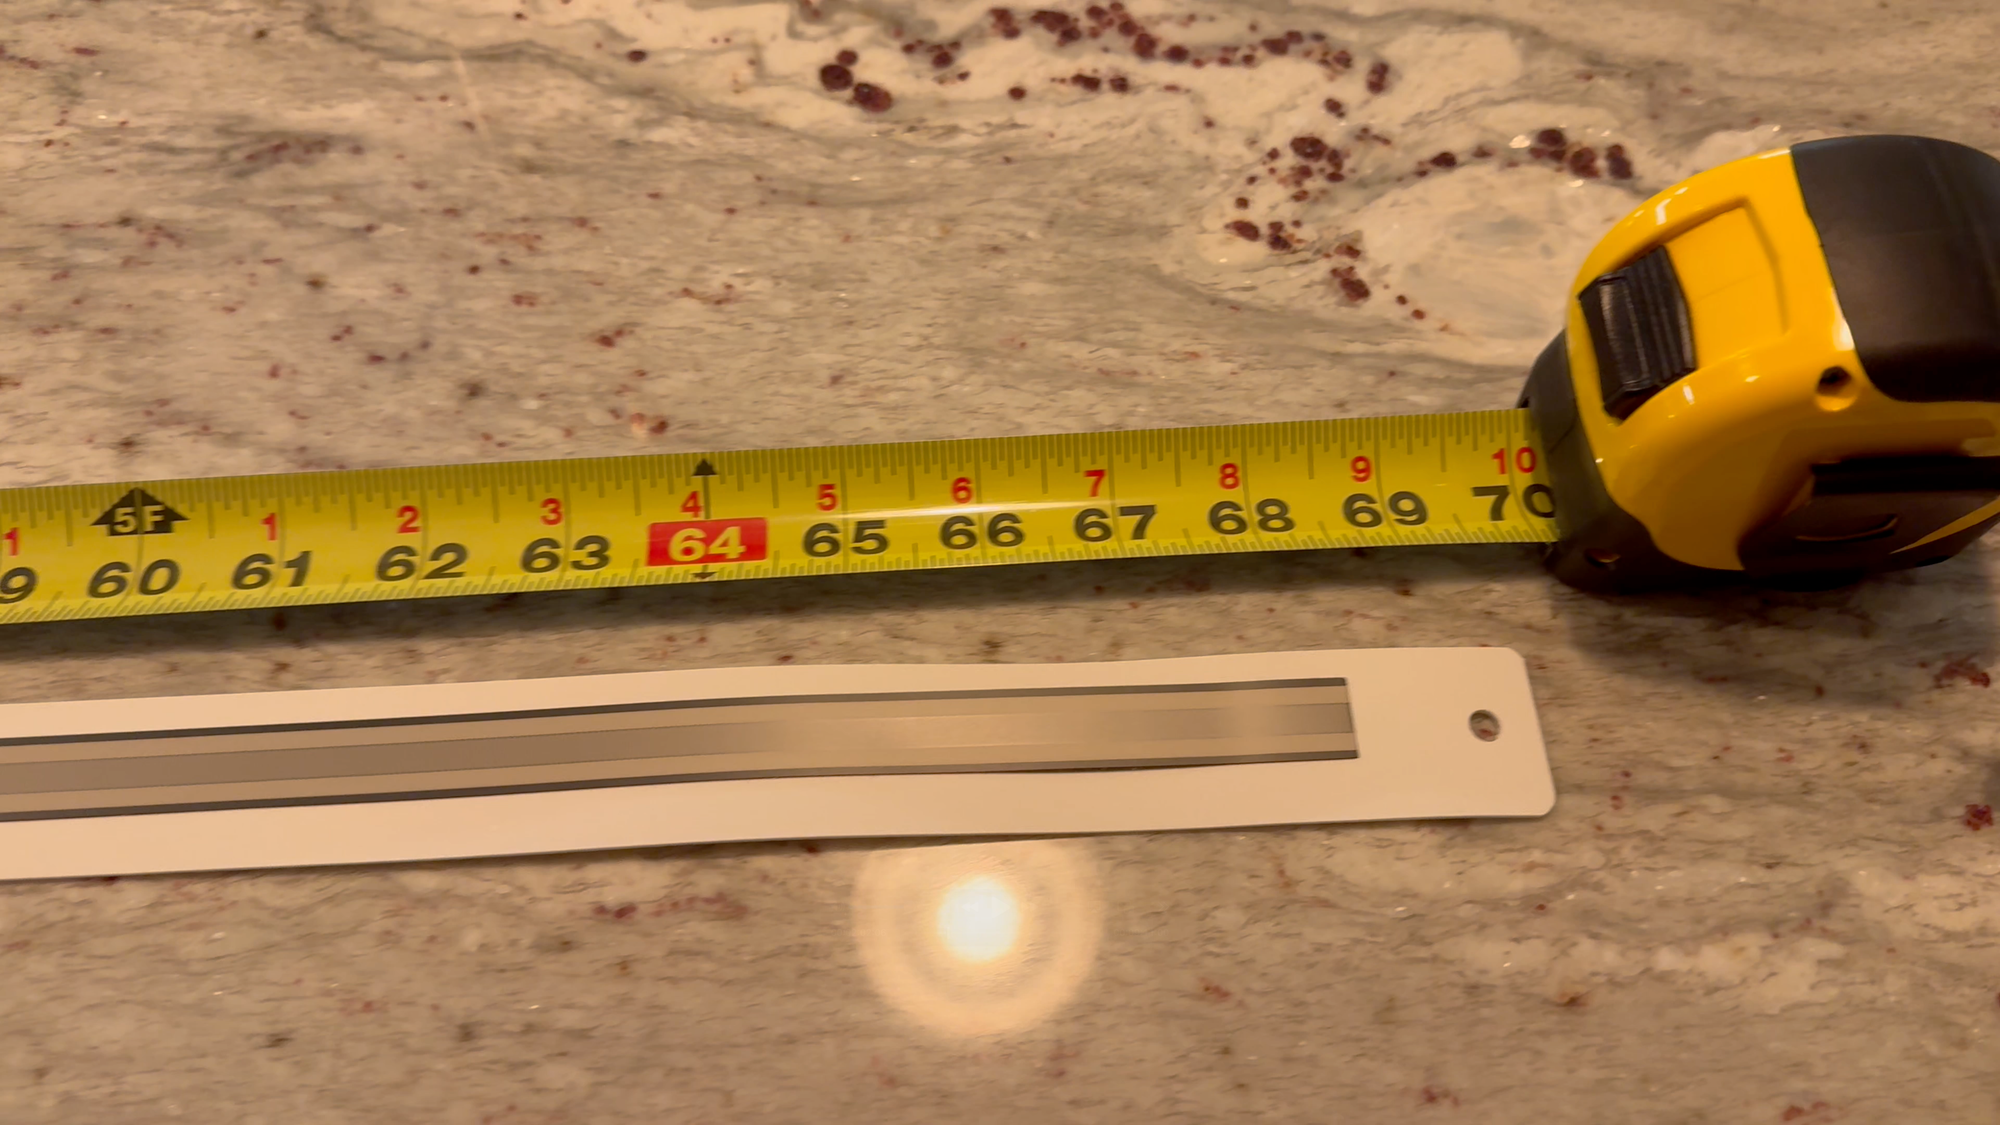
The Bed Presence MK1 uses extra long force resisting sensors, with 24 inches (61 cm) of sensing area per sensor. It detects presence across the entire range of the pressure sensor. Automated software calibration in Home Assistant helps you set the correct pressure threshold easily. This way, the sensor adjusts to you and your bed. Smaller beds can use one sensor strip, whereas Queen or King size beds can use two, so it’s suitable for all mattress sizes.
It mounts between your mattress and bed slats or a box spring, so it’s out of the way and you don’t even know it’s there. The sensor comes pre-loaded with ESPHome, offering a plug-and-play setup with Home Assistant — no coding required.
Elevated Sensors Bed Presence MK1: Features
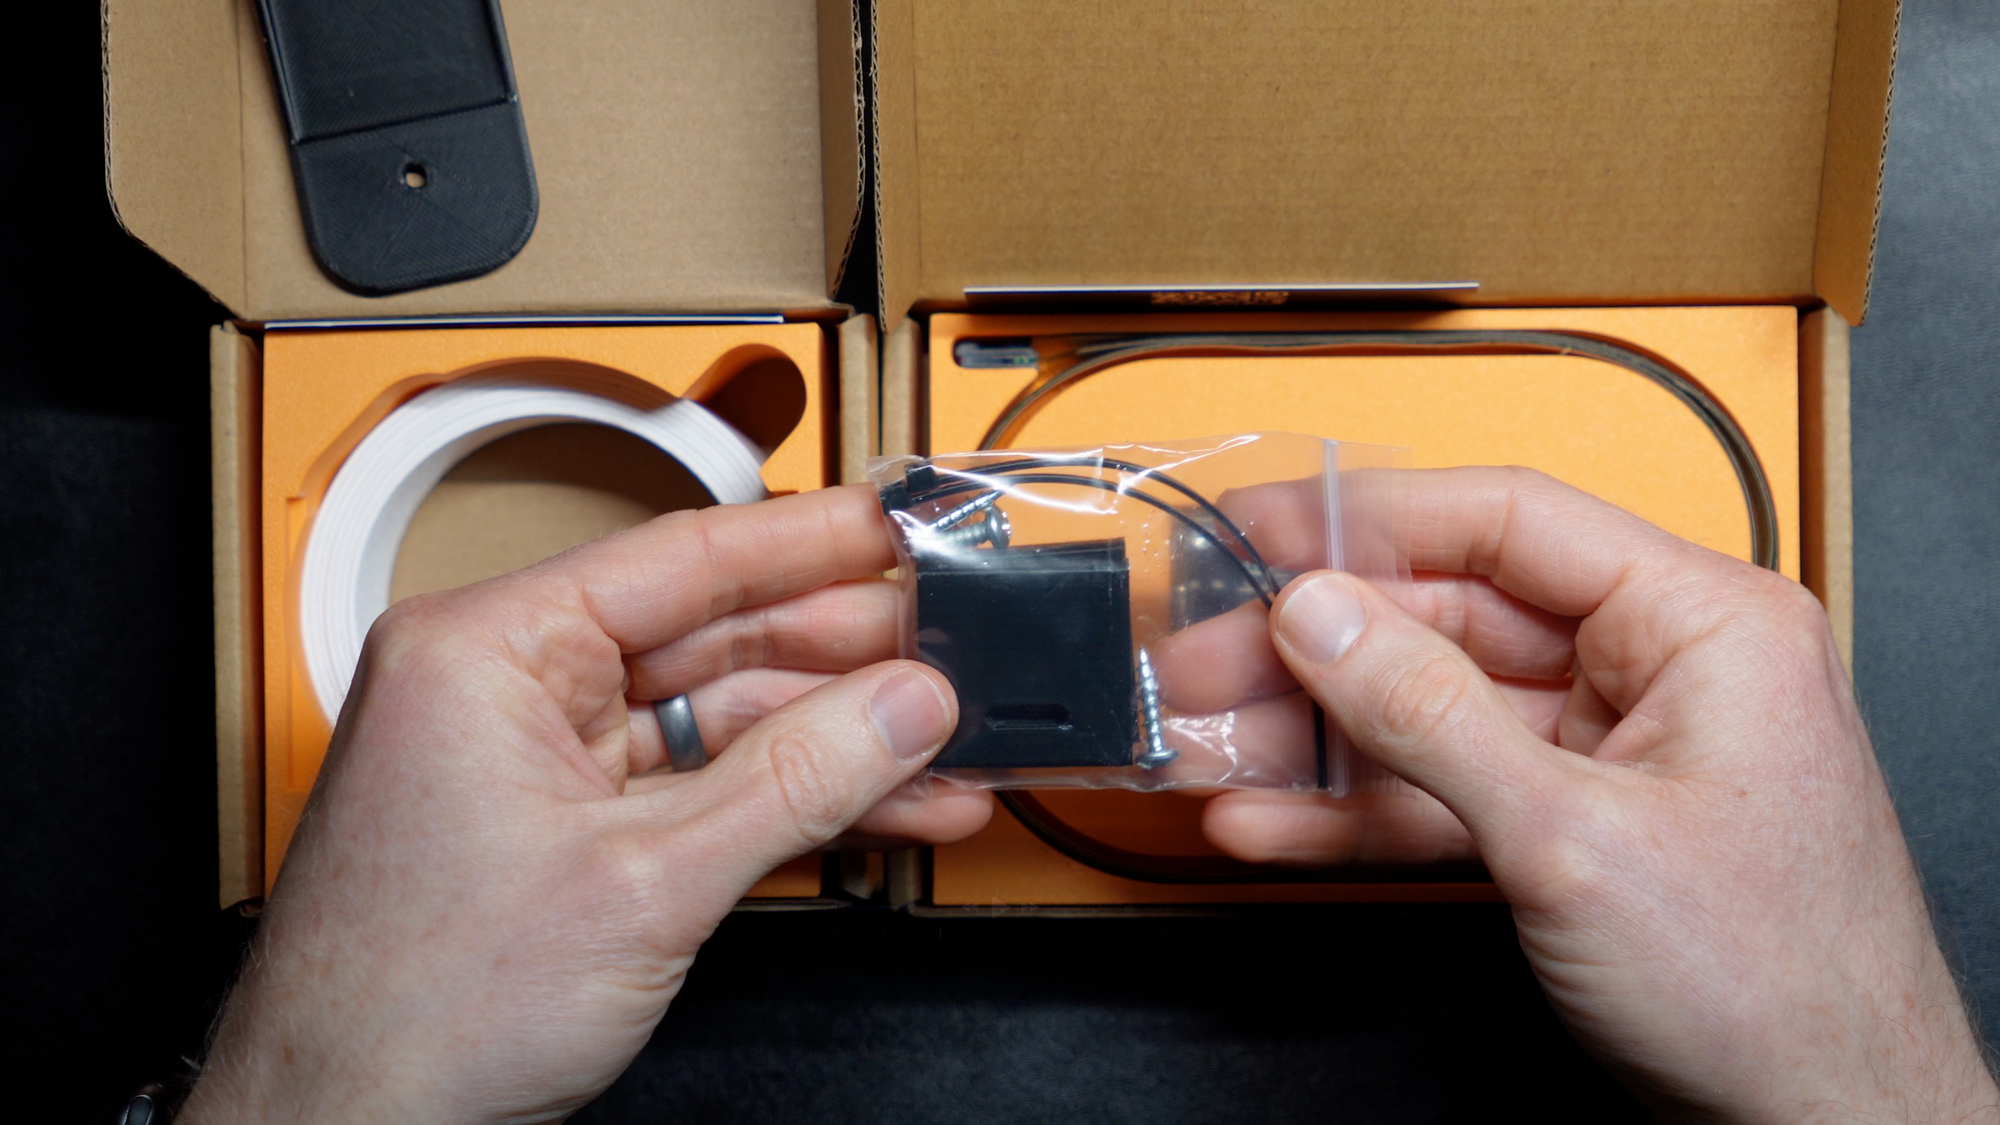
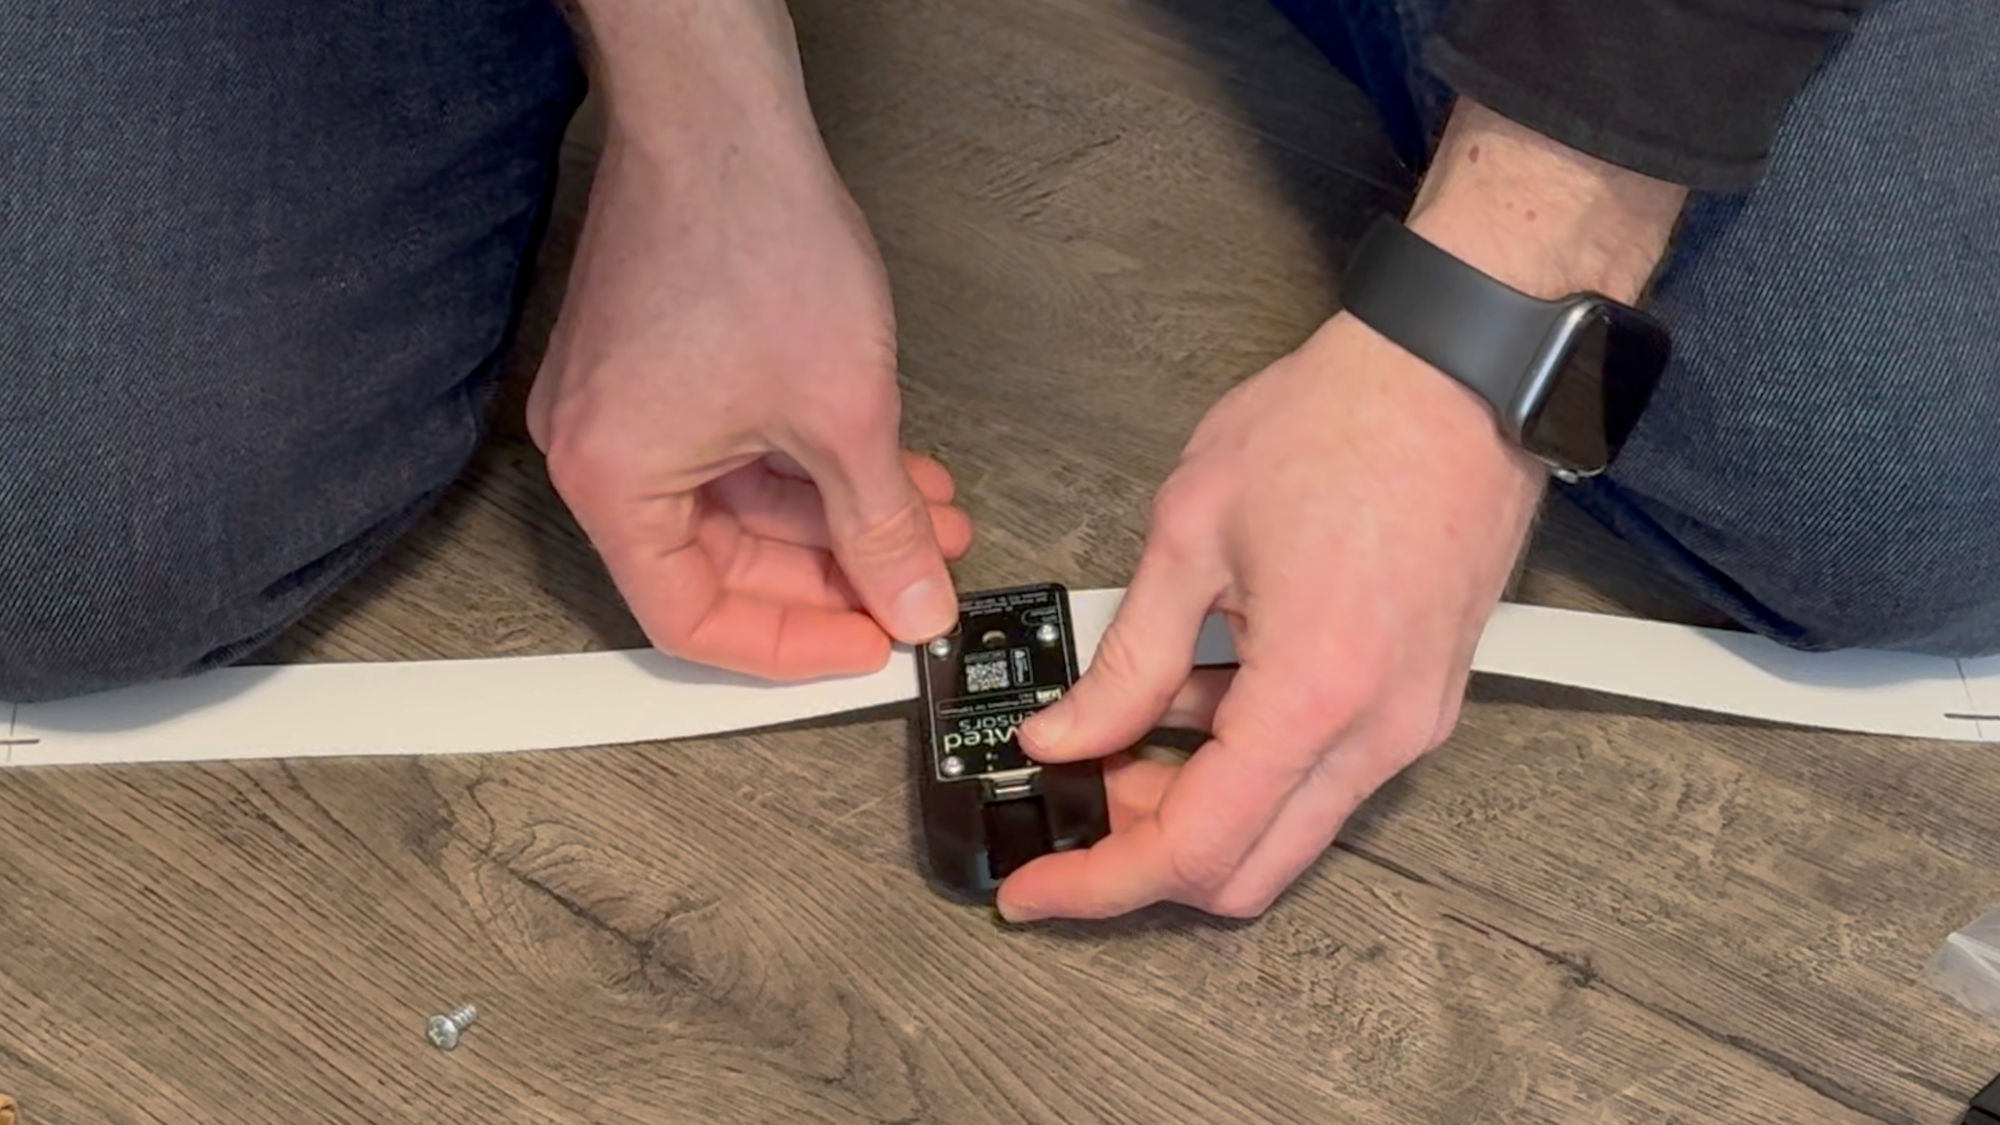
Unboxing
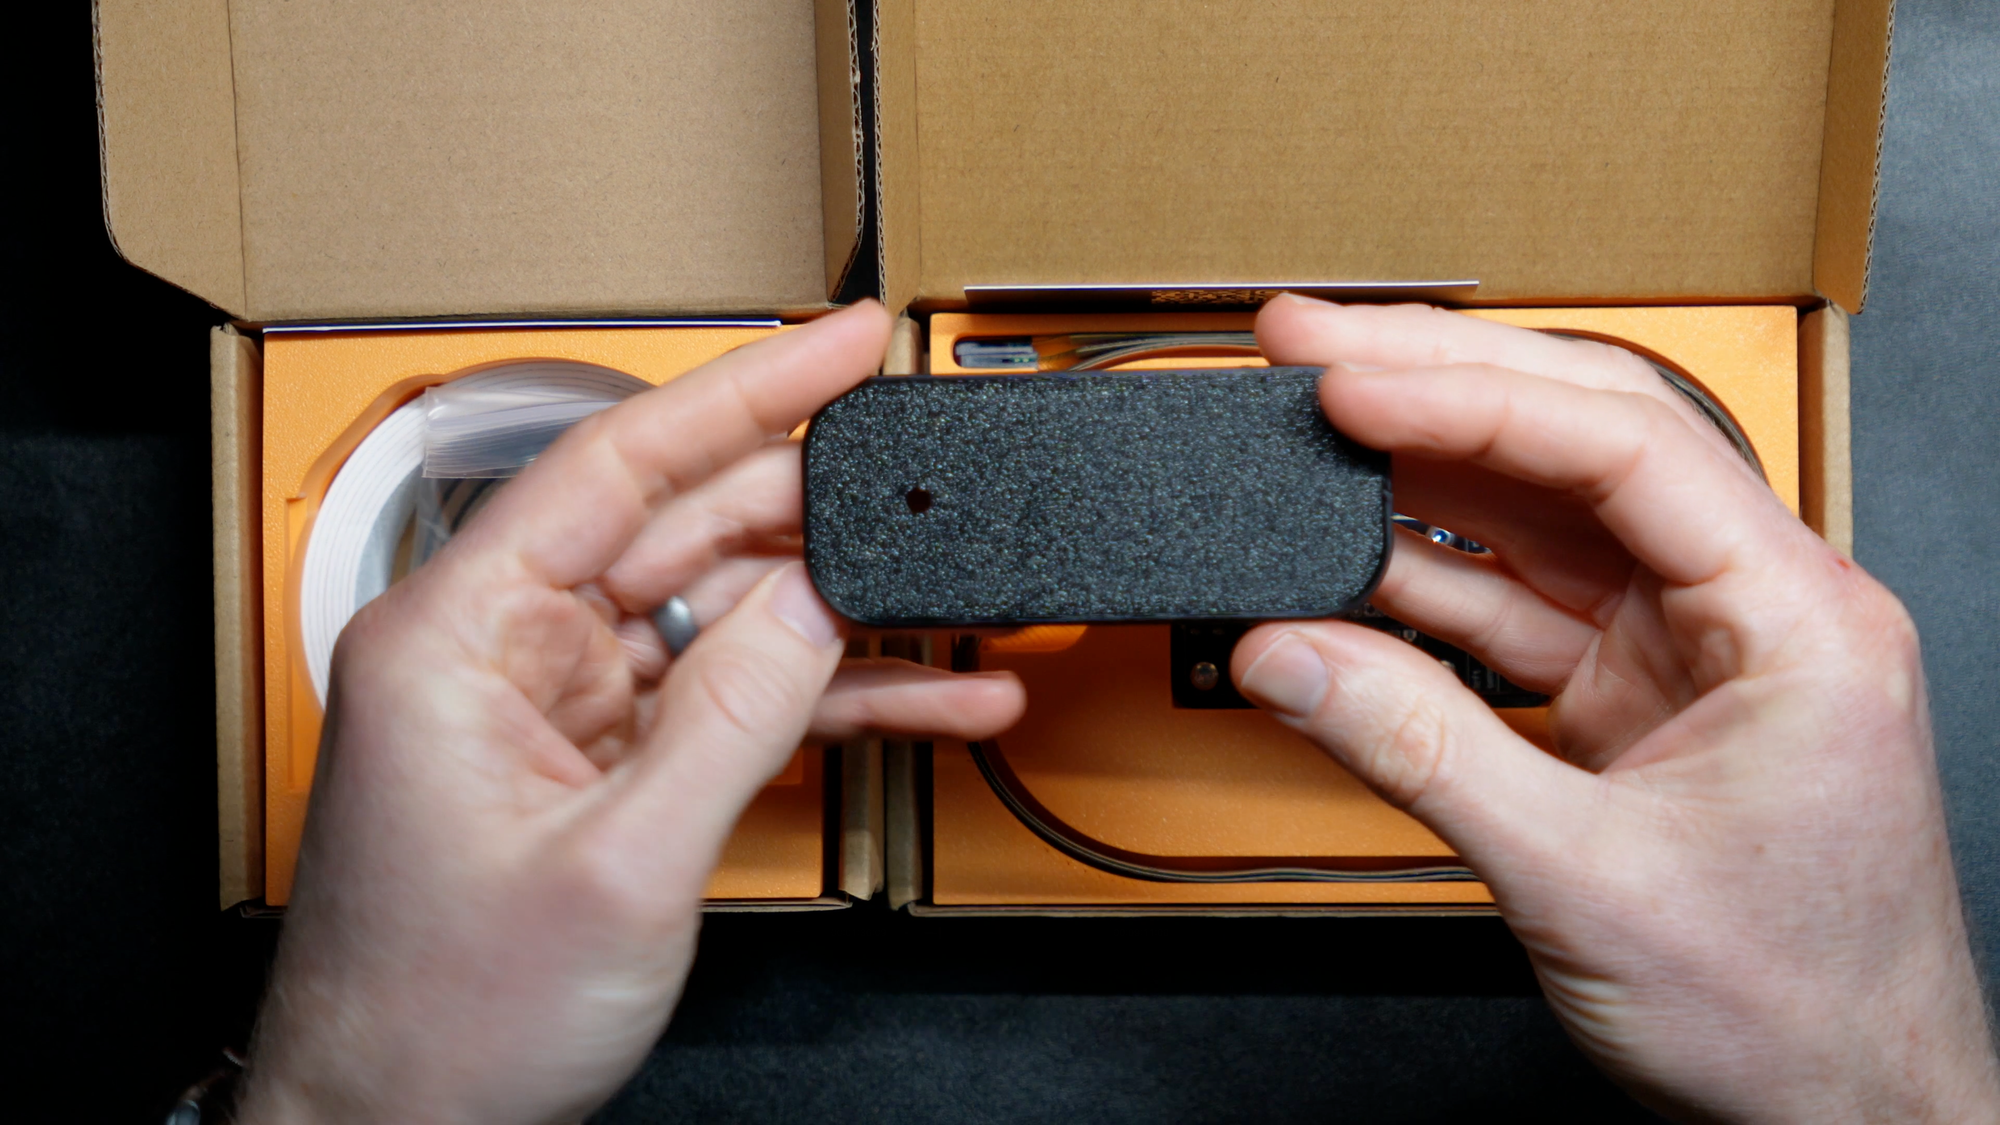
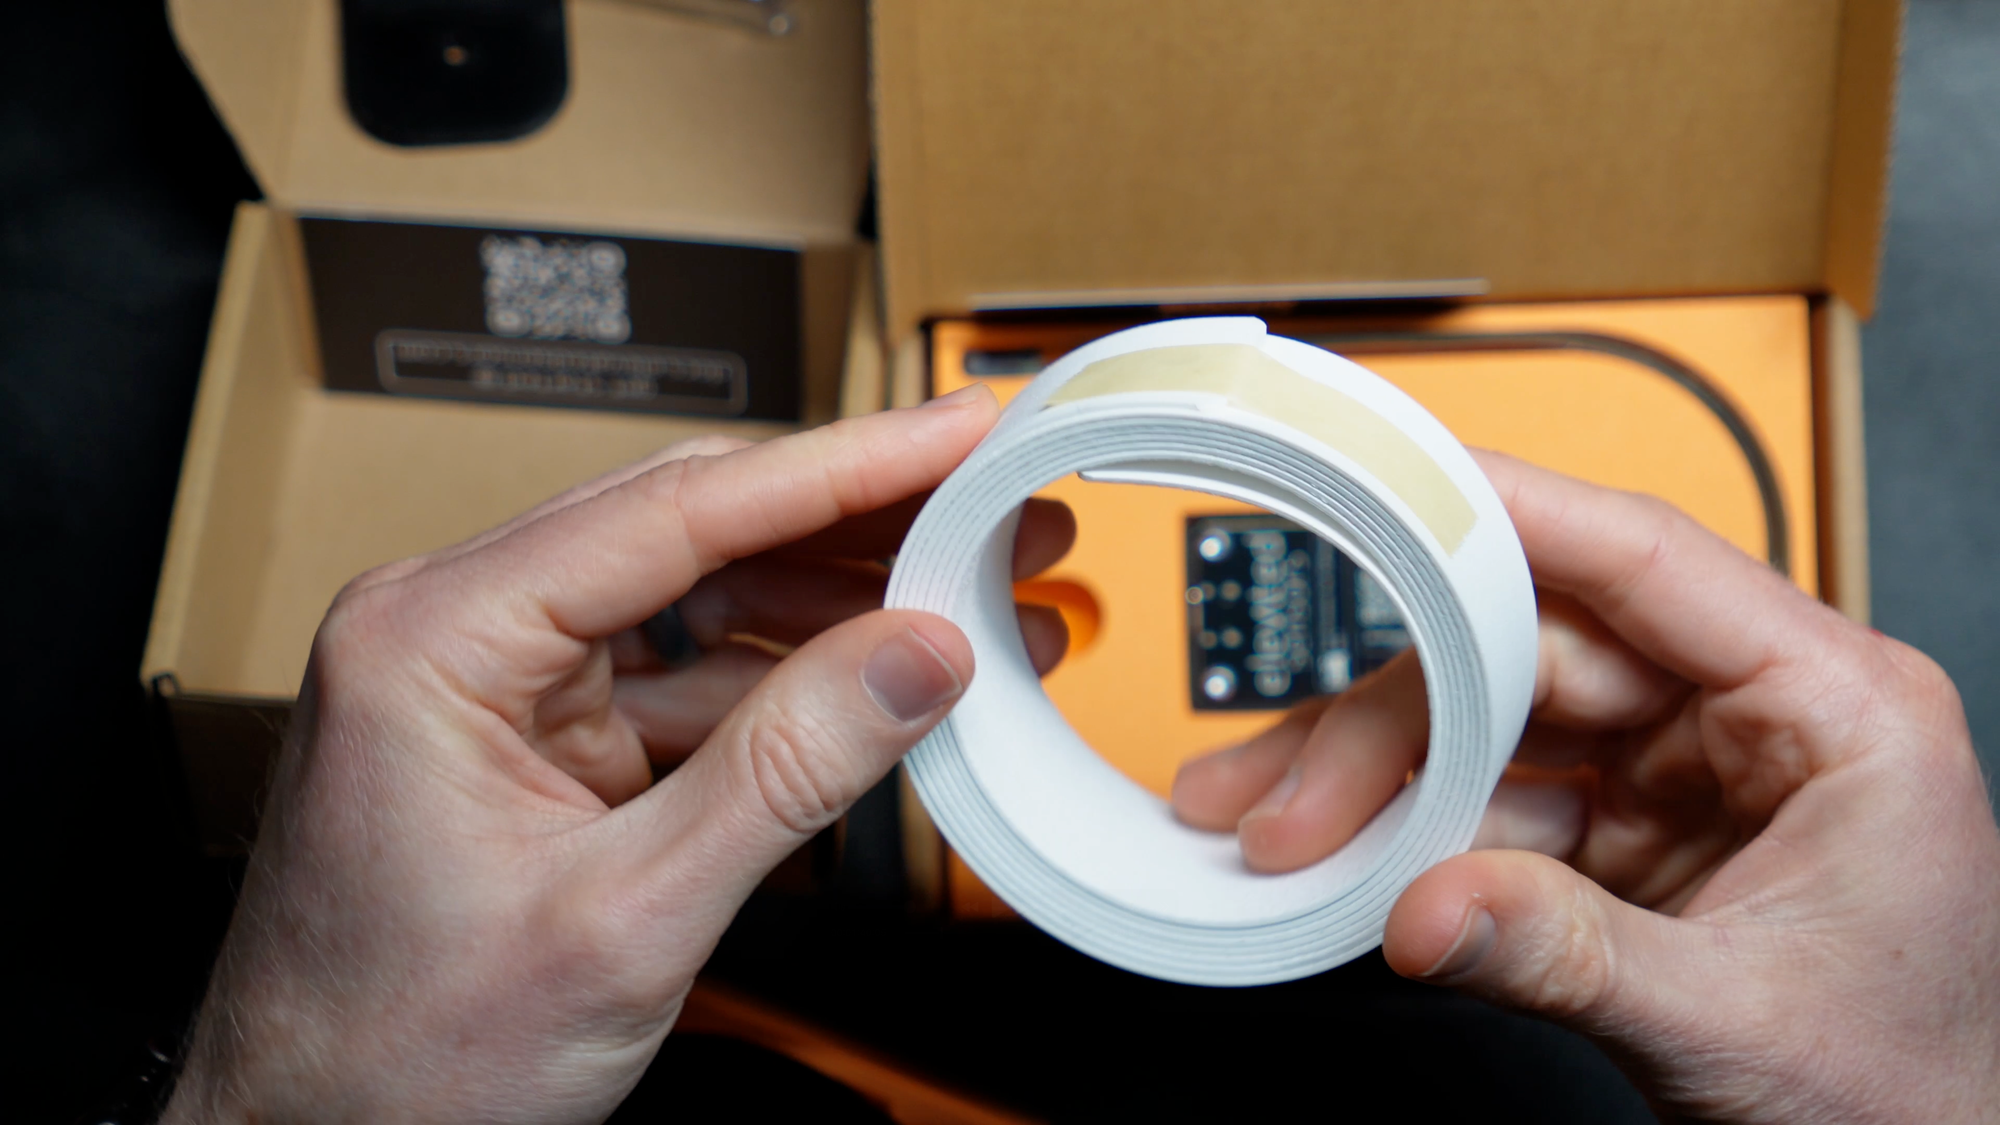
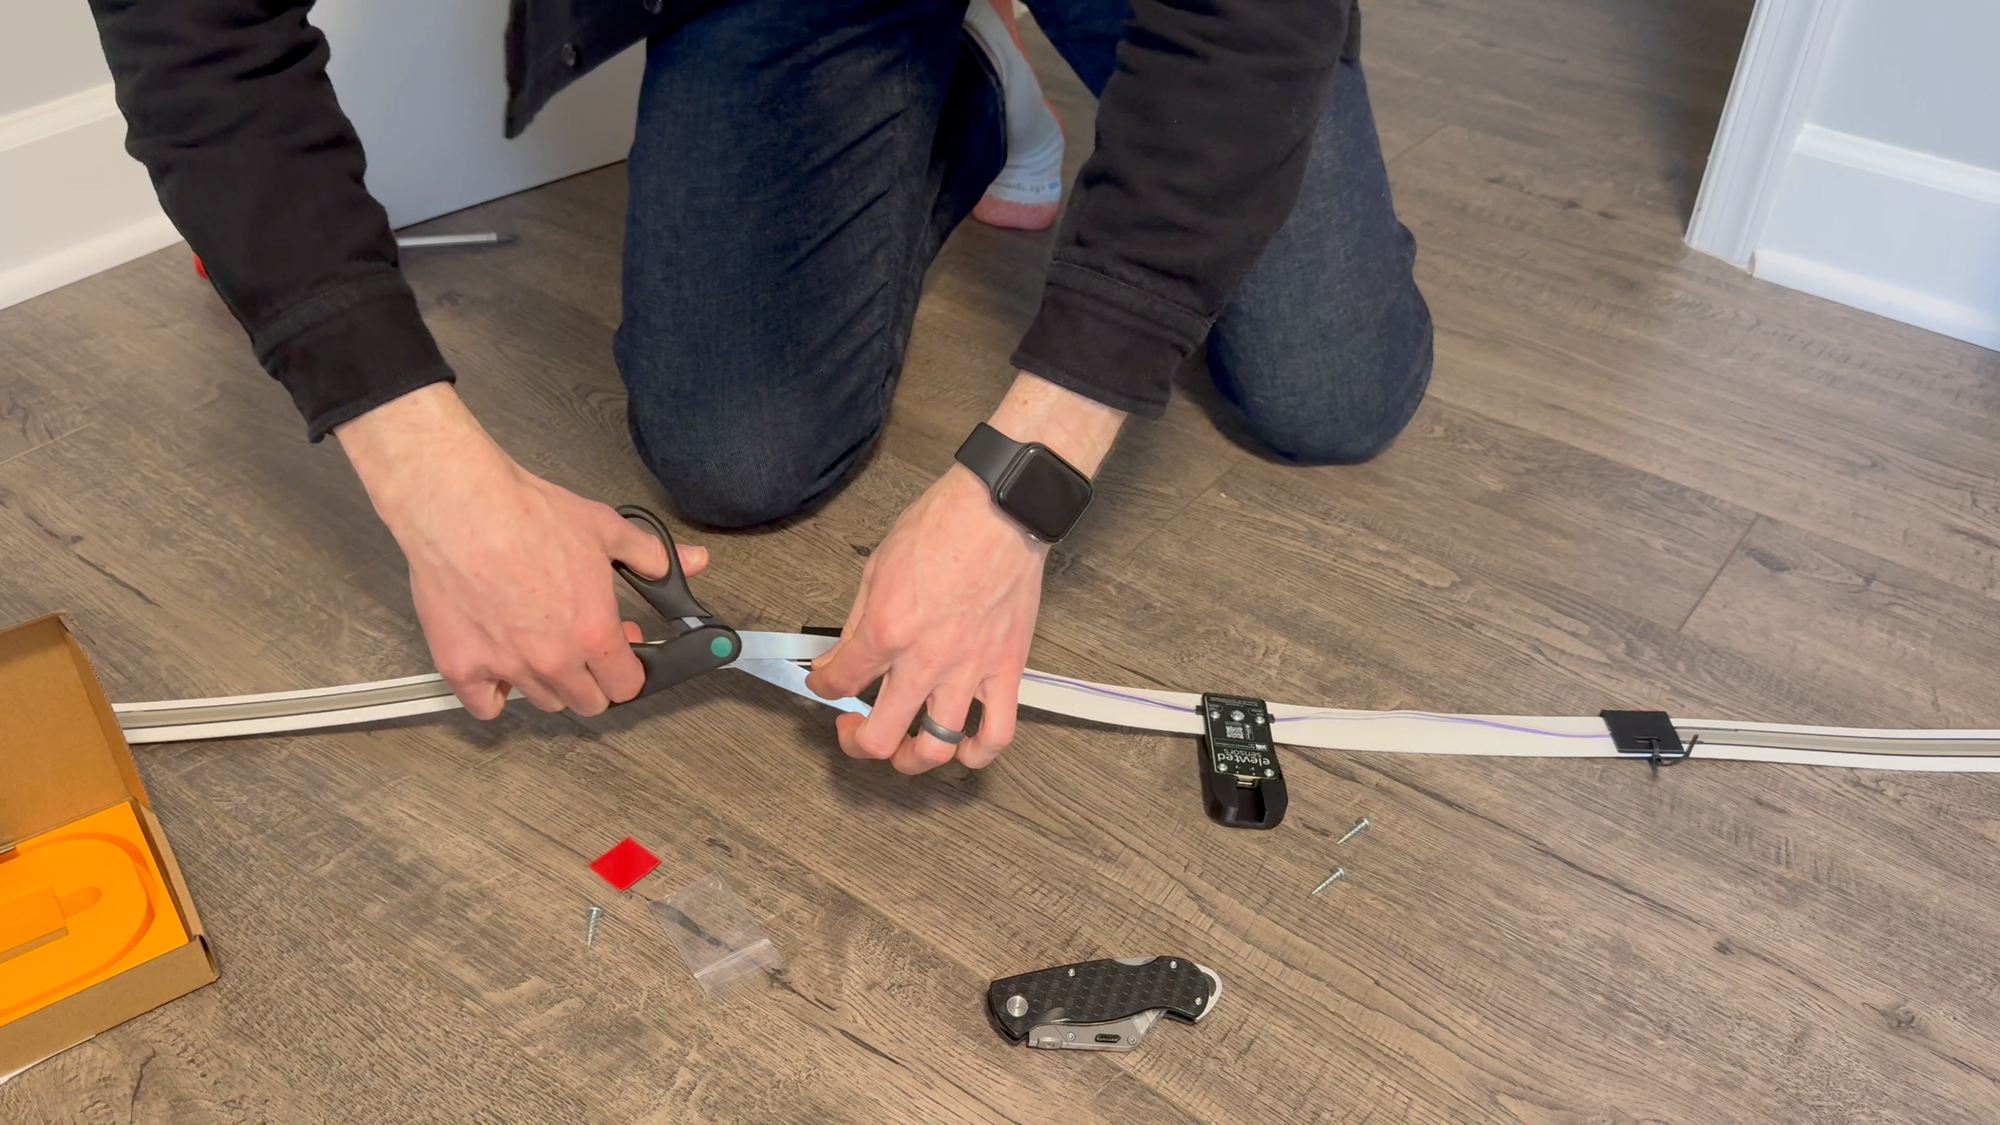
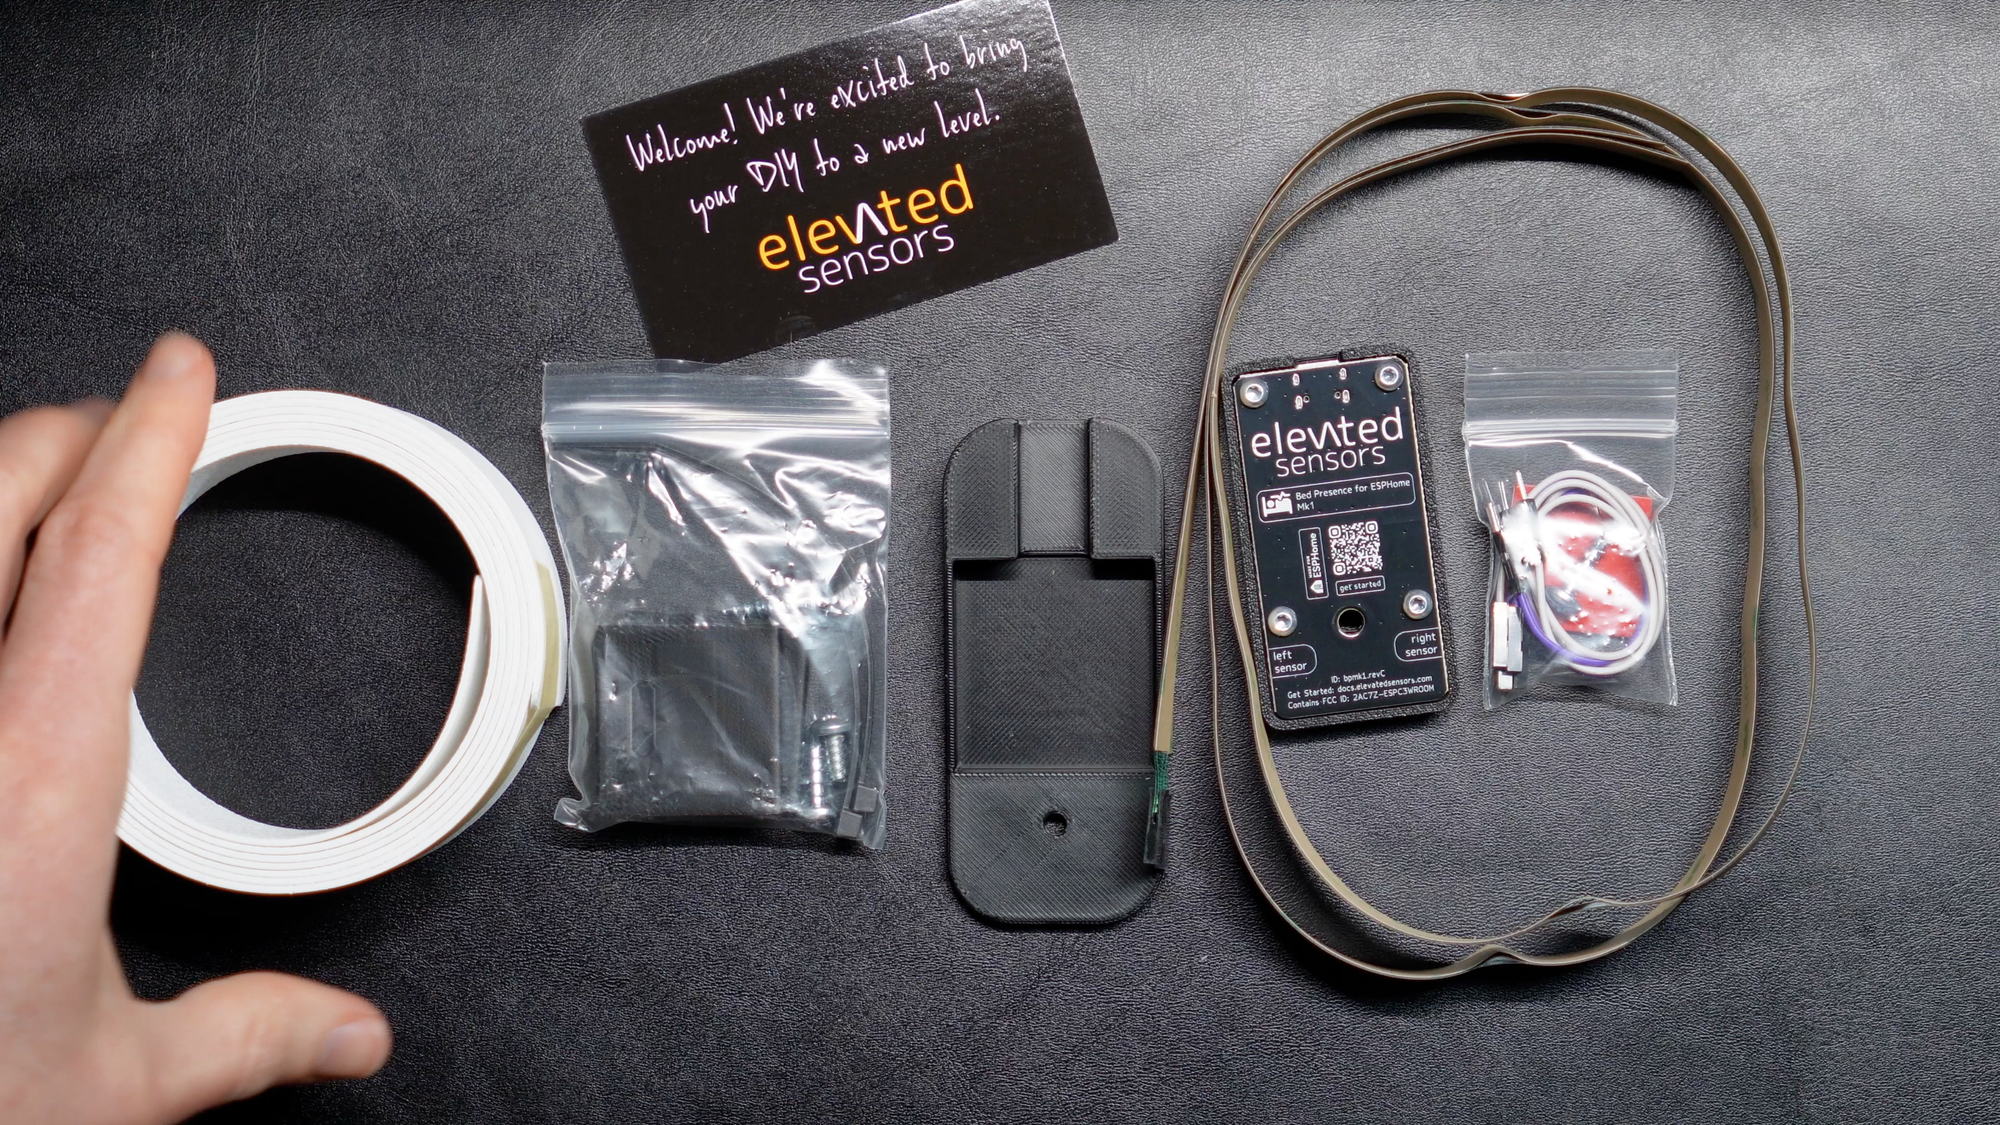
I have the King size mounting kit and dual sensor version. Inside the mounting kit is a black cradle, zip ties, screws, black sensor extension clips, and a white, flexible slat.
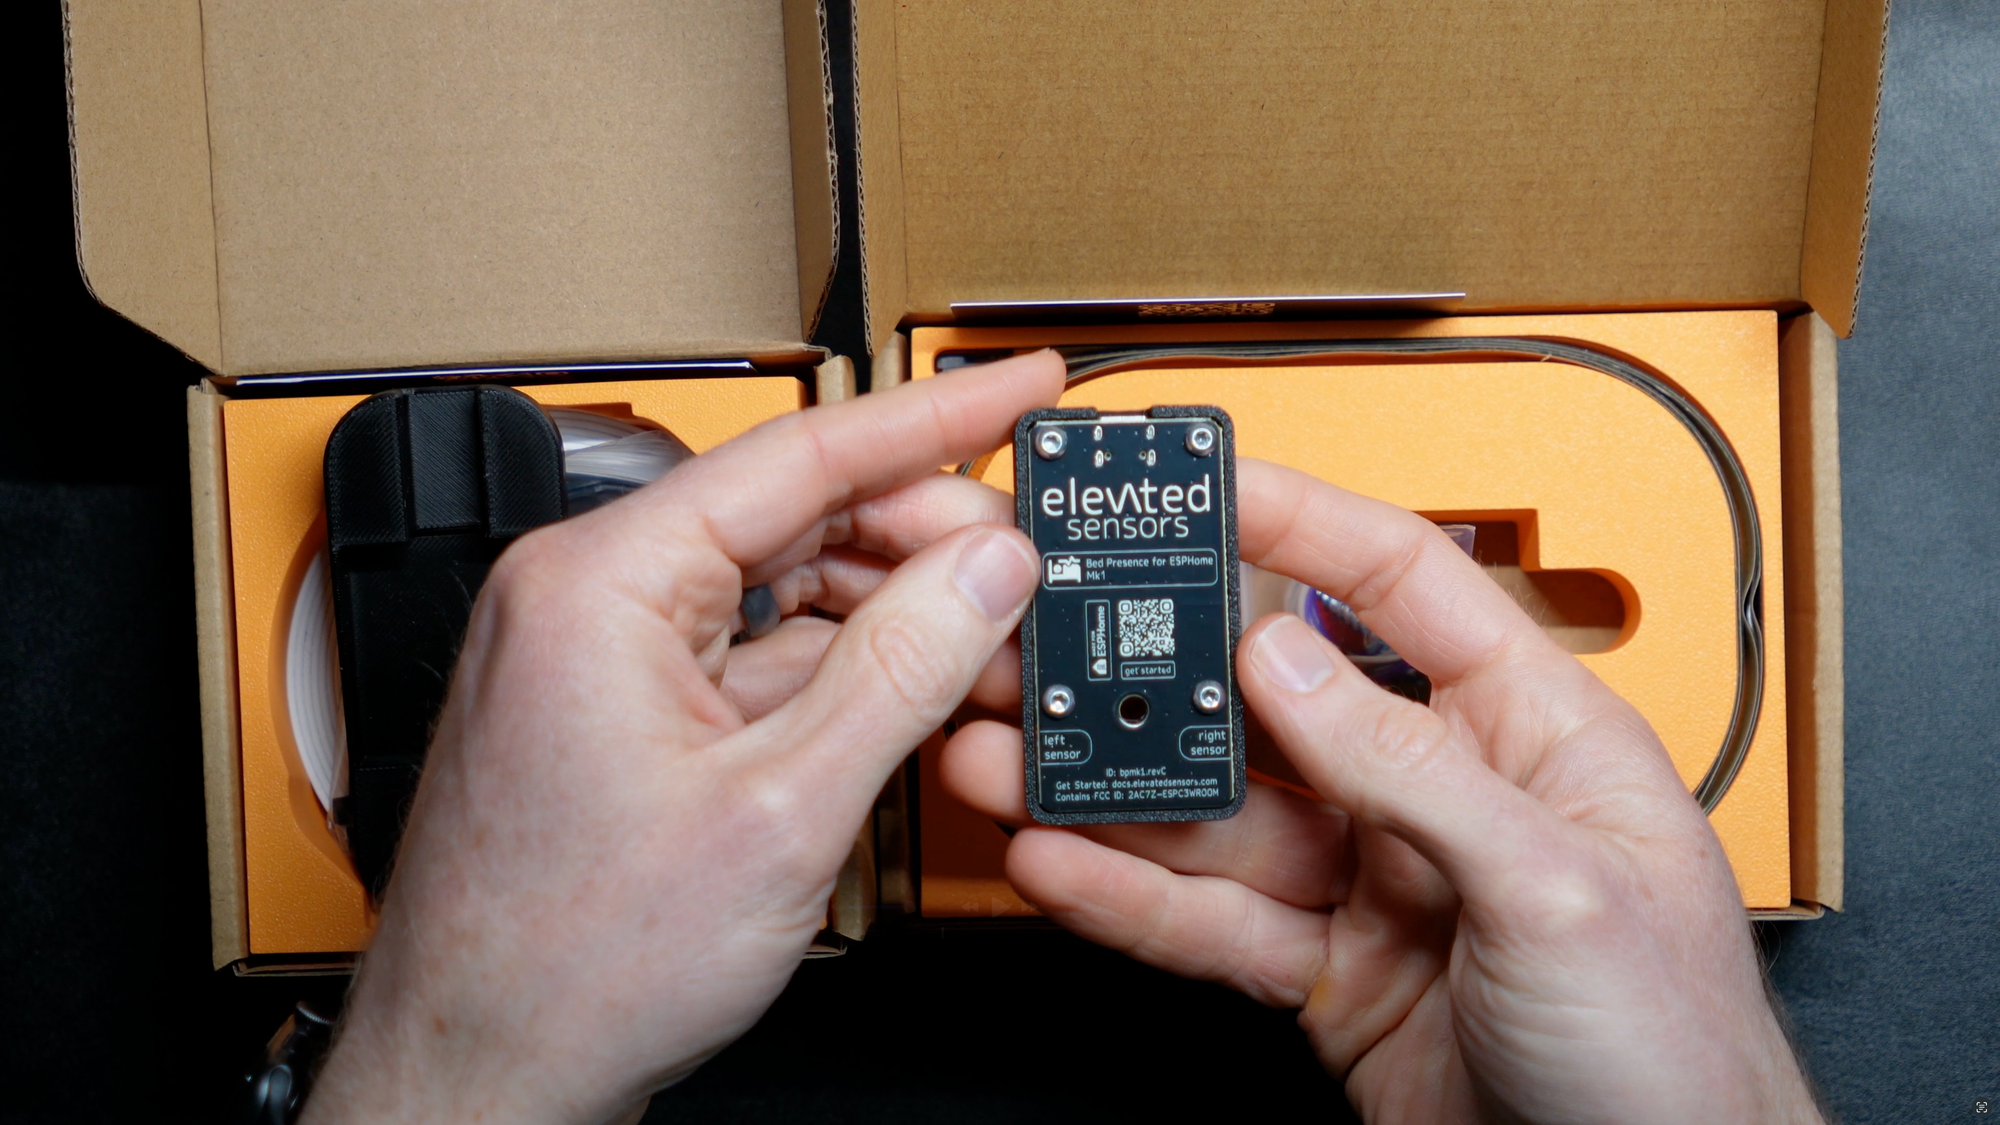
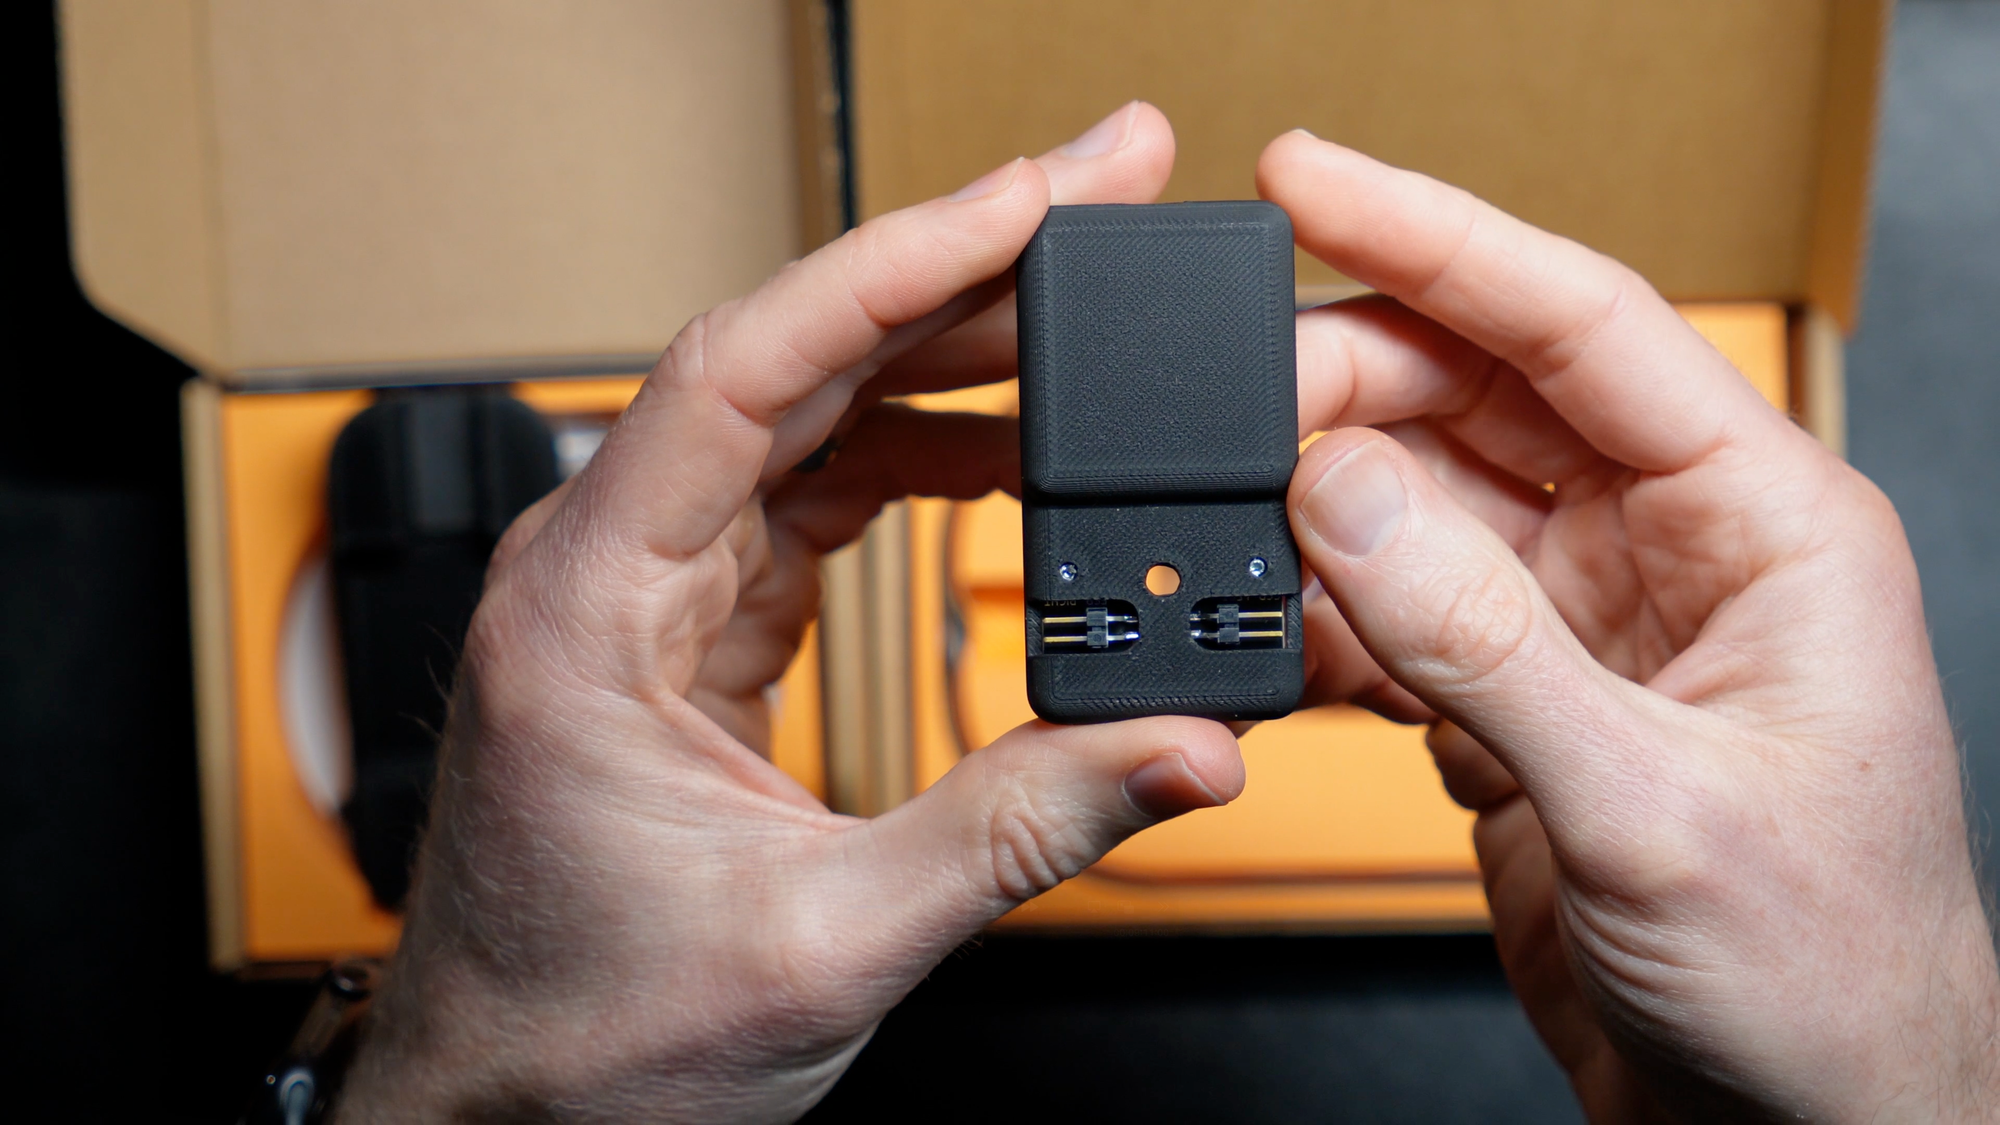
Inside the dual sensor box is the bed presence module. It has left and right points to install the sensor extension wires, and a USB-C port for power. Note that the power supply is not included. You also get extension wires, screws, and double-sided adhesive. Lastly, there are the two extra long force pressure sensors, each with an adhesive backing. The King mounting kit end-to-end is around 70 inches long (178 cm).
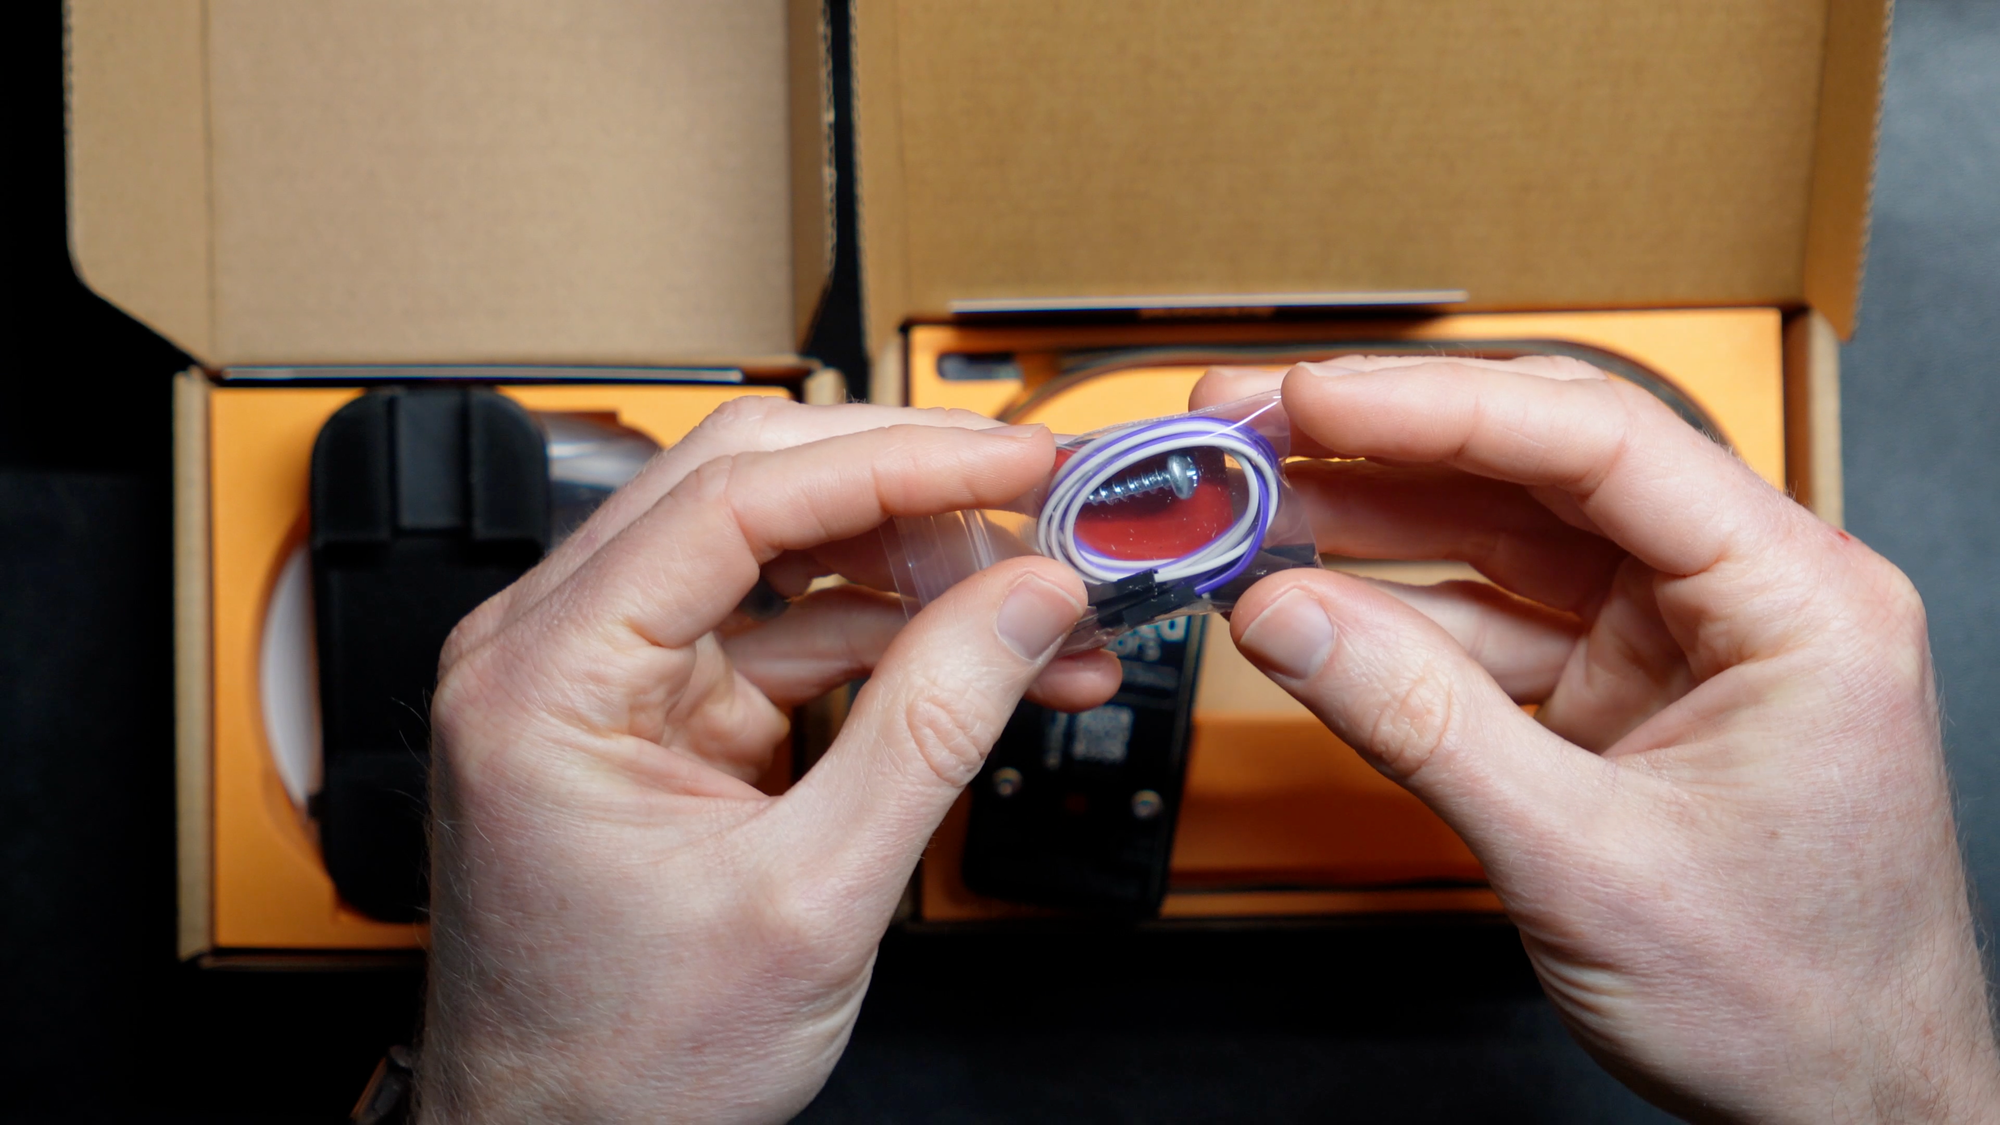
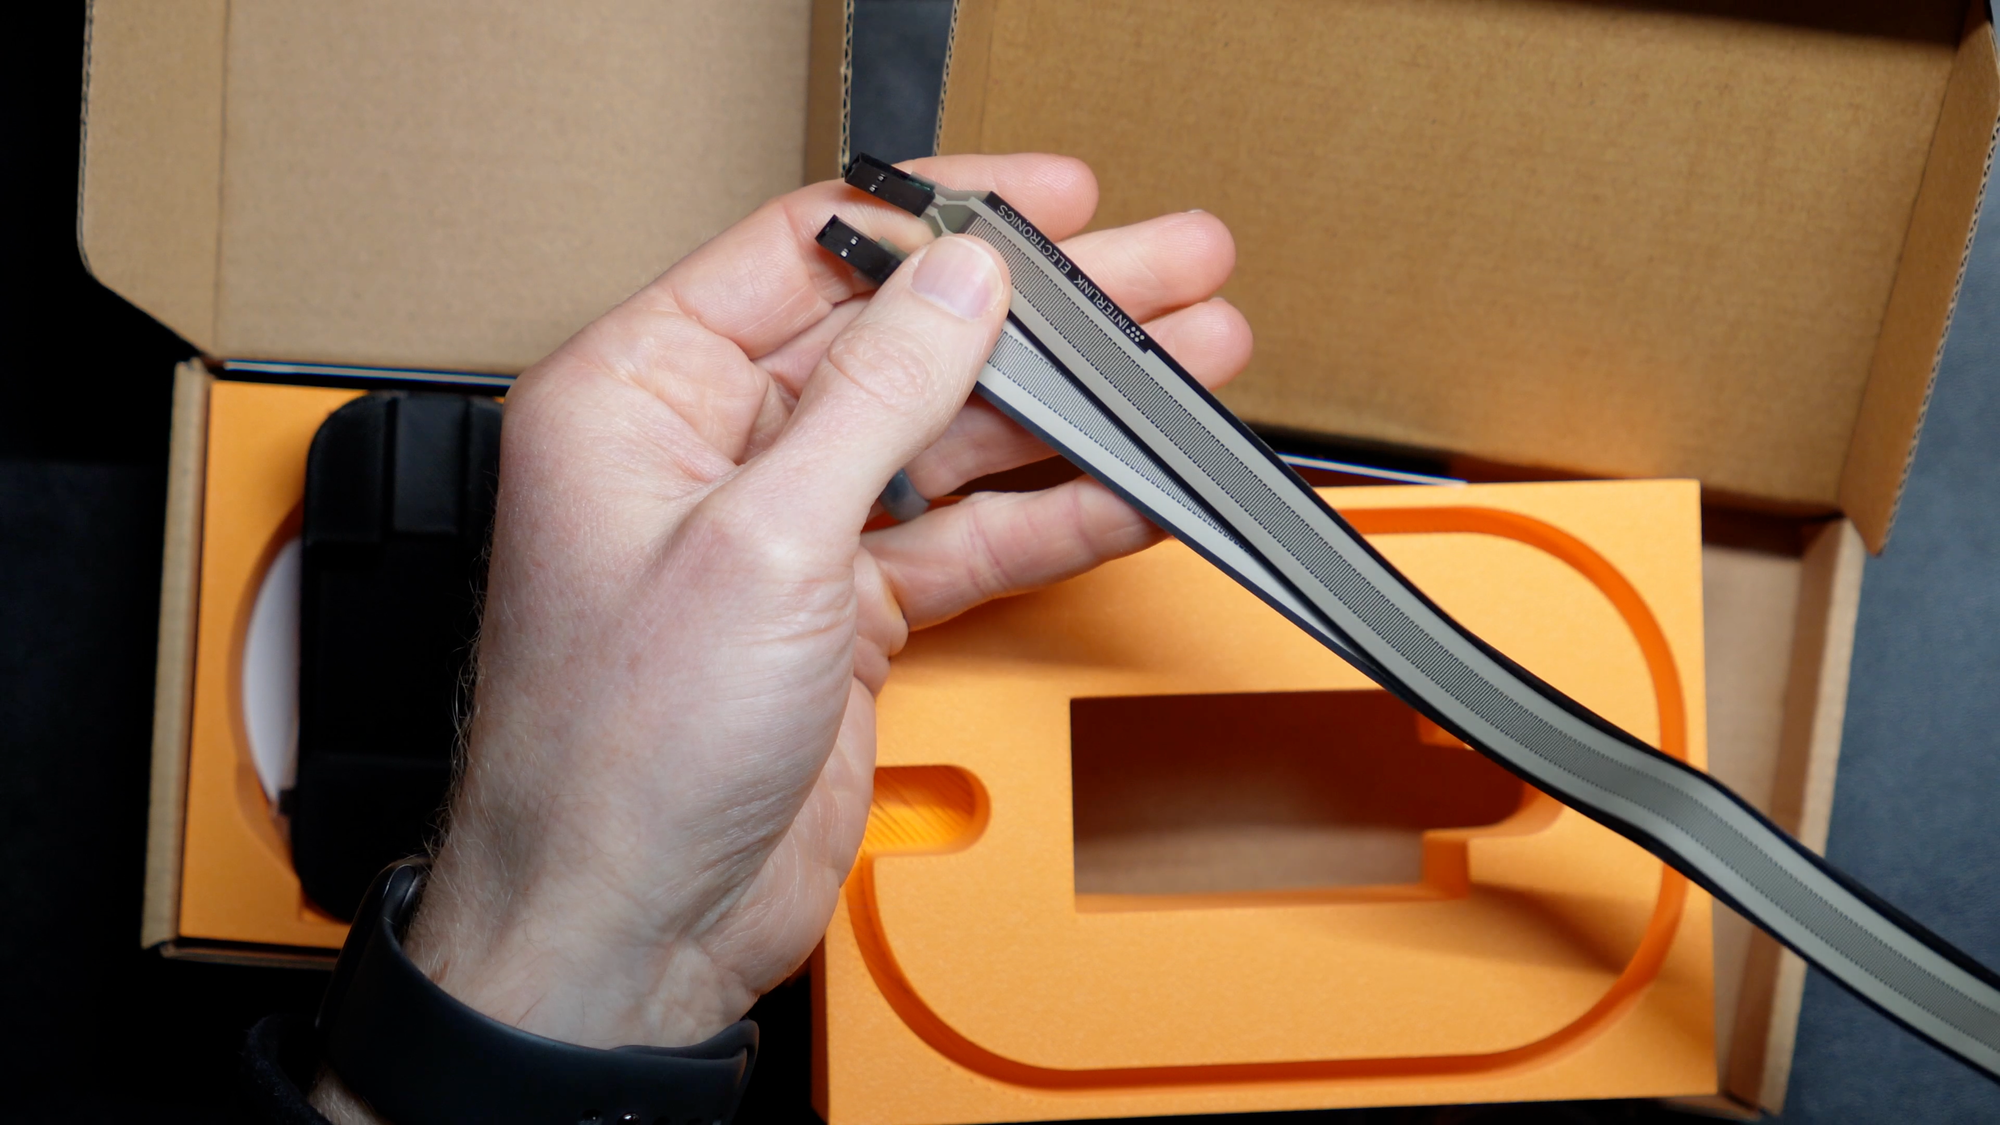
Elevated Sensors Bed Presence MK1: Unboxing
Home Assistant Setup
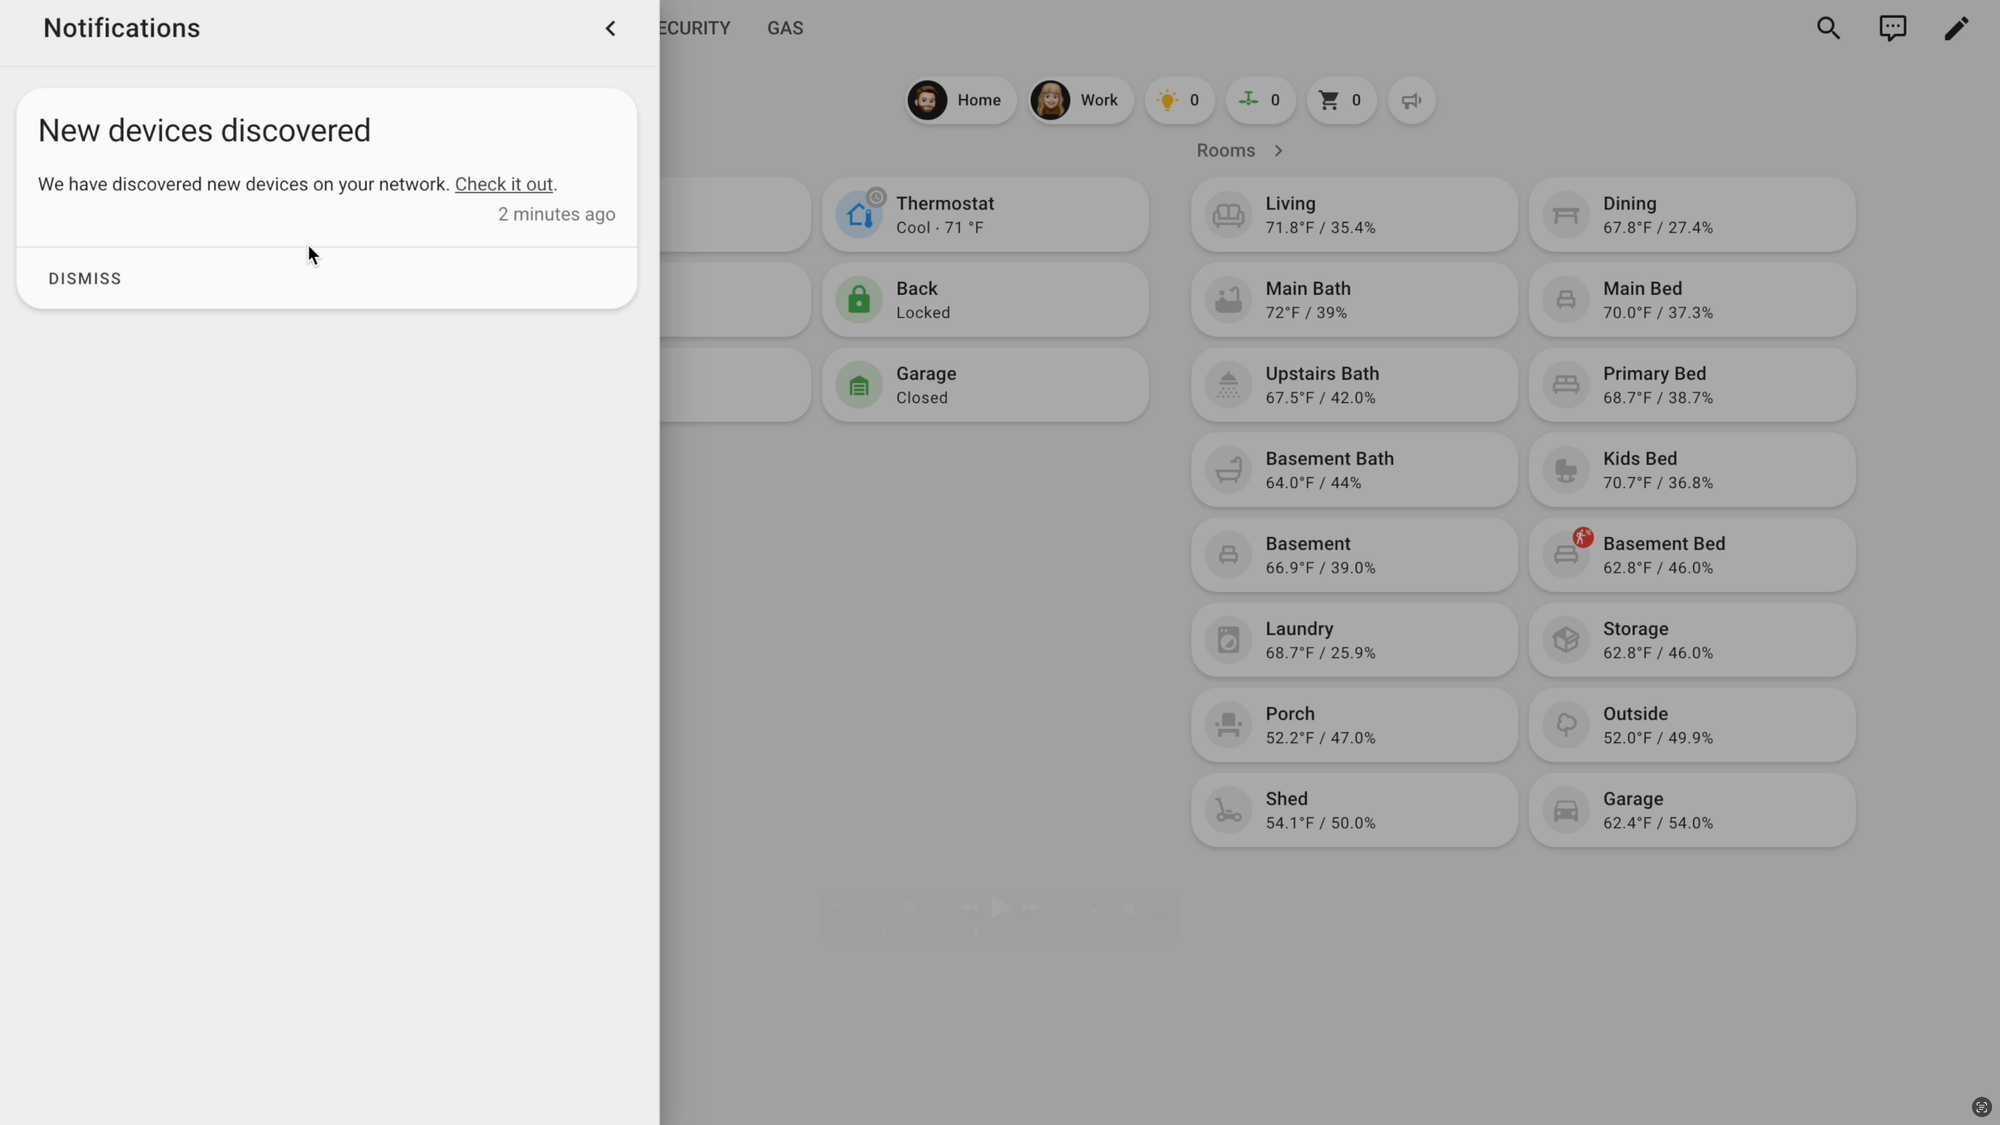
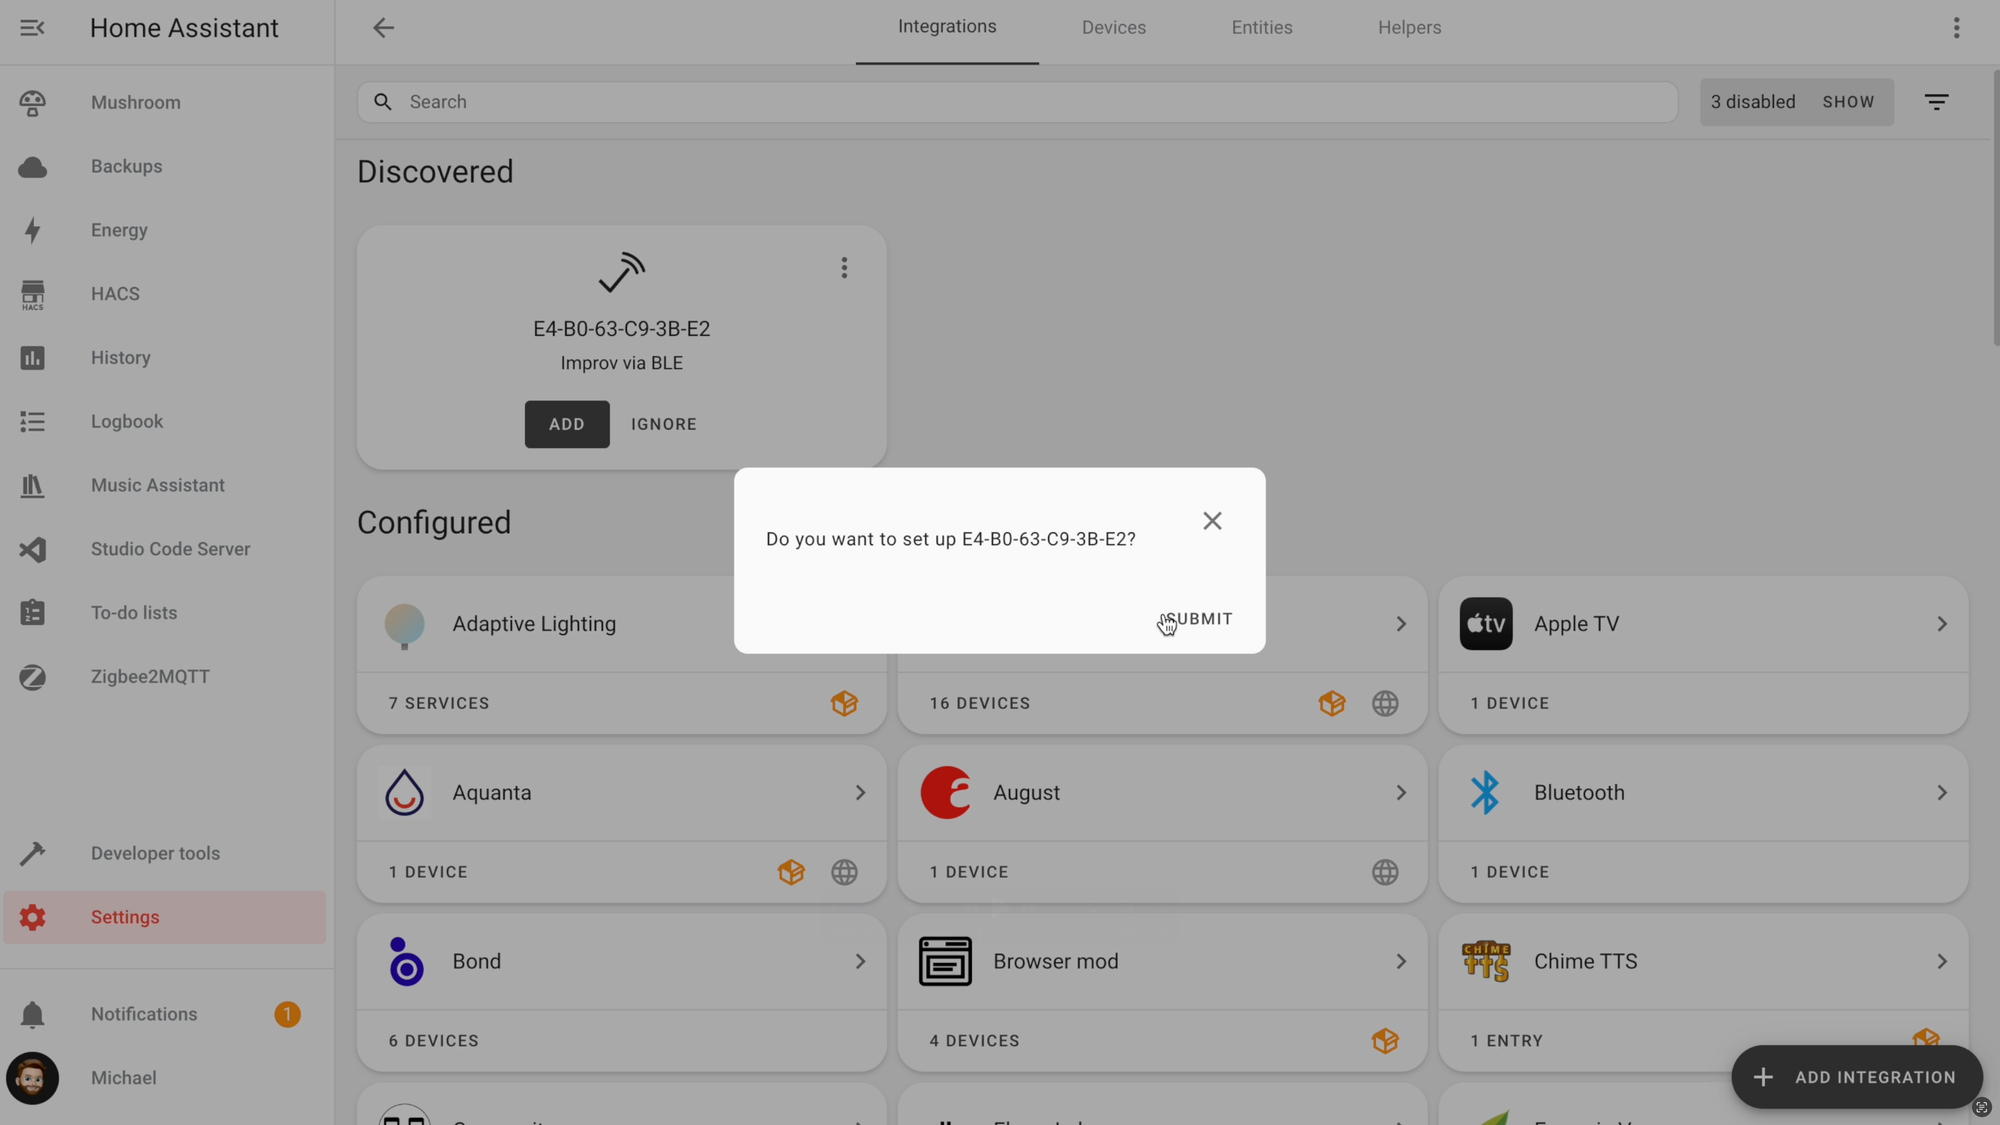
Adding the device to Home Assistant is quick and easy. If you have a Bluetooth proxy like I do, just connect the sensor to a USB-C power supply. In Home Assistant, there should be a notification telling you that a new device was discovered. Otherwise, you can go to Settings > Devices & services > and you’ll find the newly discovered device at the top.
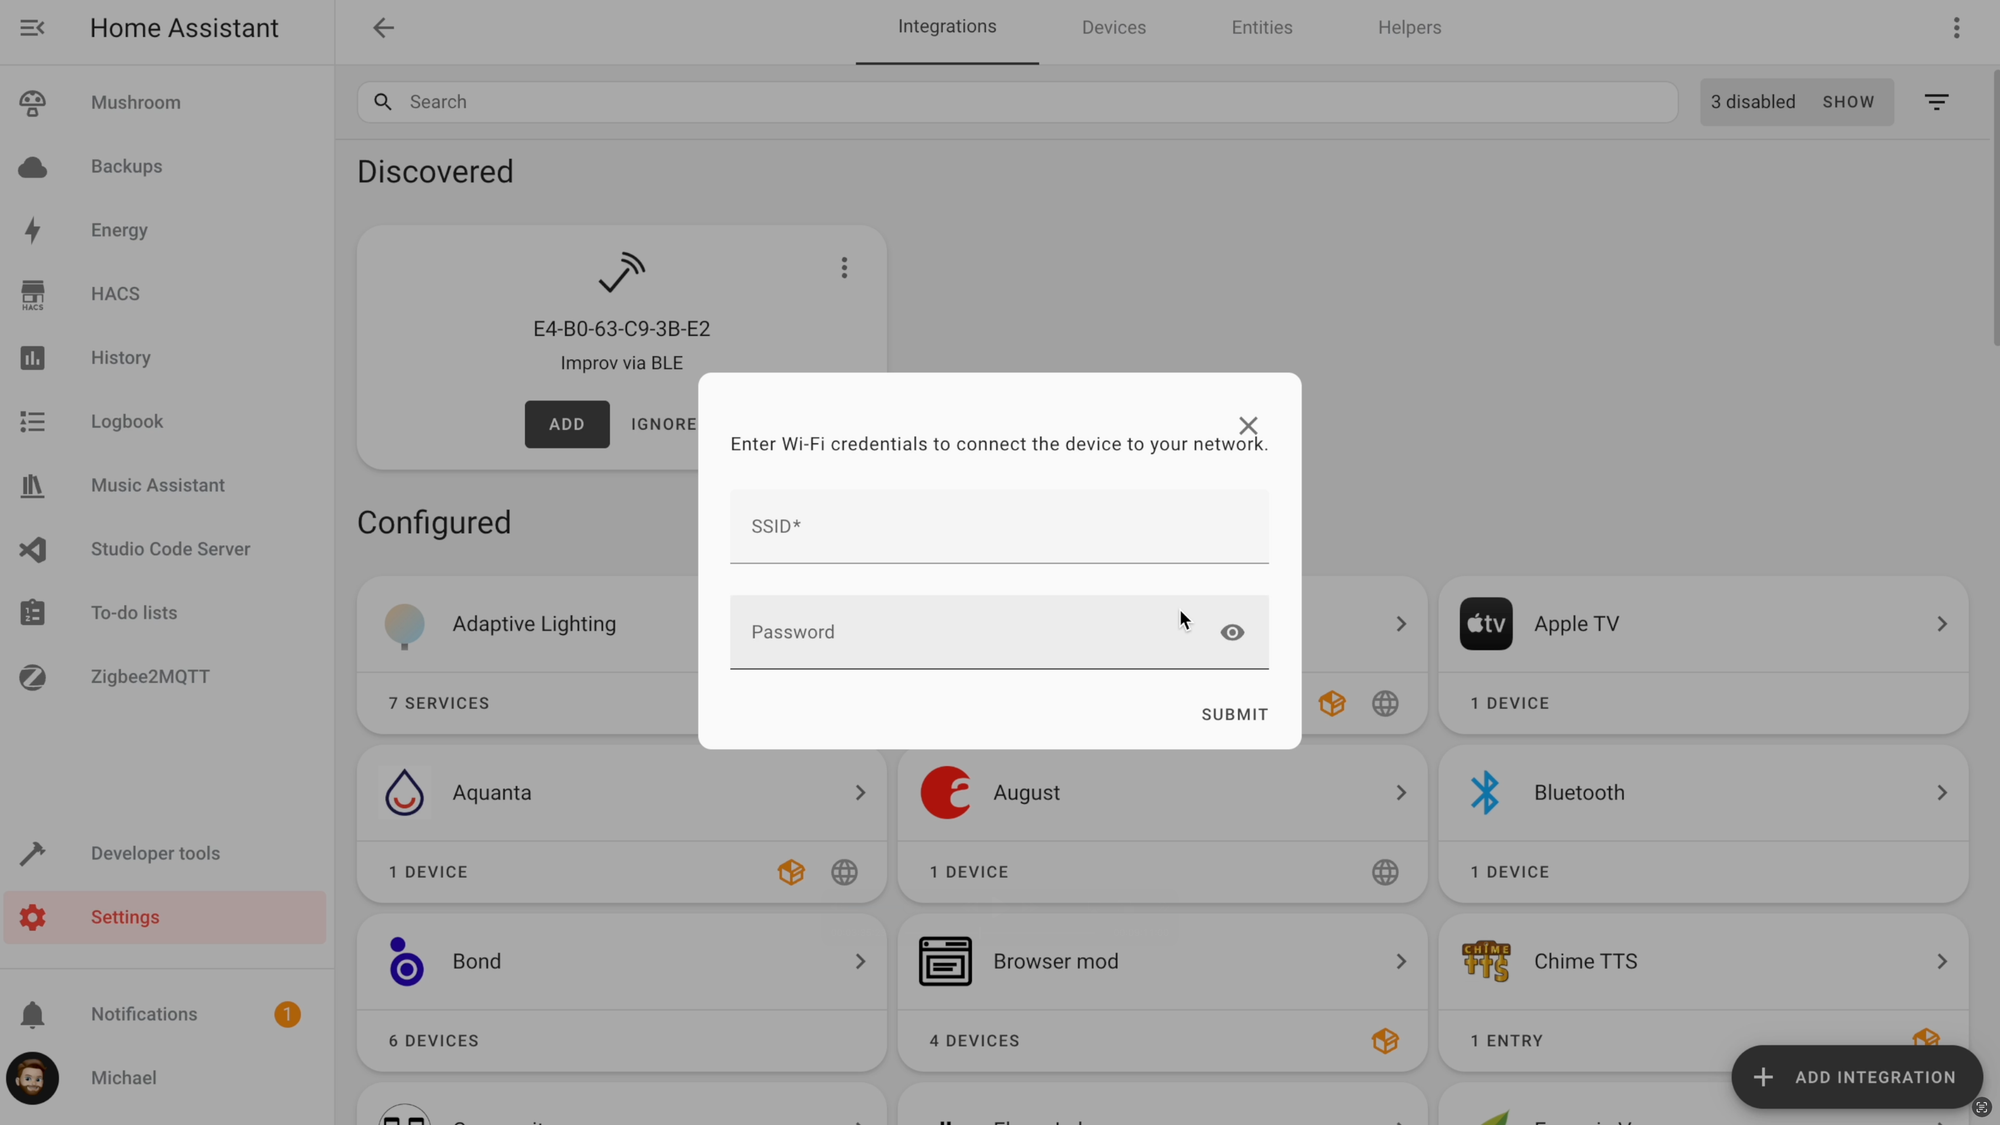
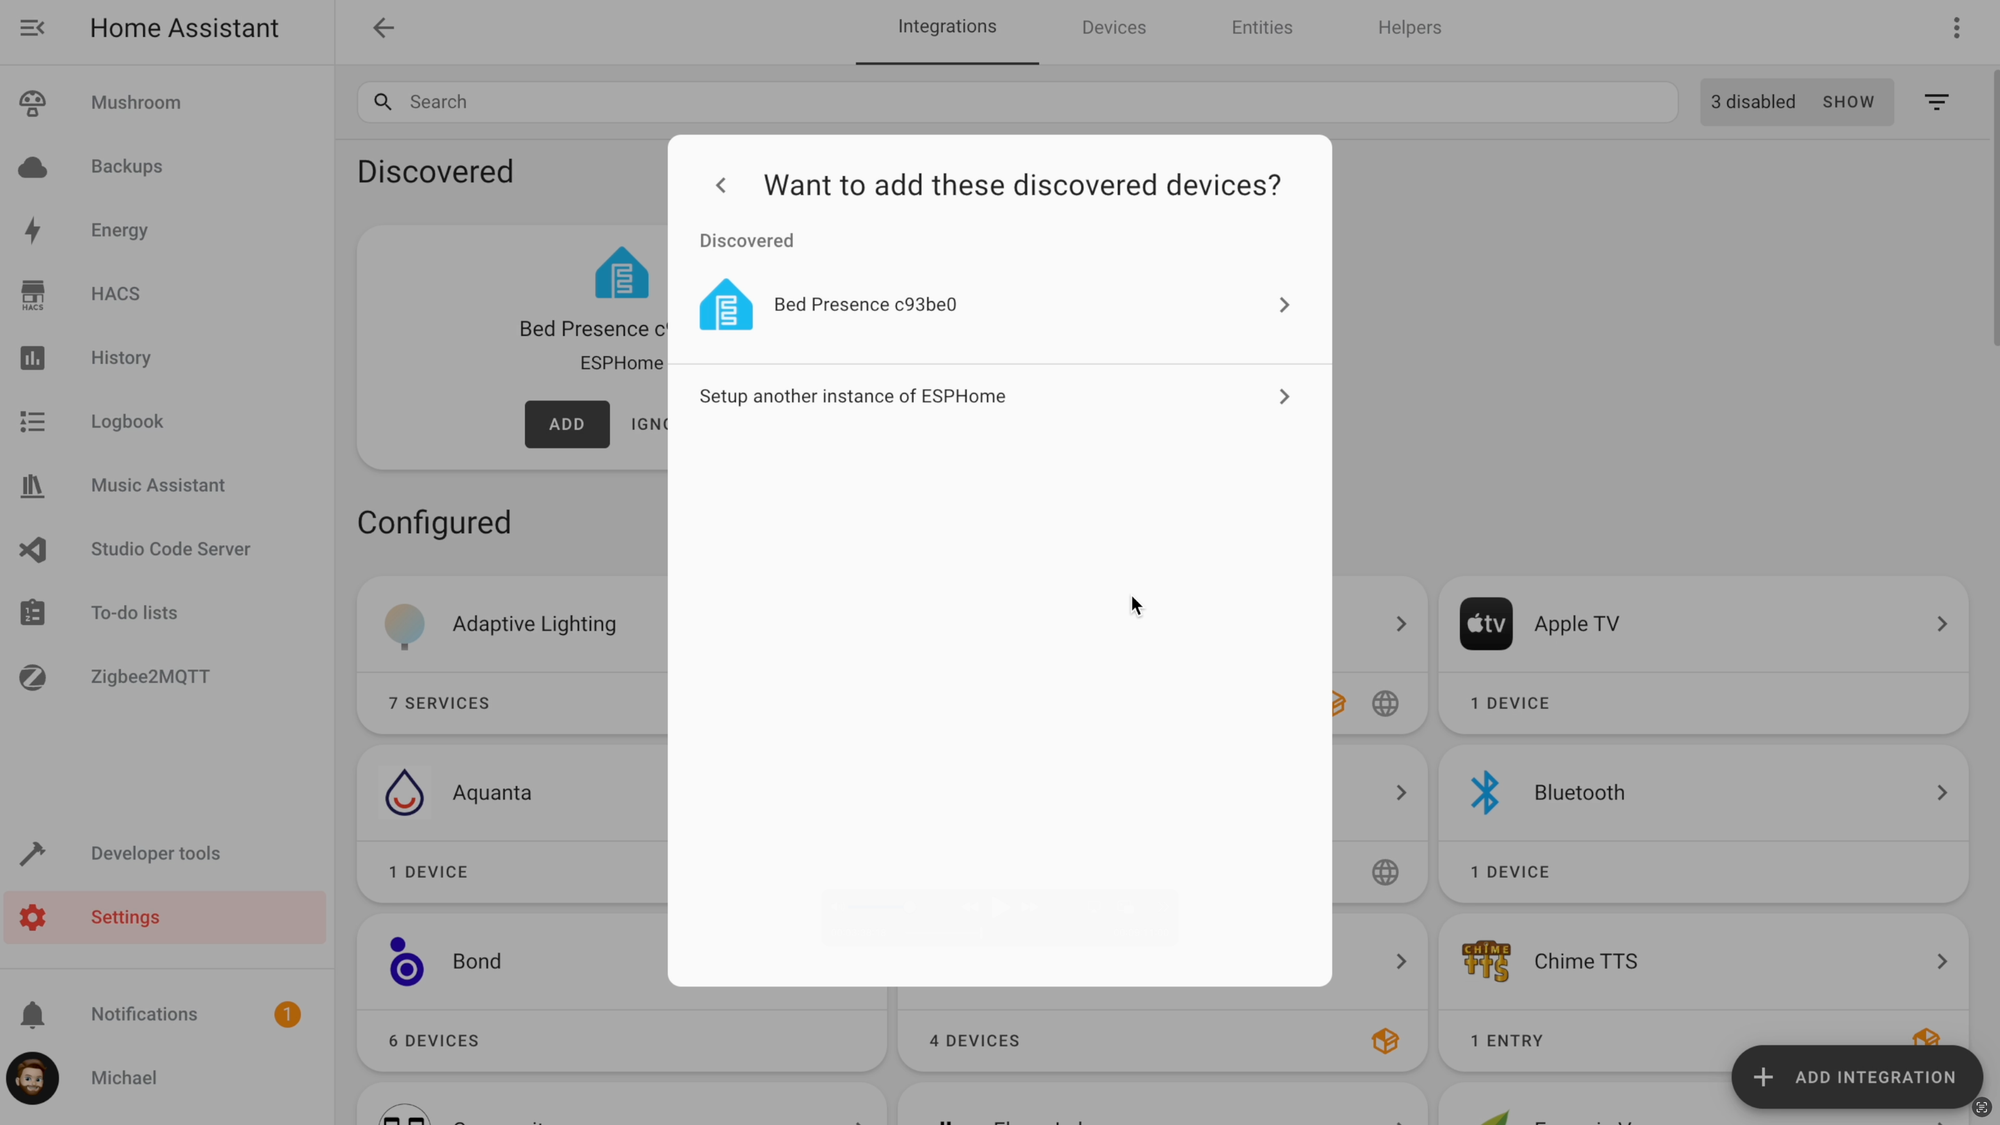
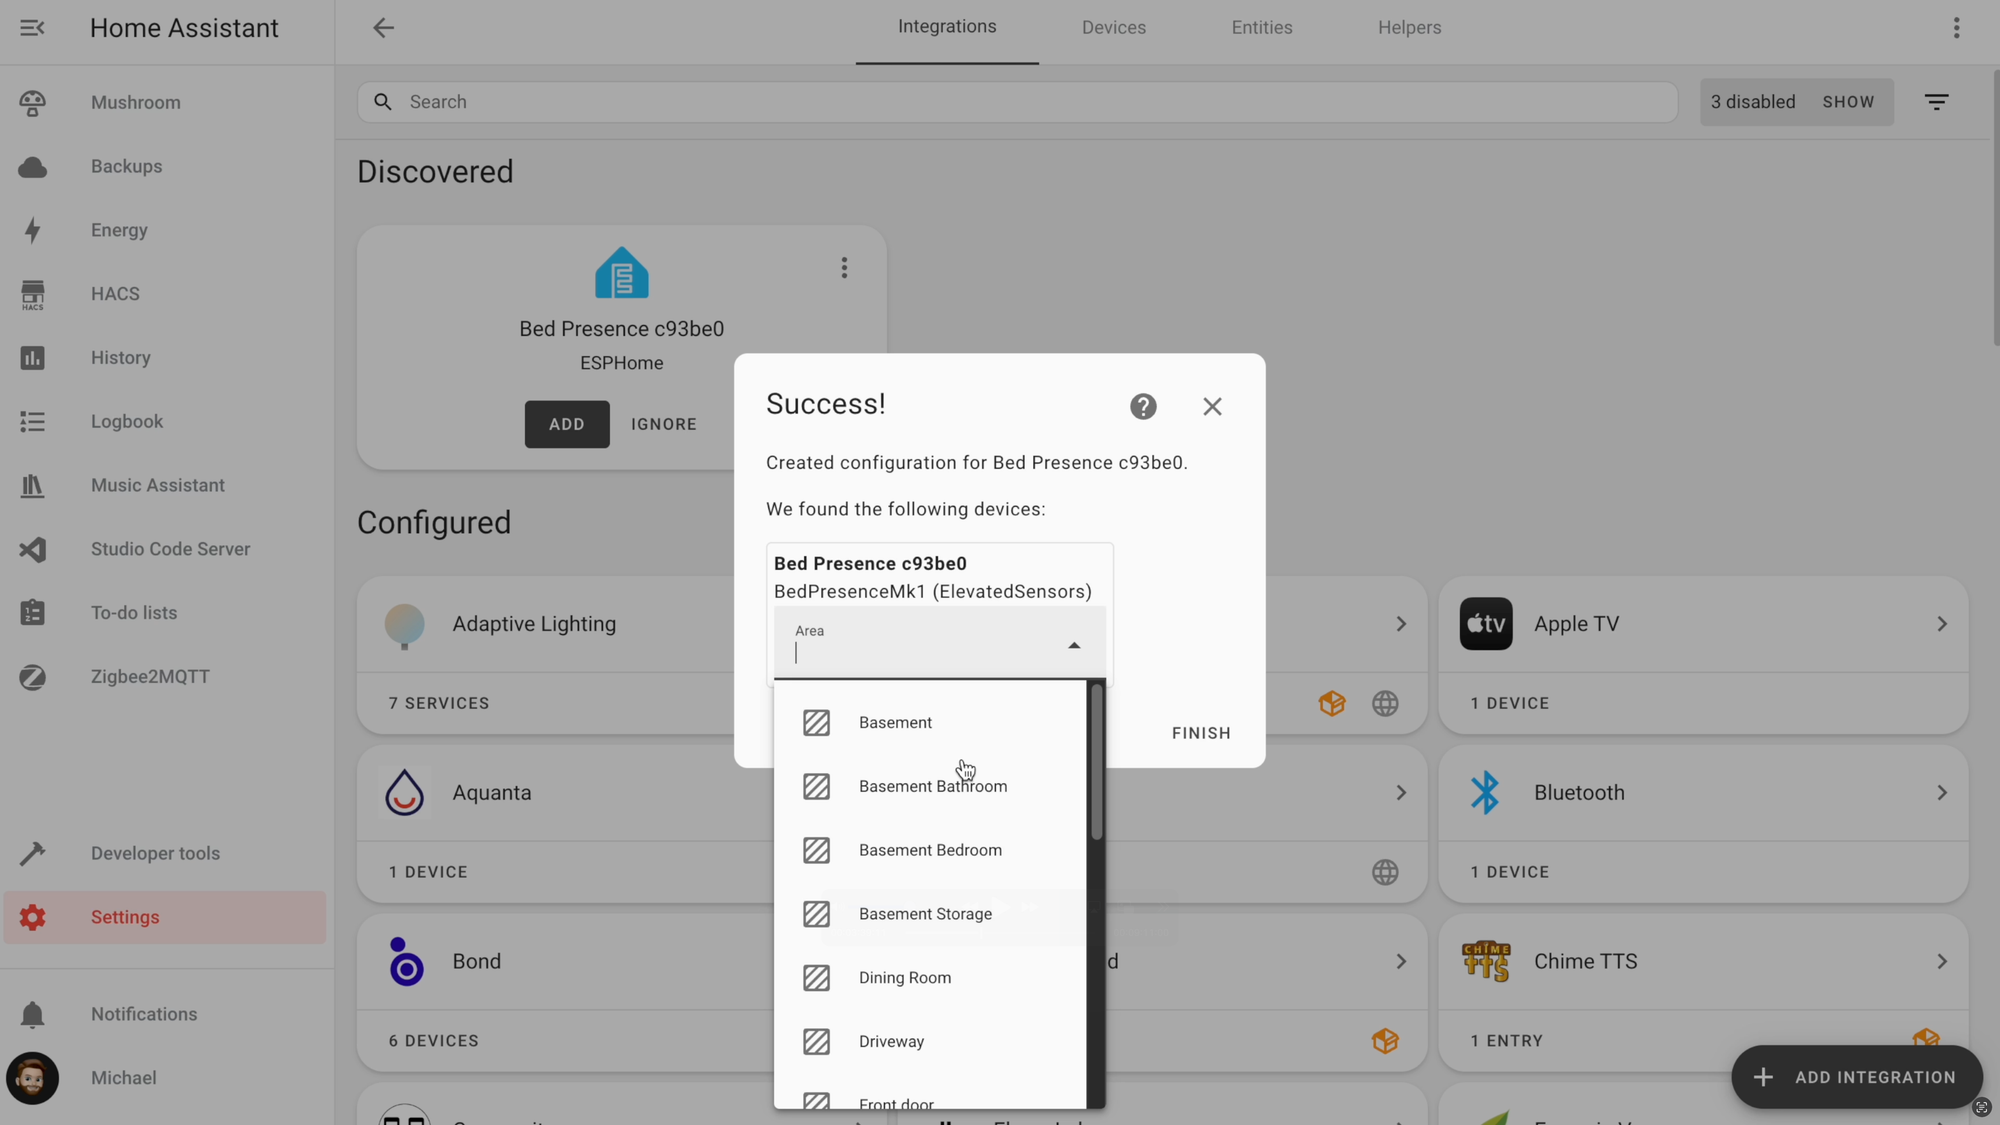
From there, click Add > Submit > Enter your WiFi credentials. Then, you can add the device using ESPHome and assign it to a room.
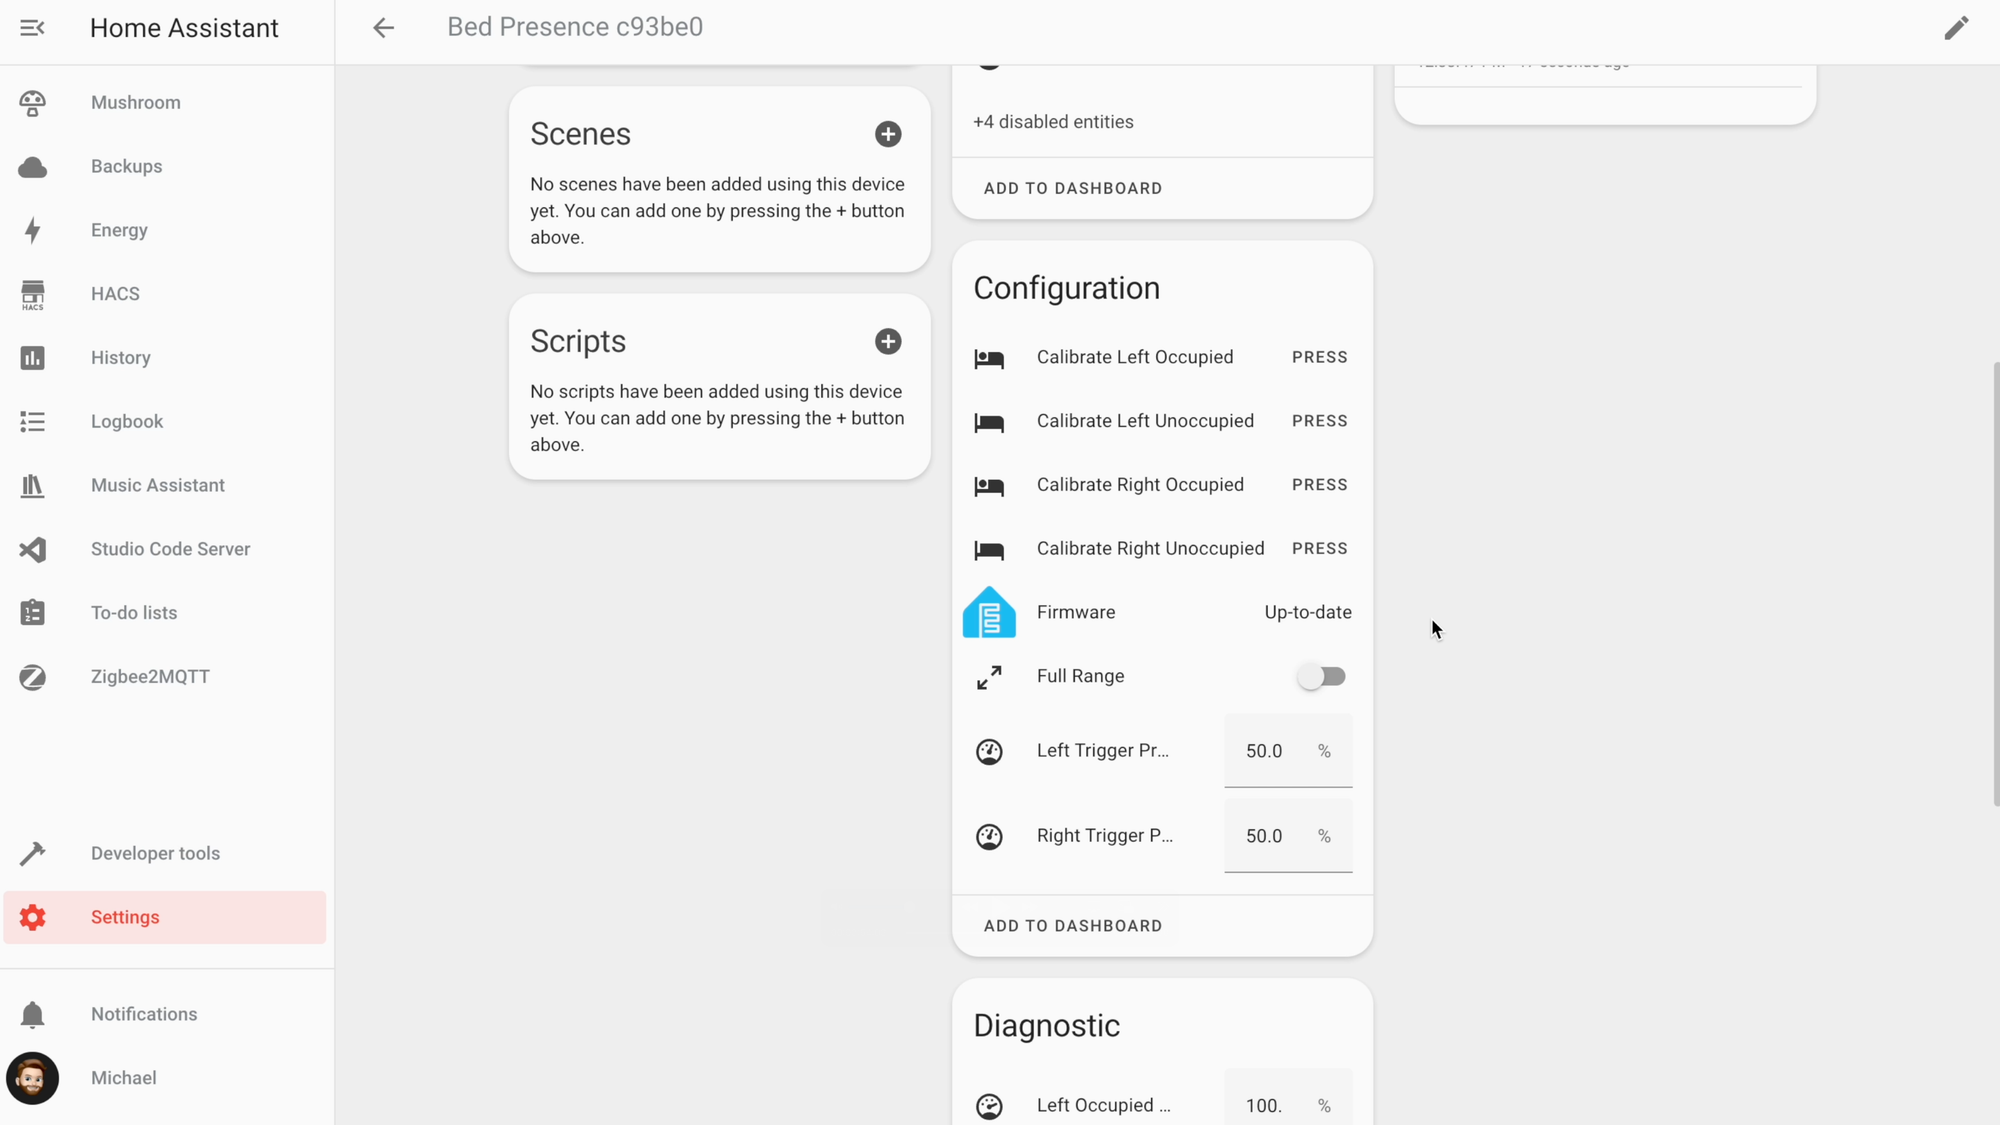
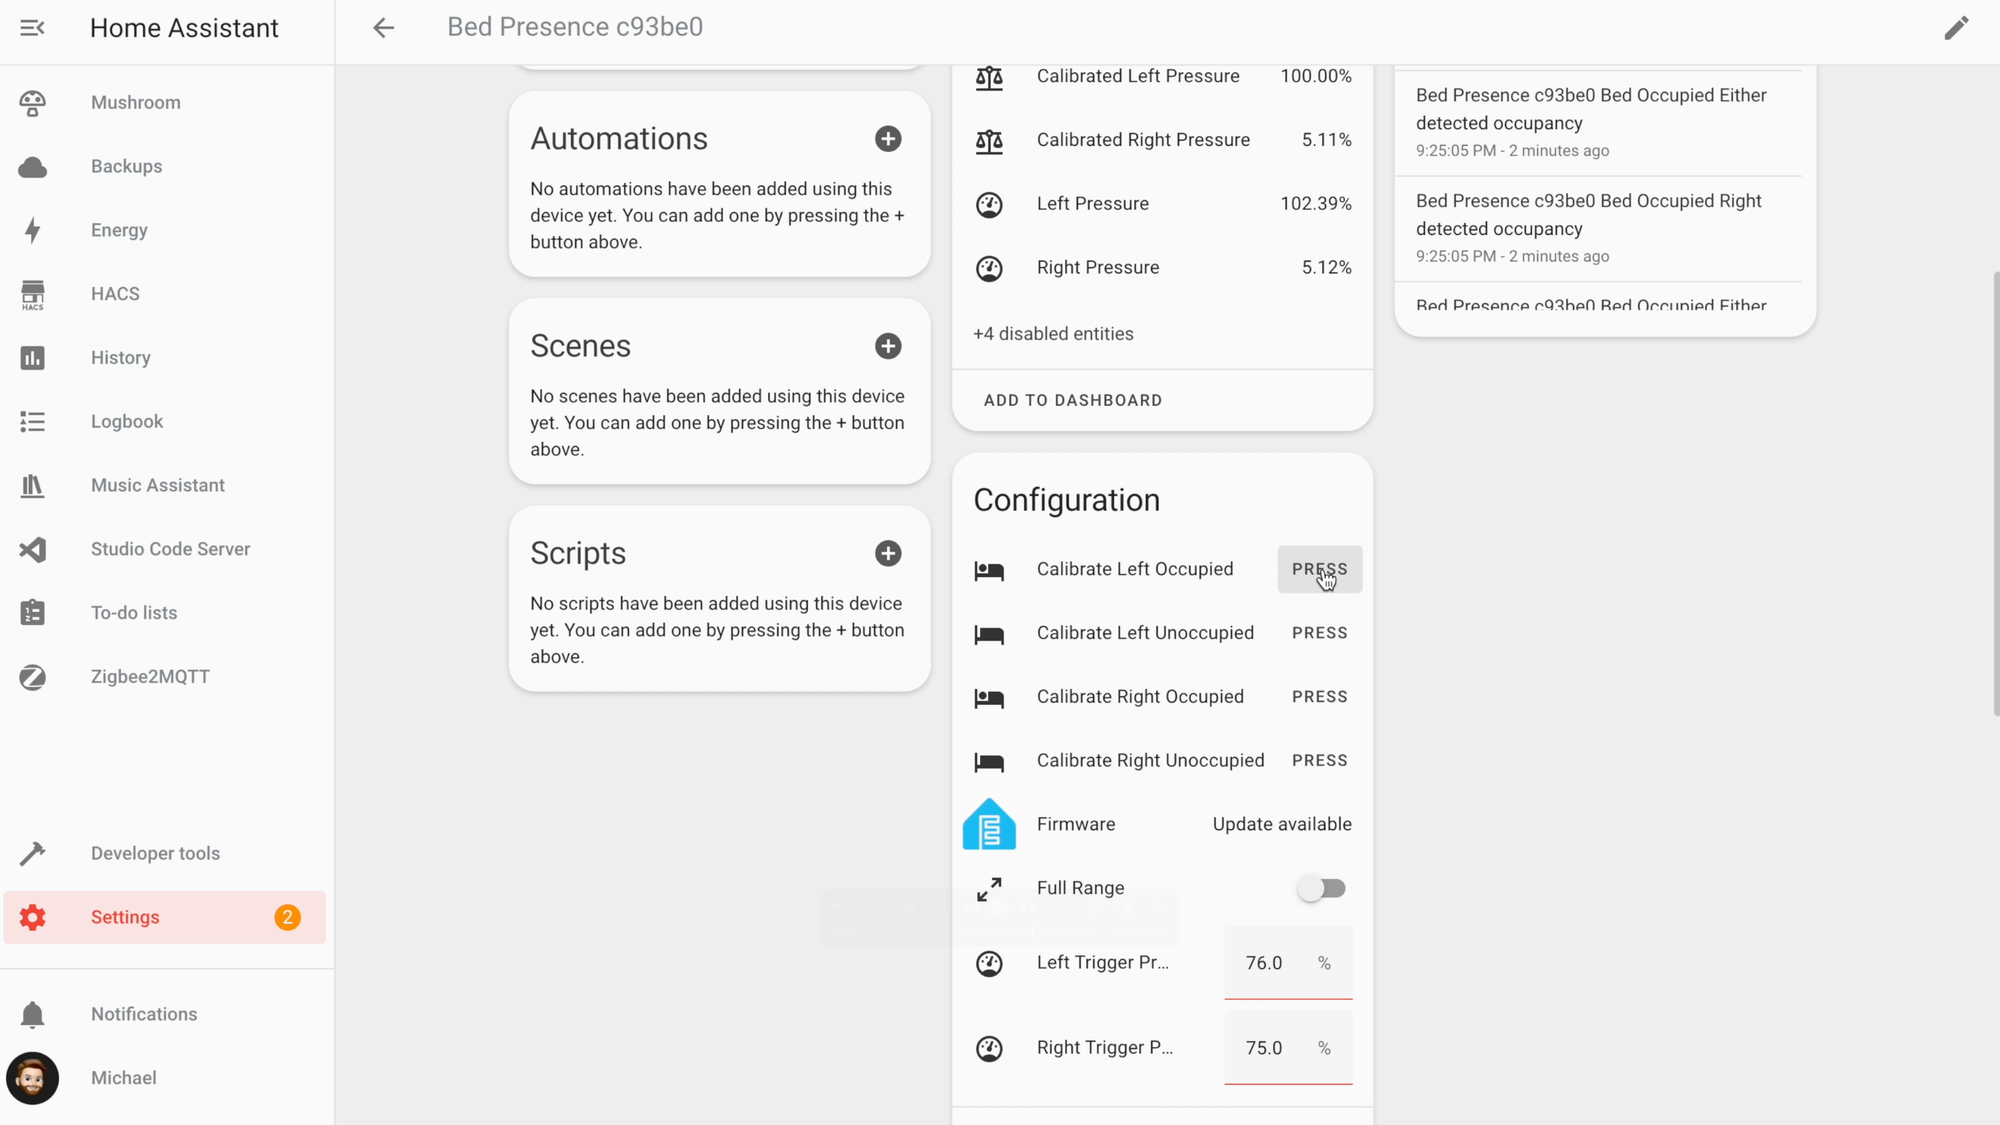
Looking at the device page, there are a ton of entities, including occupancy sensors for the left and right side of the bed, and entities that tell you if both sides of the bed or if either side of the bed is occupied, which I really appreciate as it simplifies home automation configuration. You can also calibrate the sensor from this page, but I’ll come back to that in a moment.


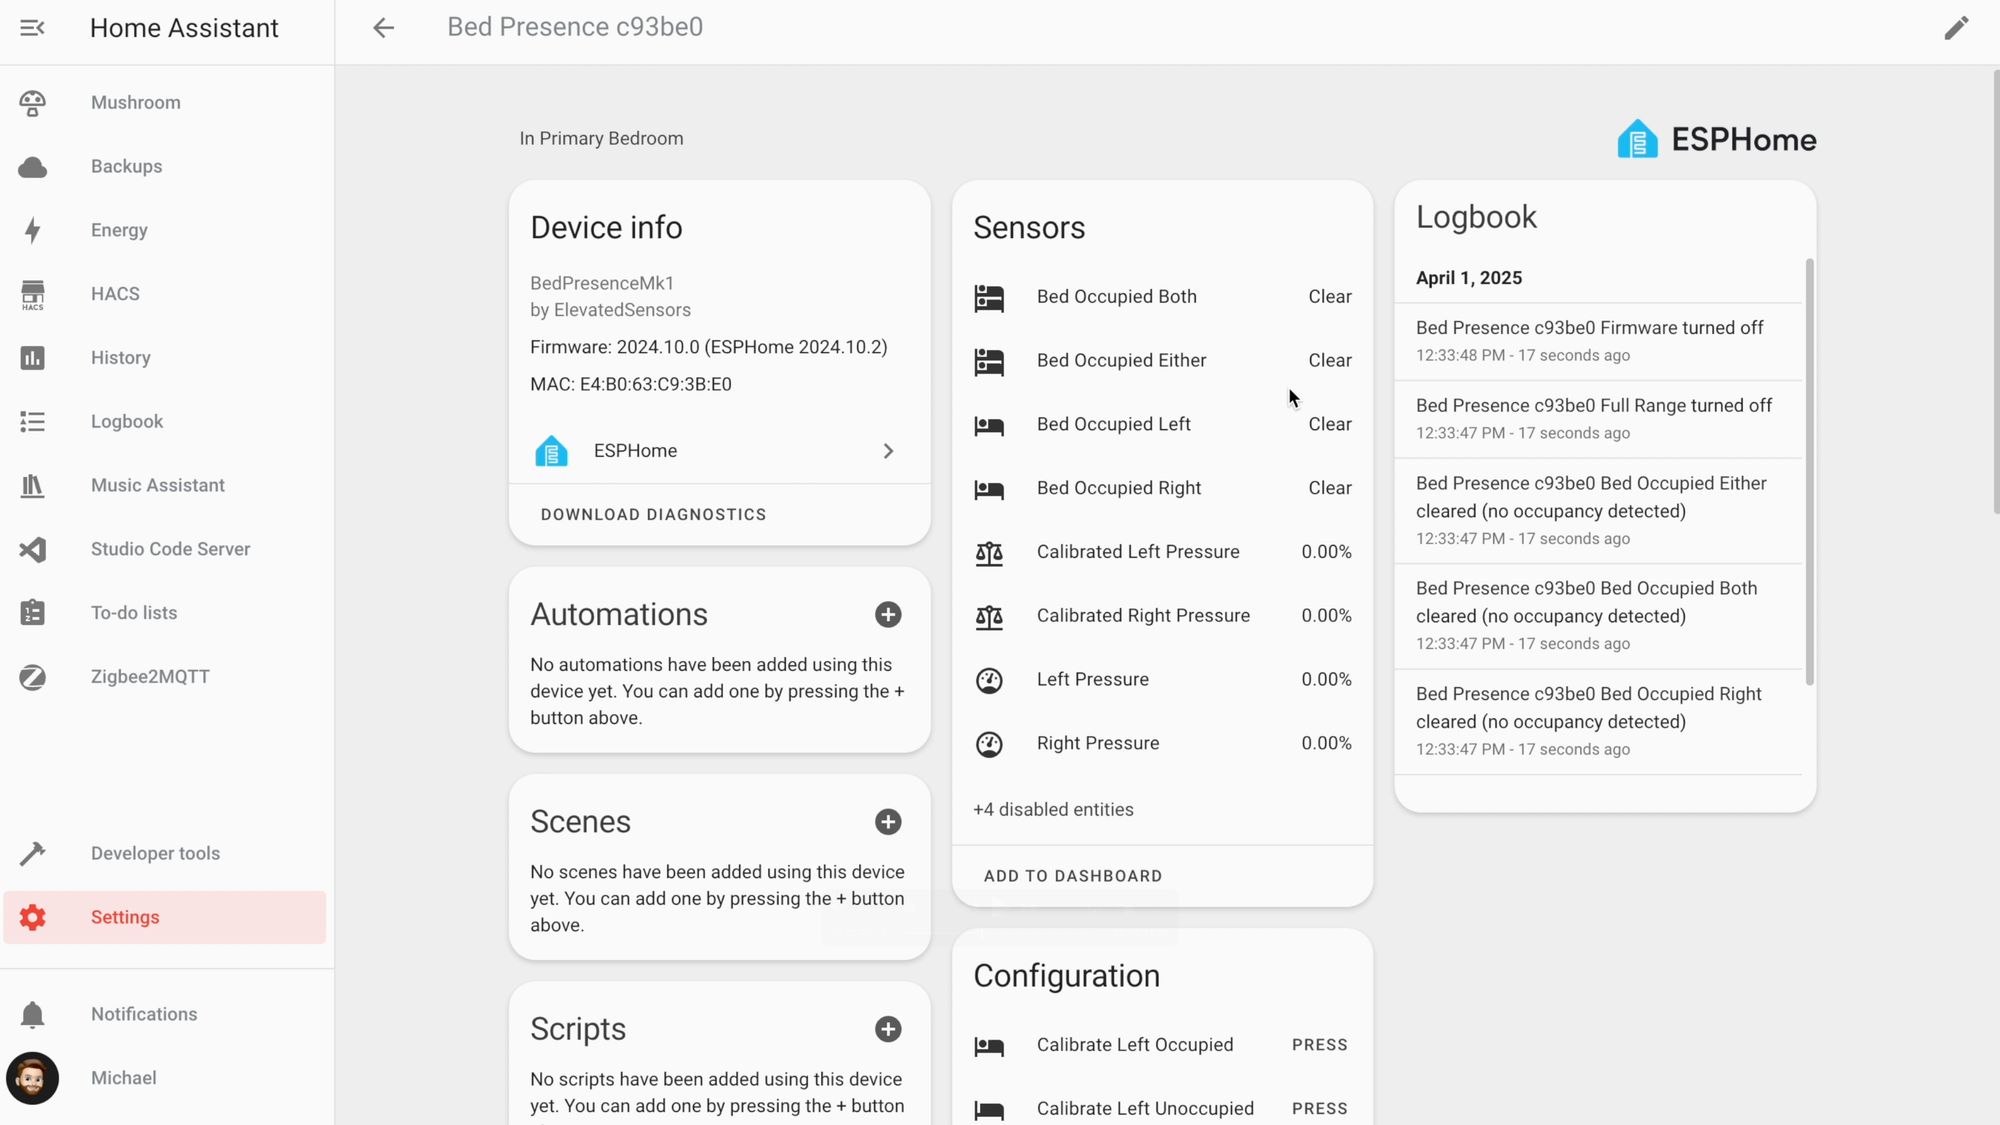
Elevated Sensors Bed Presence MK1: Home Assistant Setup
Hardware Setup
After adding the sensor to Home Assistant, you need to setup the hardware before placing it on your bed. I’m going to focus on the installation for a King size bed.
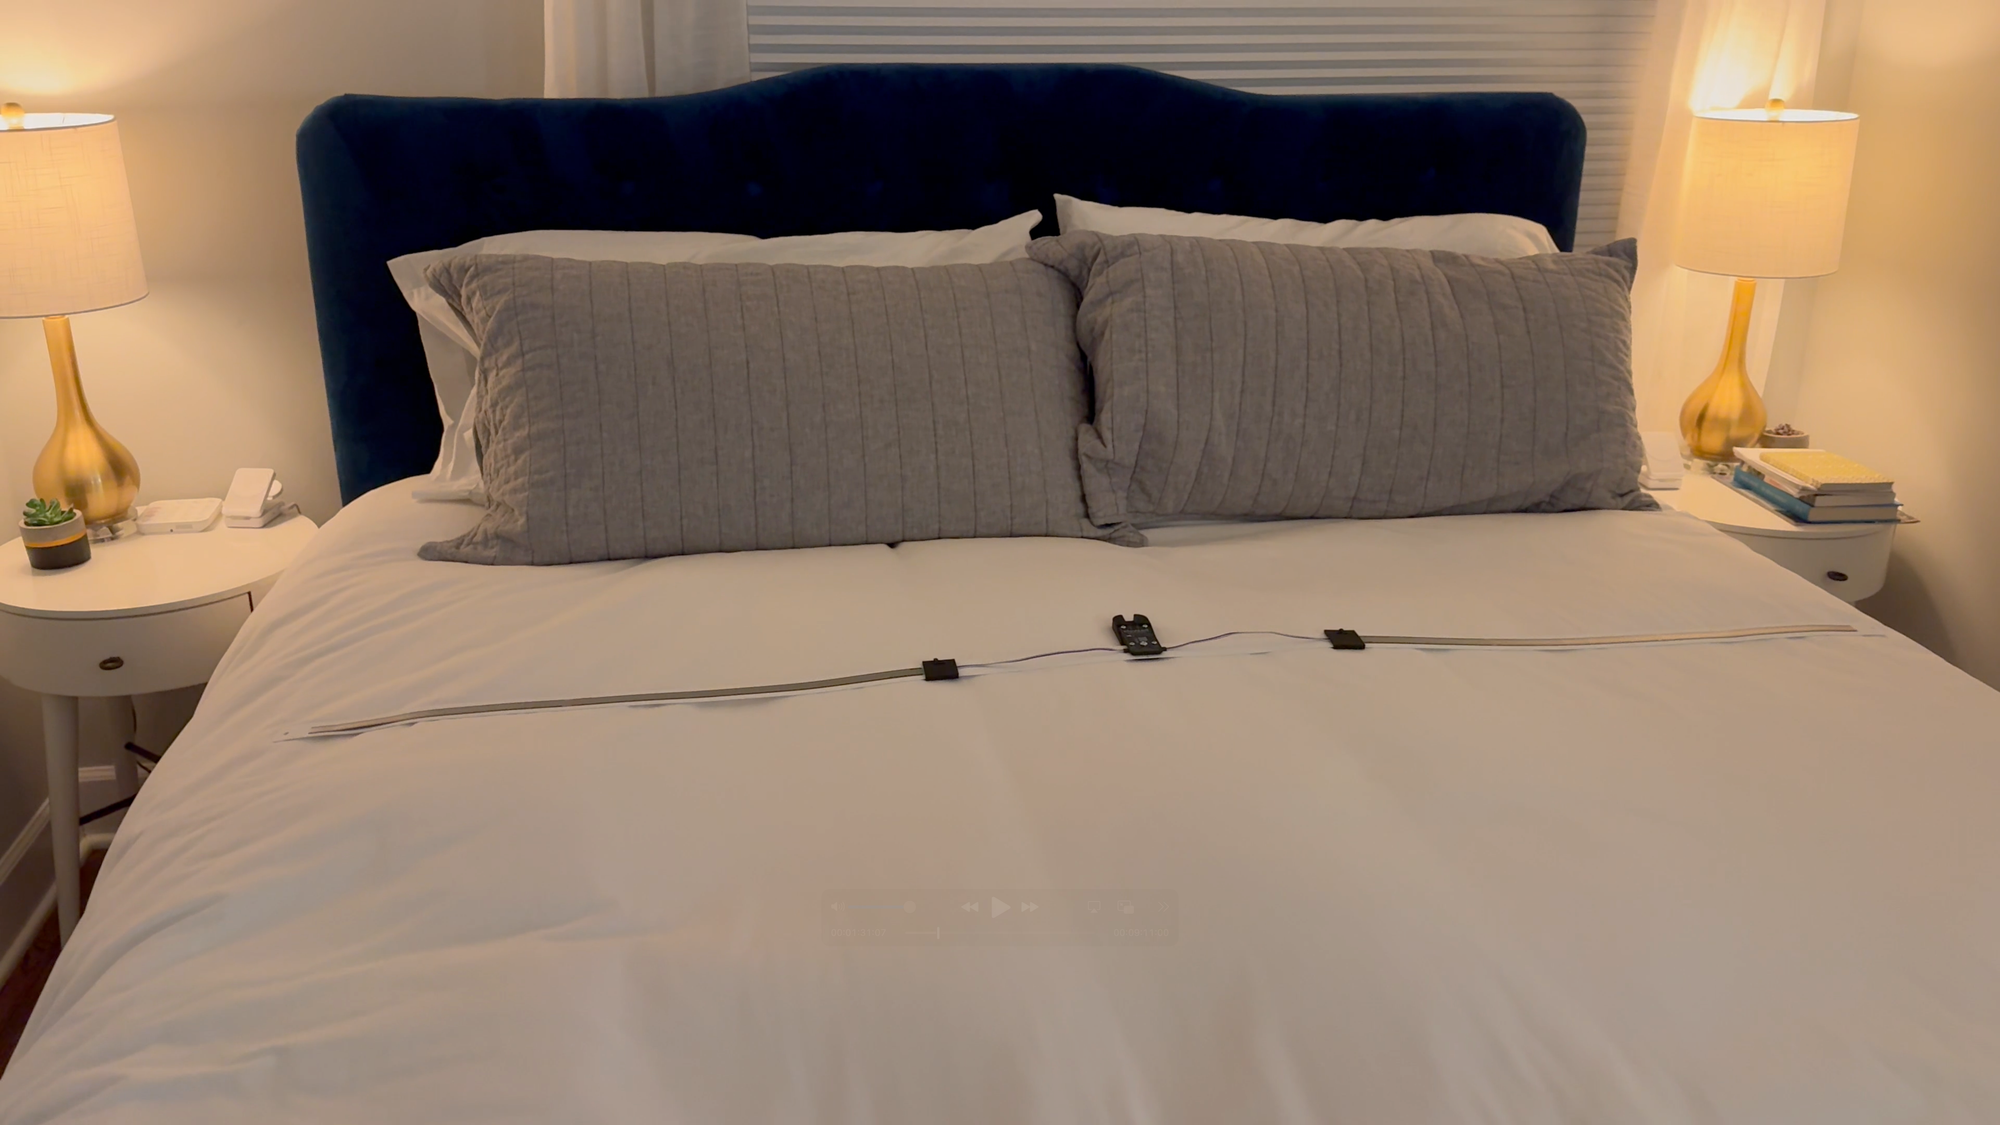
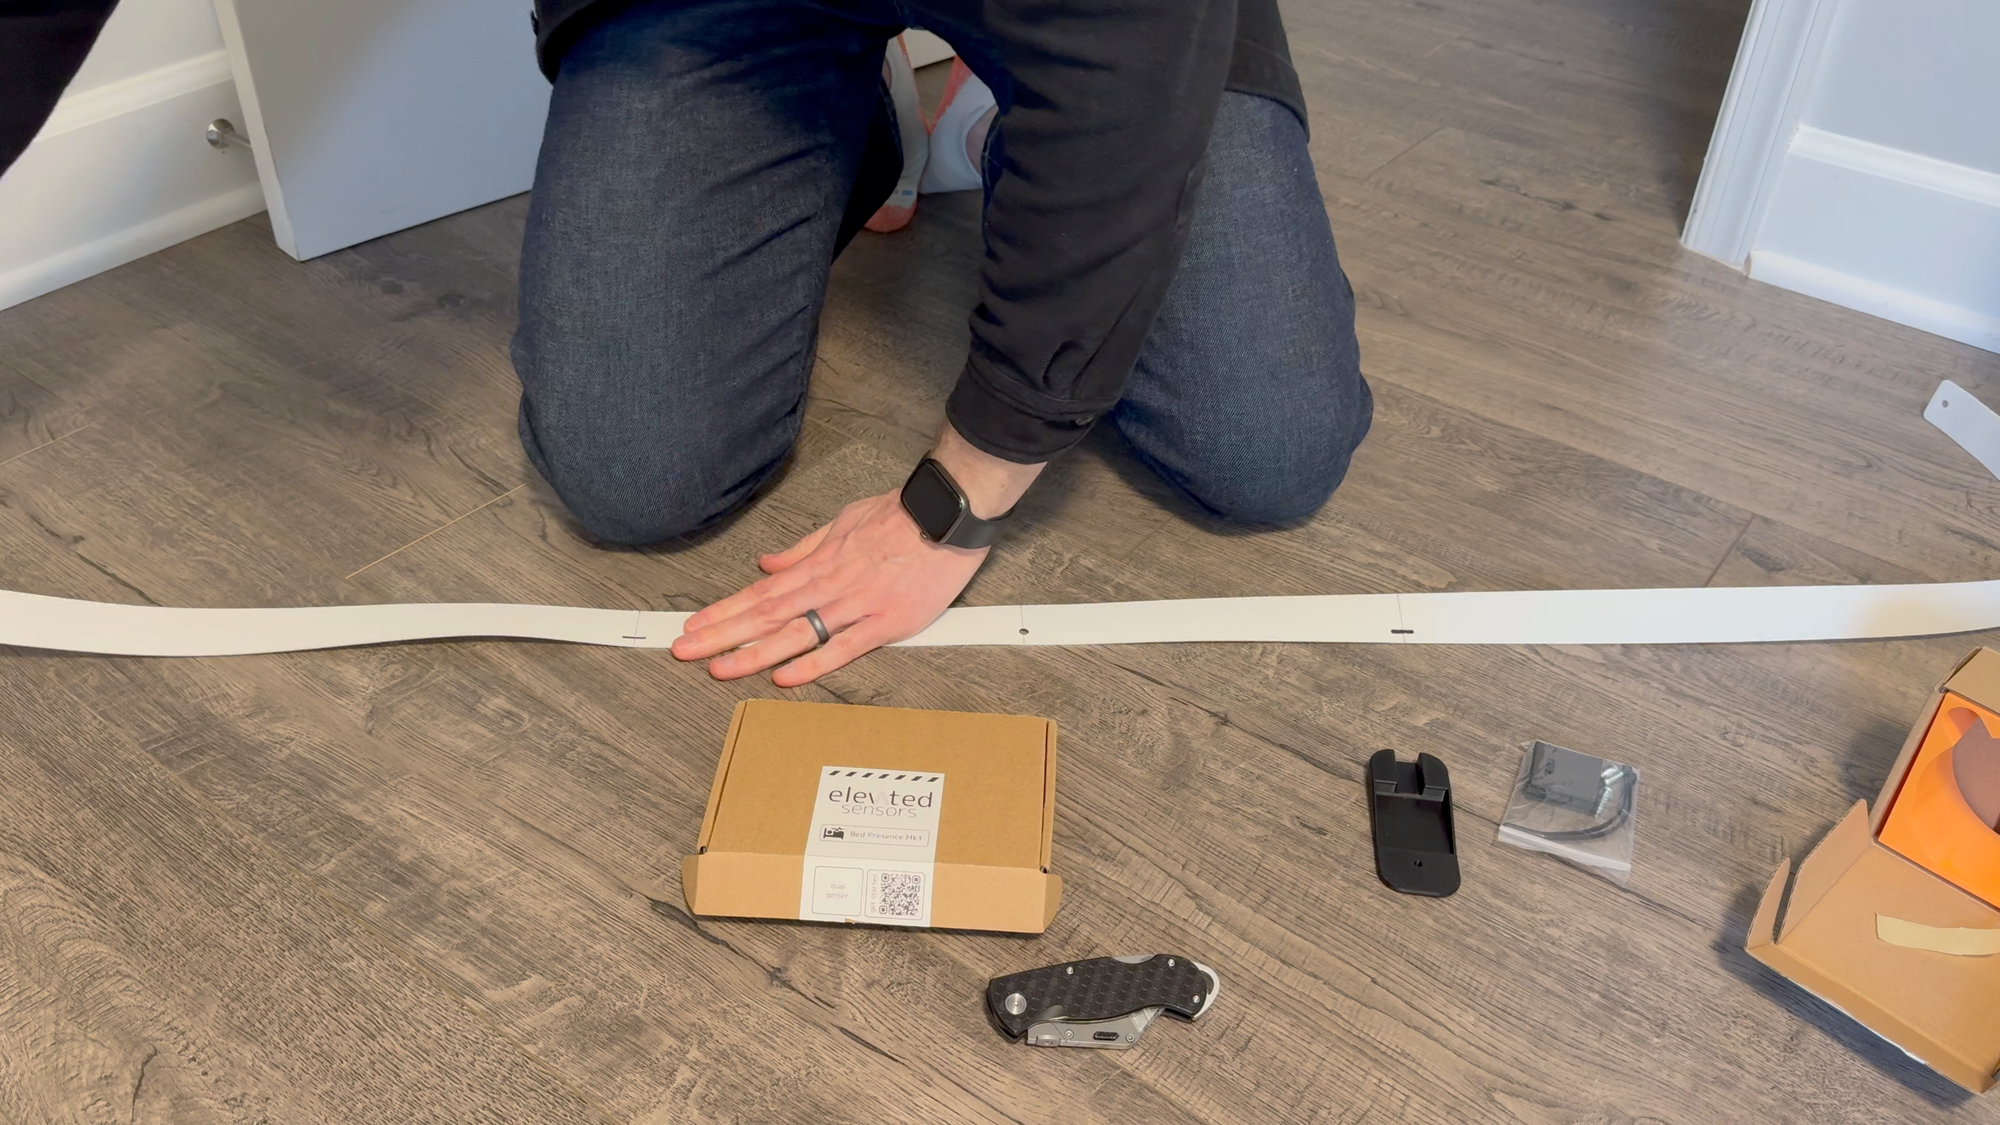
To begin, lay the white, flexible slat on the ground. You may need to bend it in the opposite direction to get it to lie flat since it was rolled up inside a box for shipping.
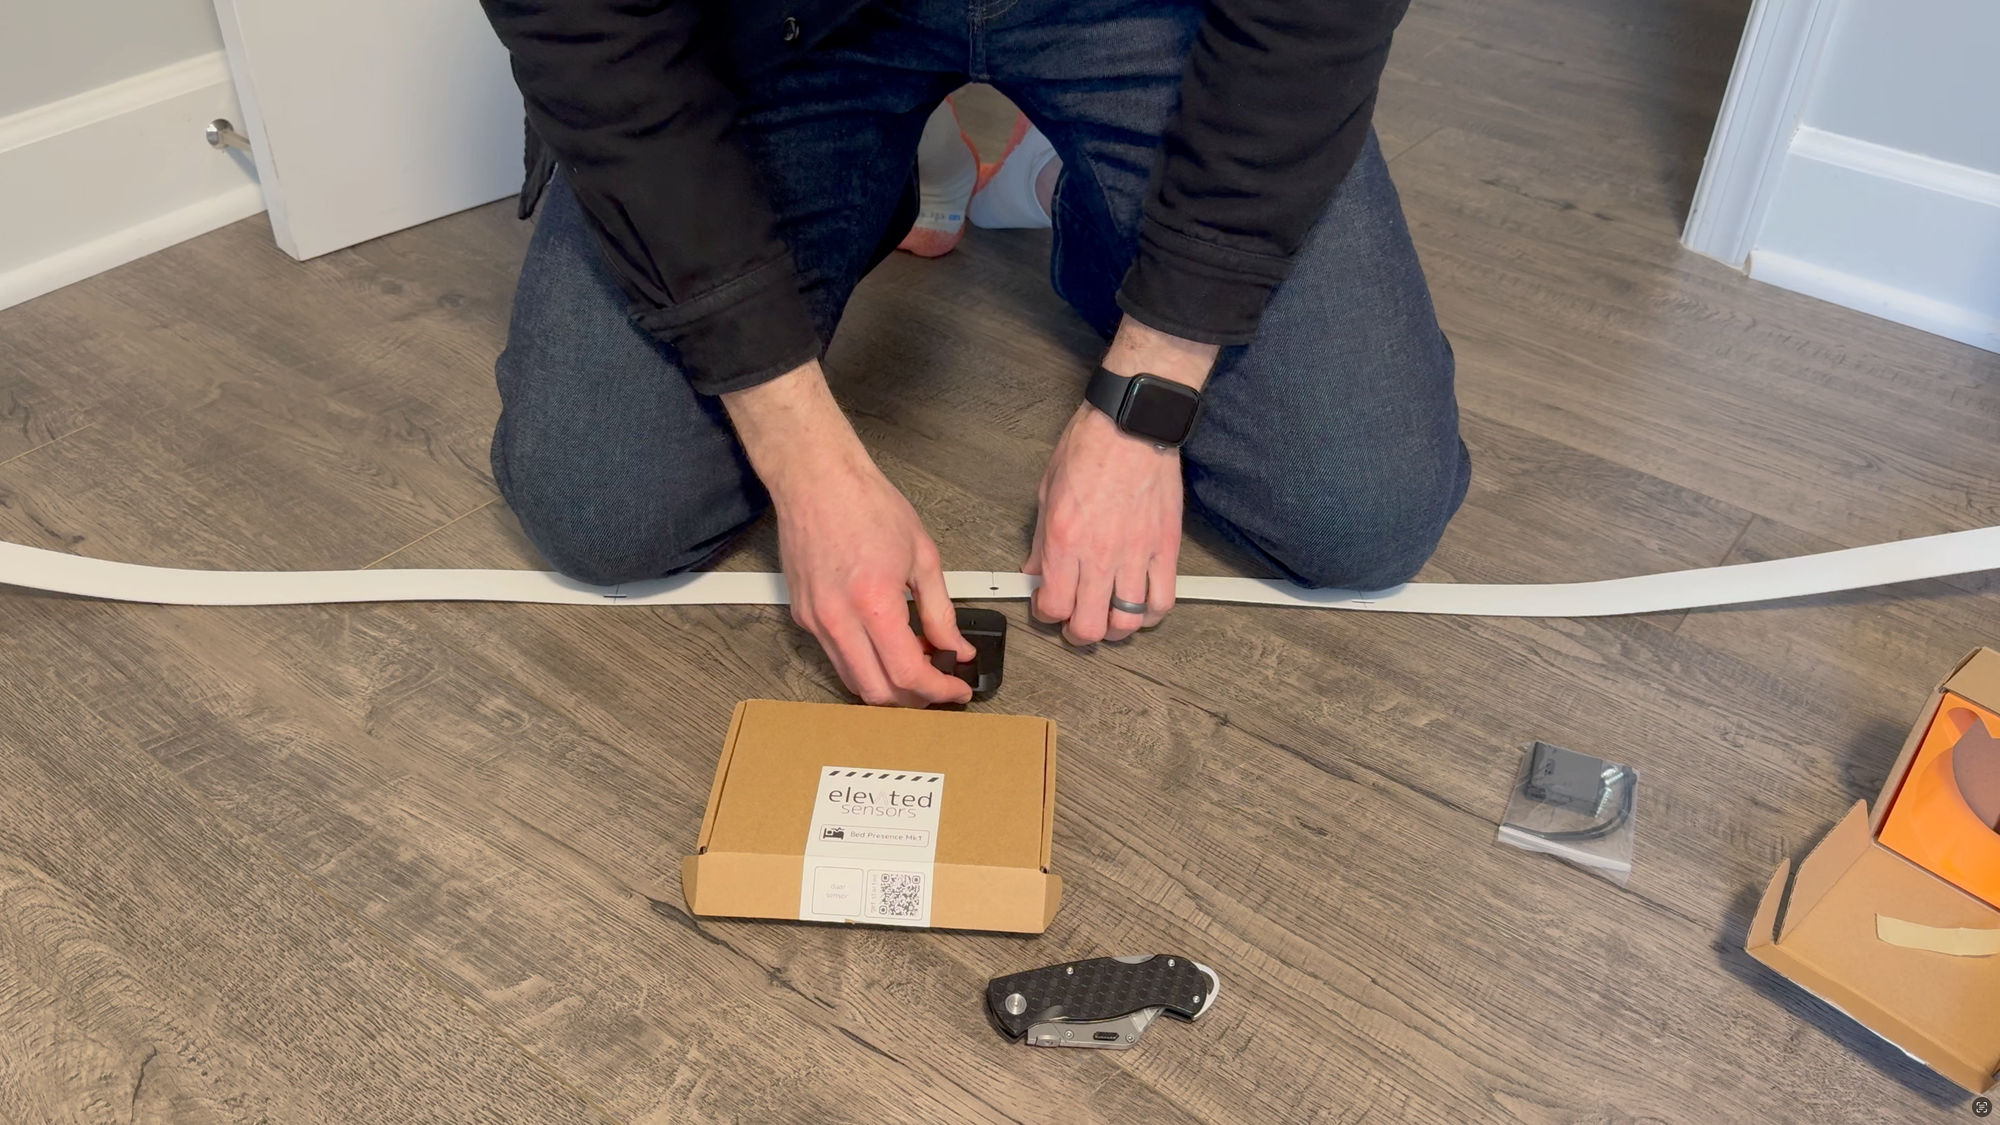
Then, align the black cradle under the center hole of the slat, and place the main sensor unit into the cradle on top of the slat, and connect all three using the flat-end screw.
Next, attach the sensor extension wires into the left and right sensors. You can fully tighten the screw at this point, but don’t over-tighten to avoid stripping the plastic.
Then, connect the sensor strips to the extension wires, peel off the adhesive backing on each sensor strip, and stick them down flat and centered along the white, flexible slat.
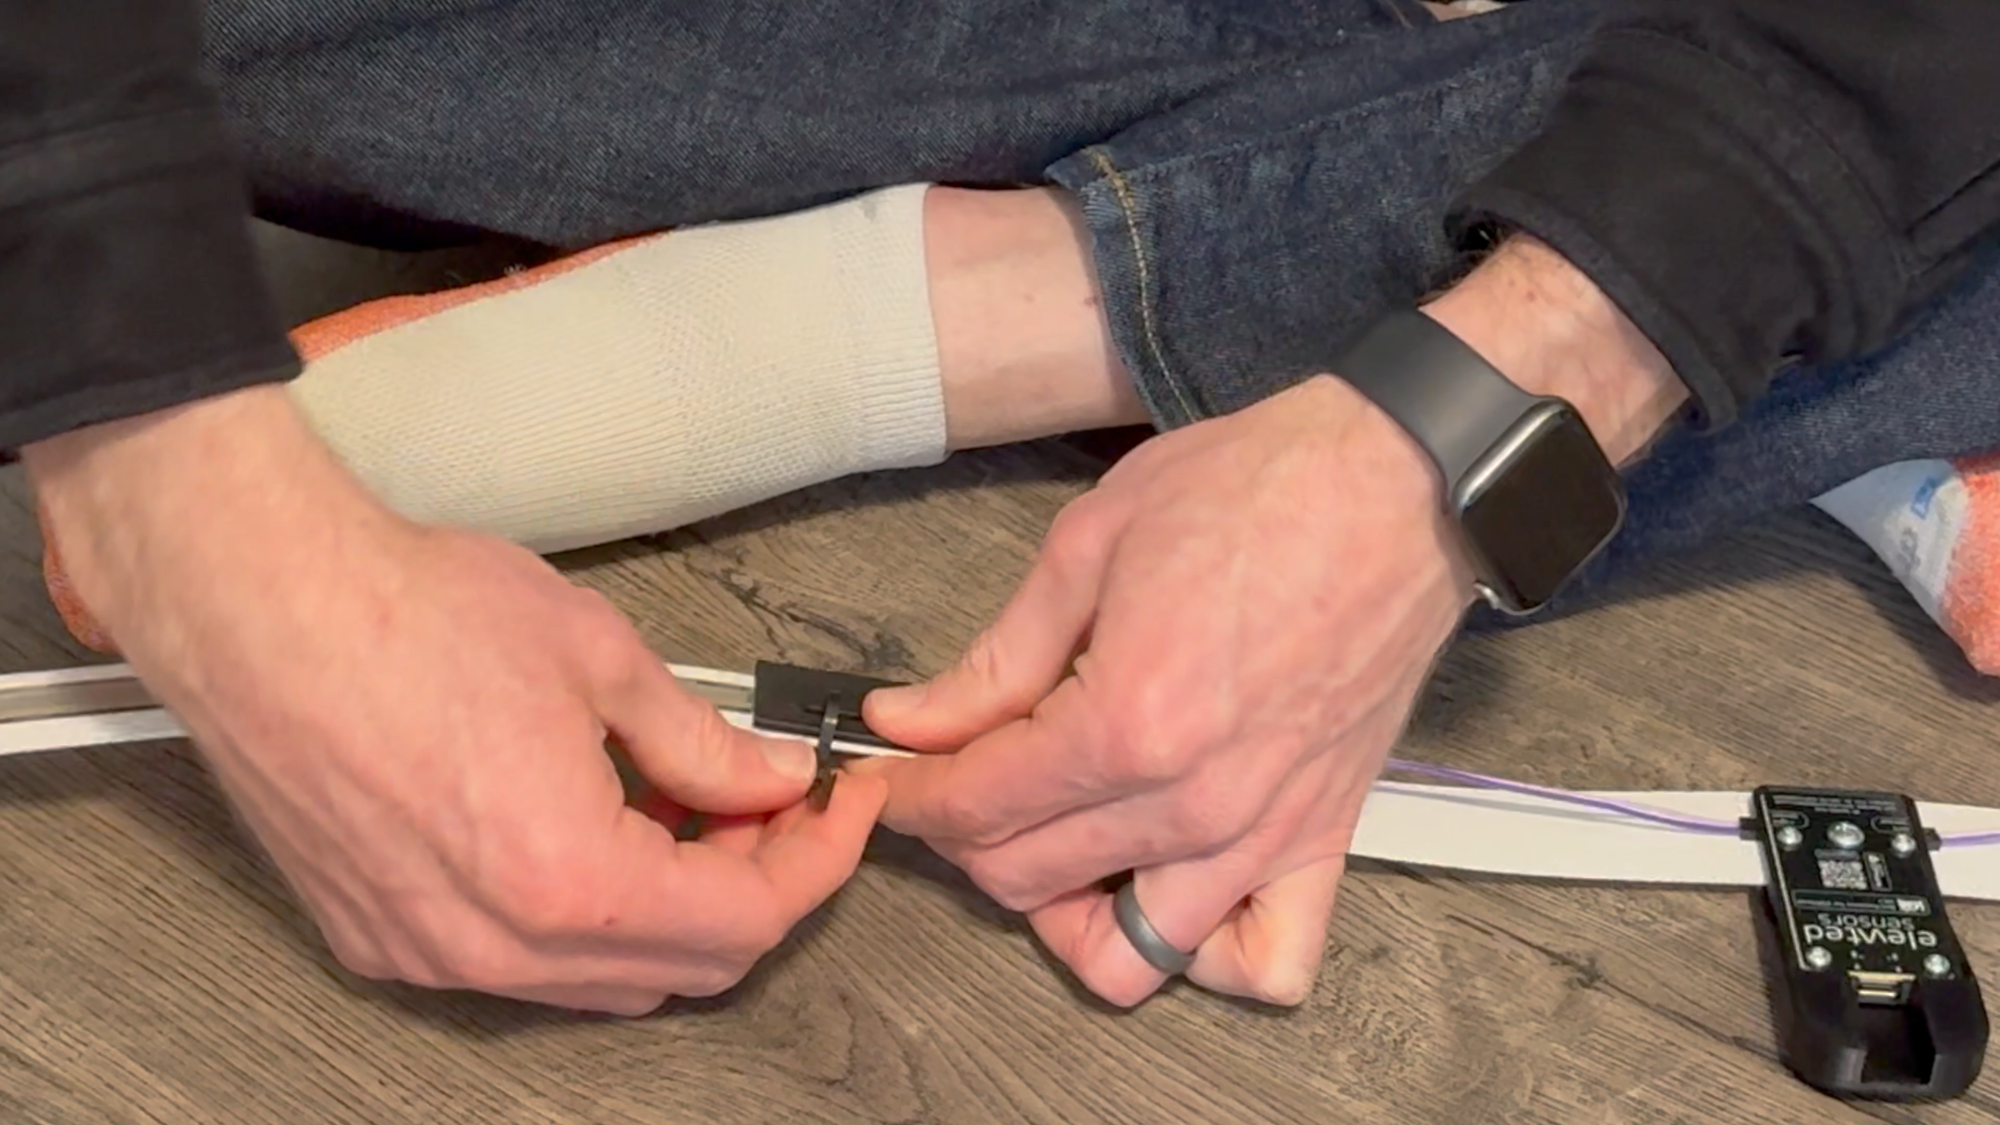
Install the black sensor extension clips, taking note of the cavity in the clip where the wire connectors should sit.
Finally, run the included zip ties through the openings of the black sensor extension clips and white, flexible slat, and then tighten and trim the excess zip tie plastic.
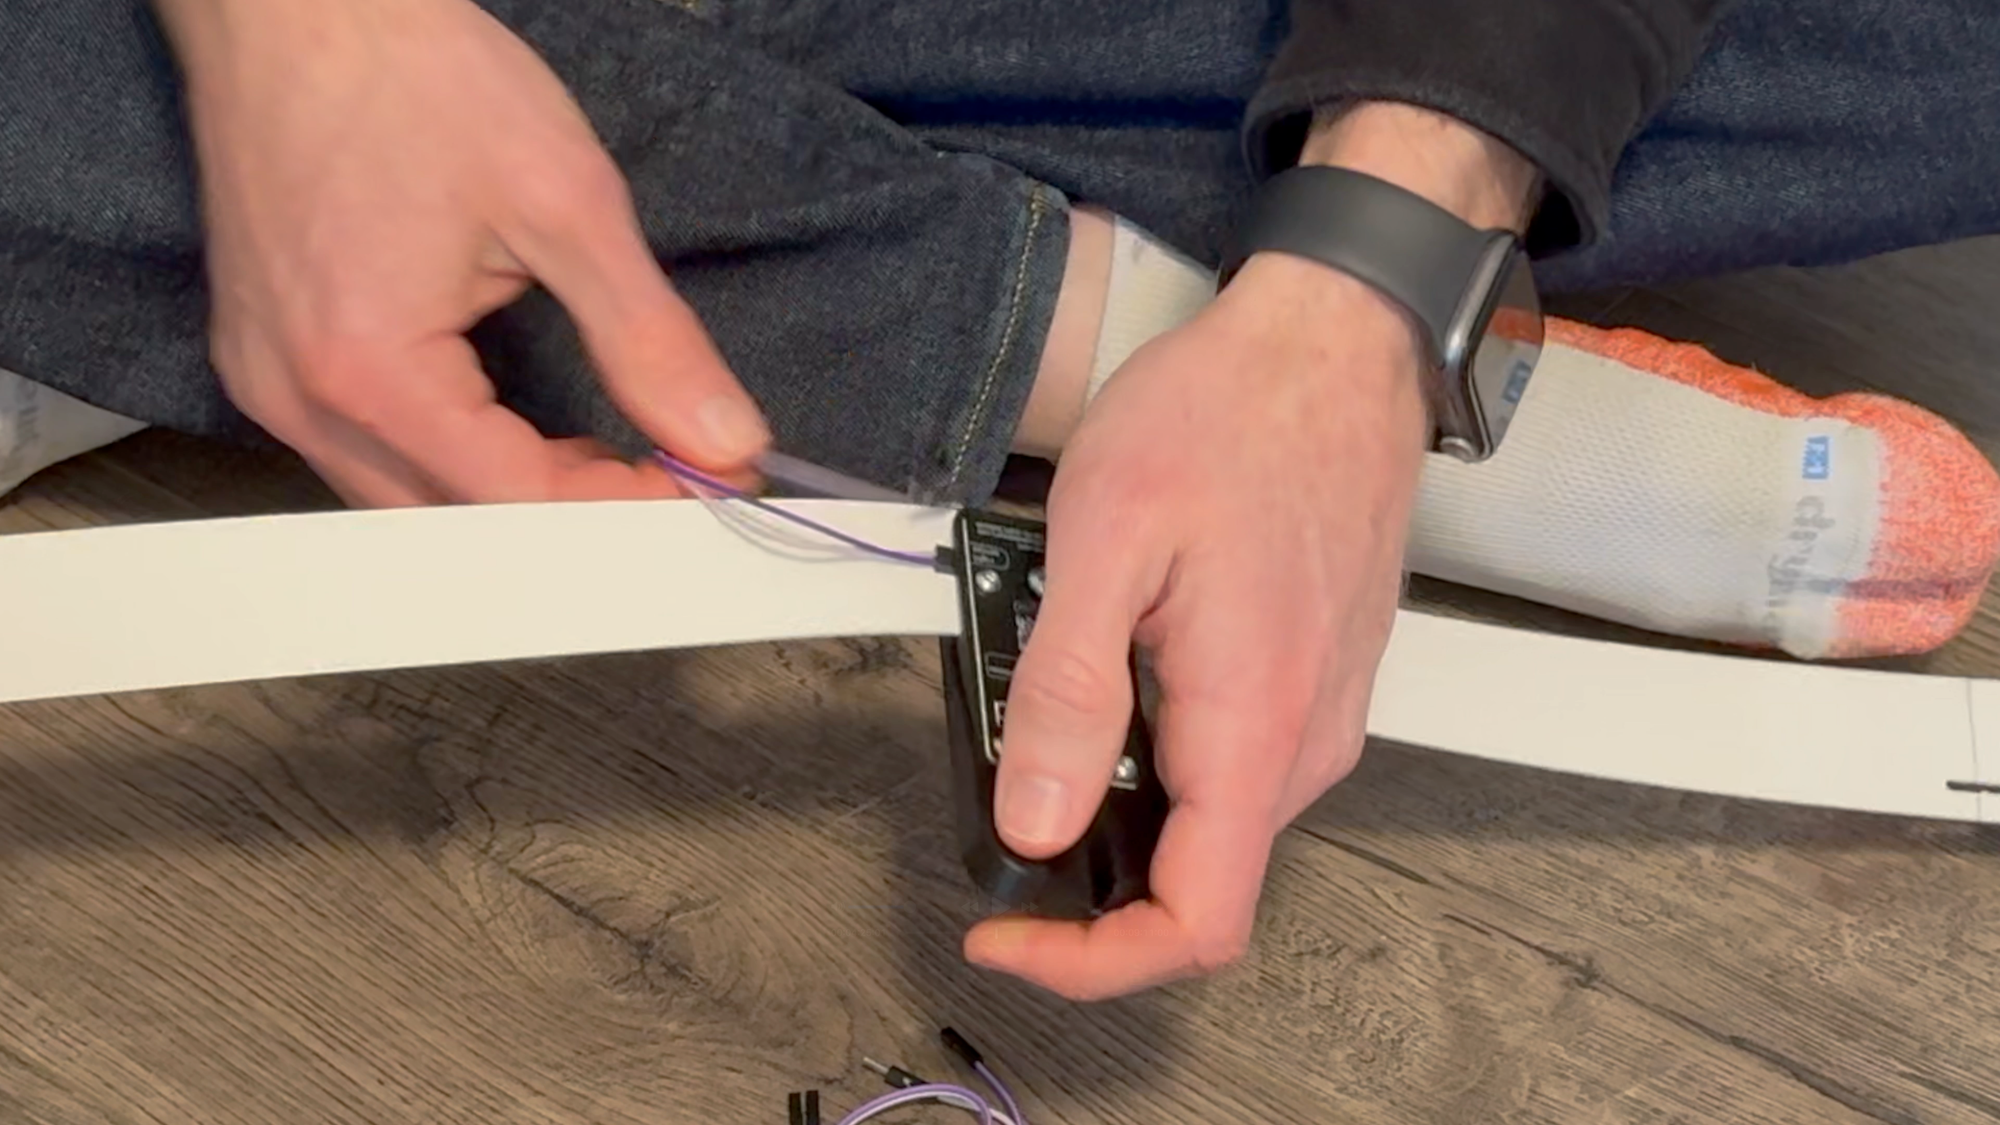

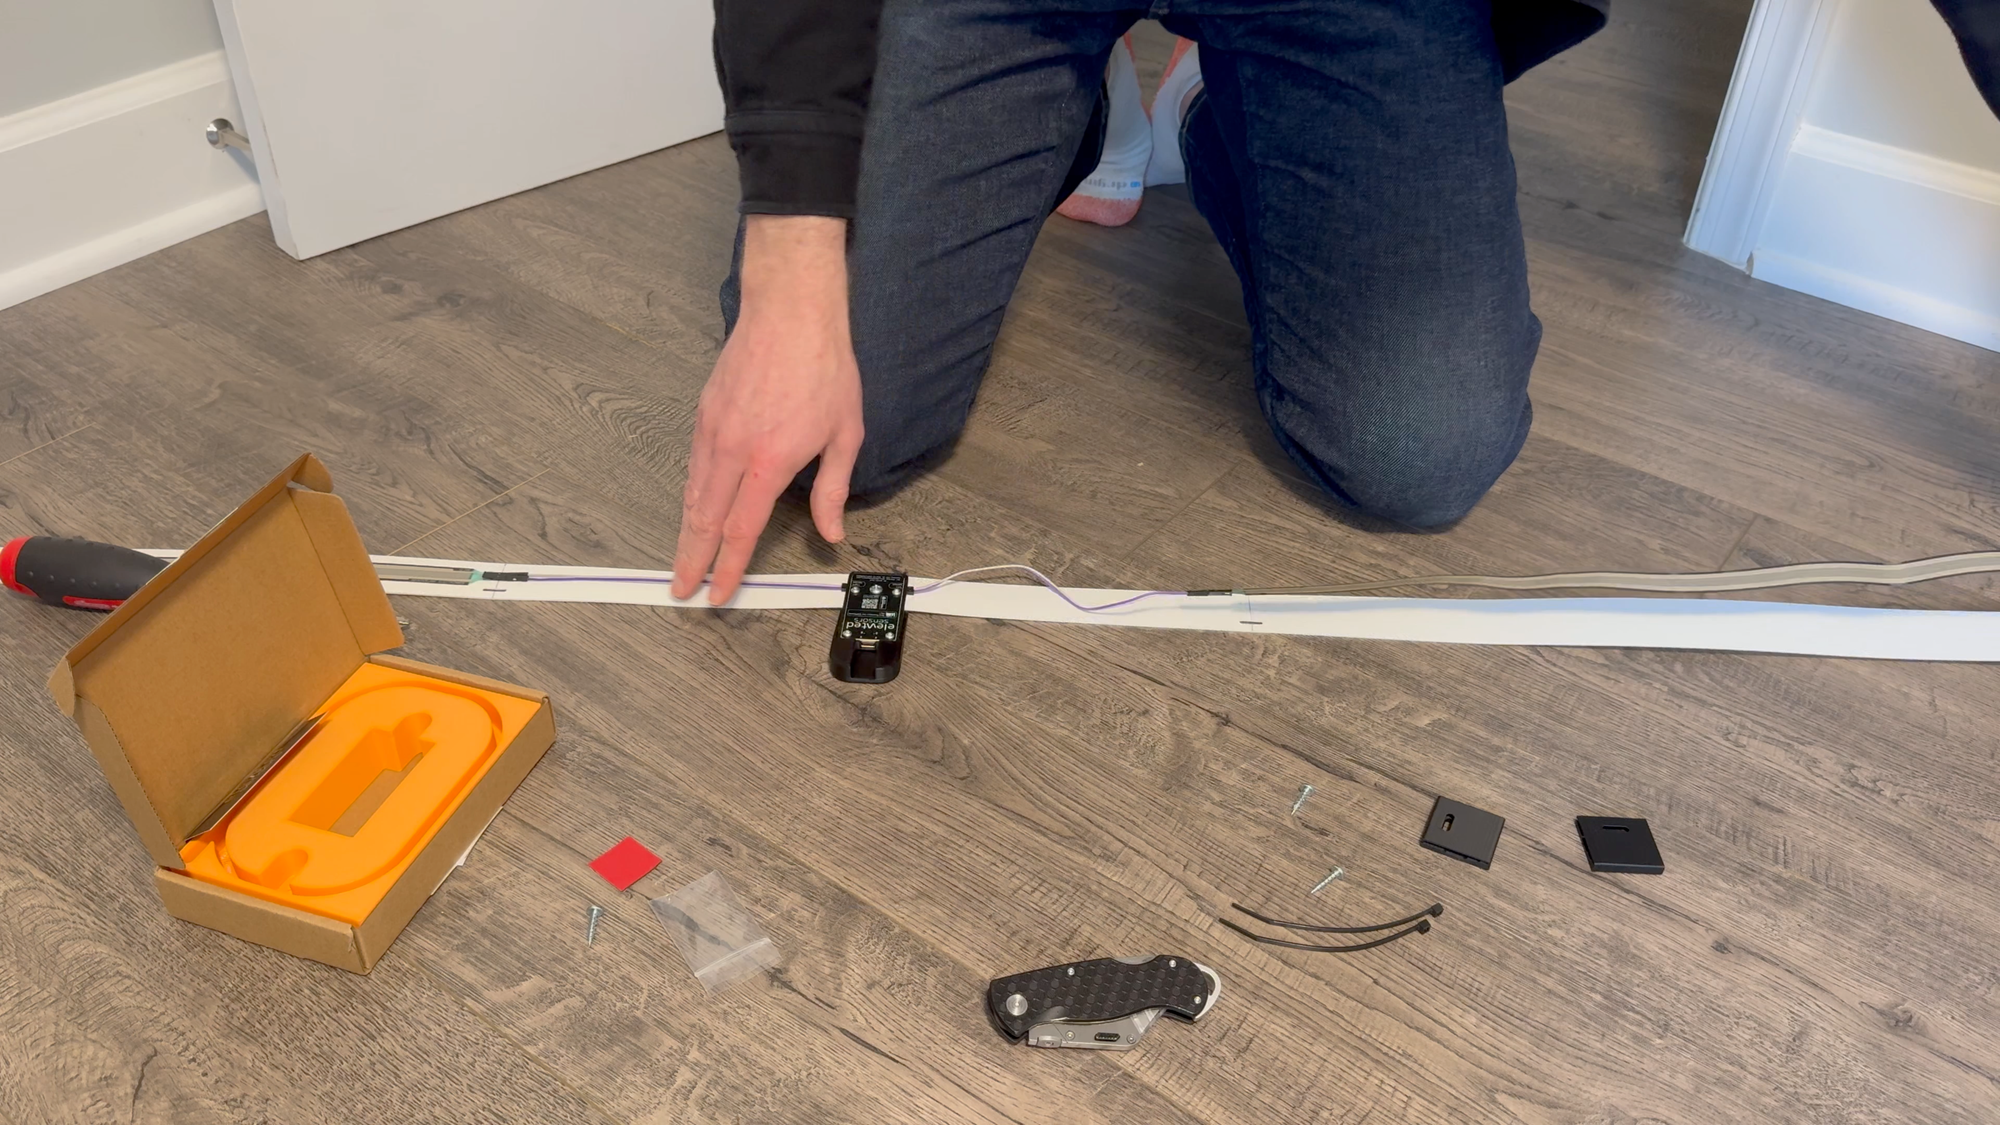
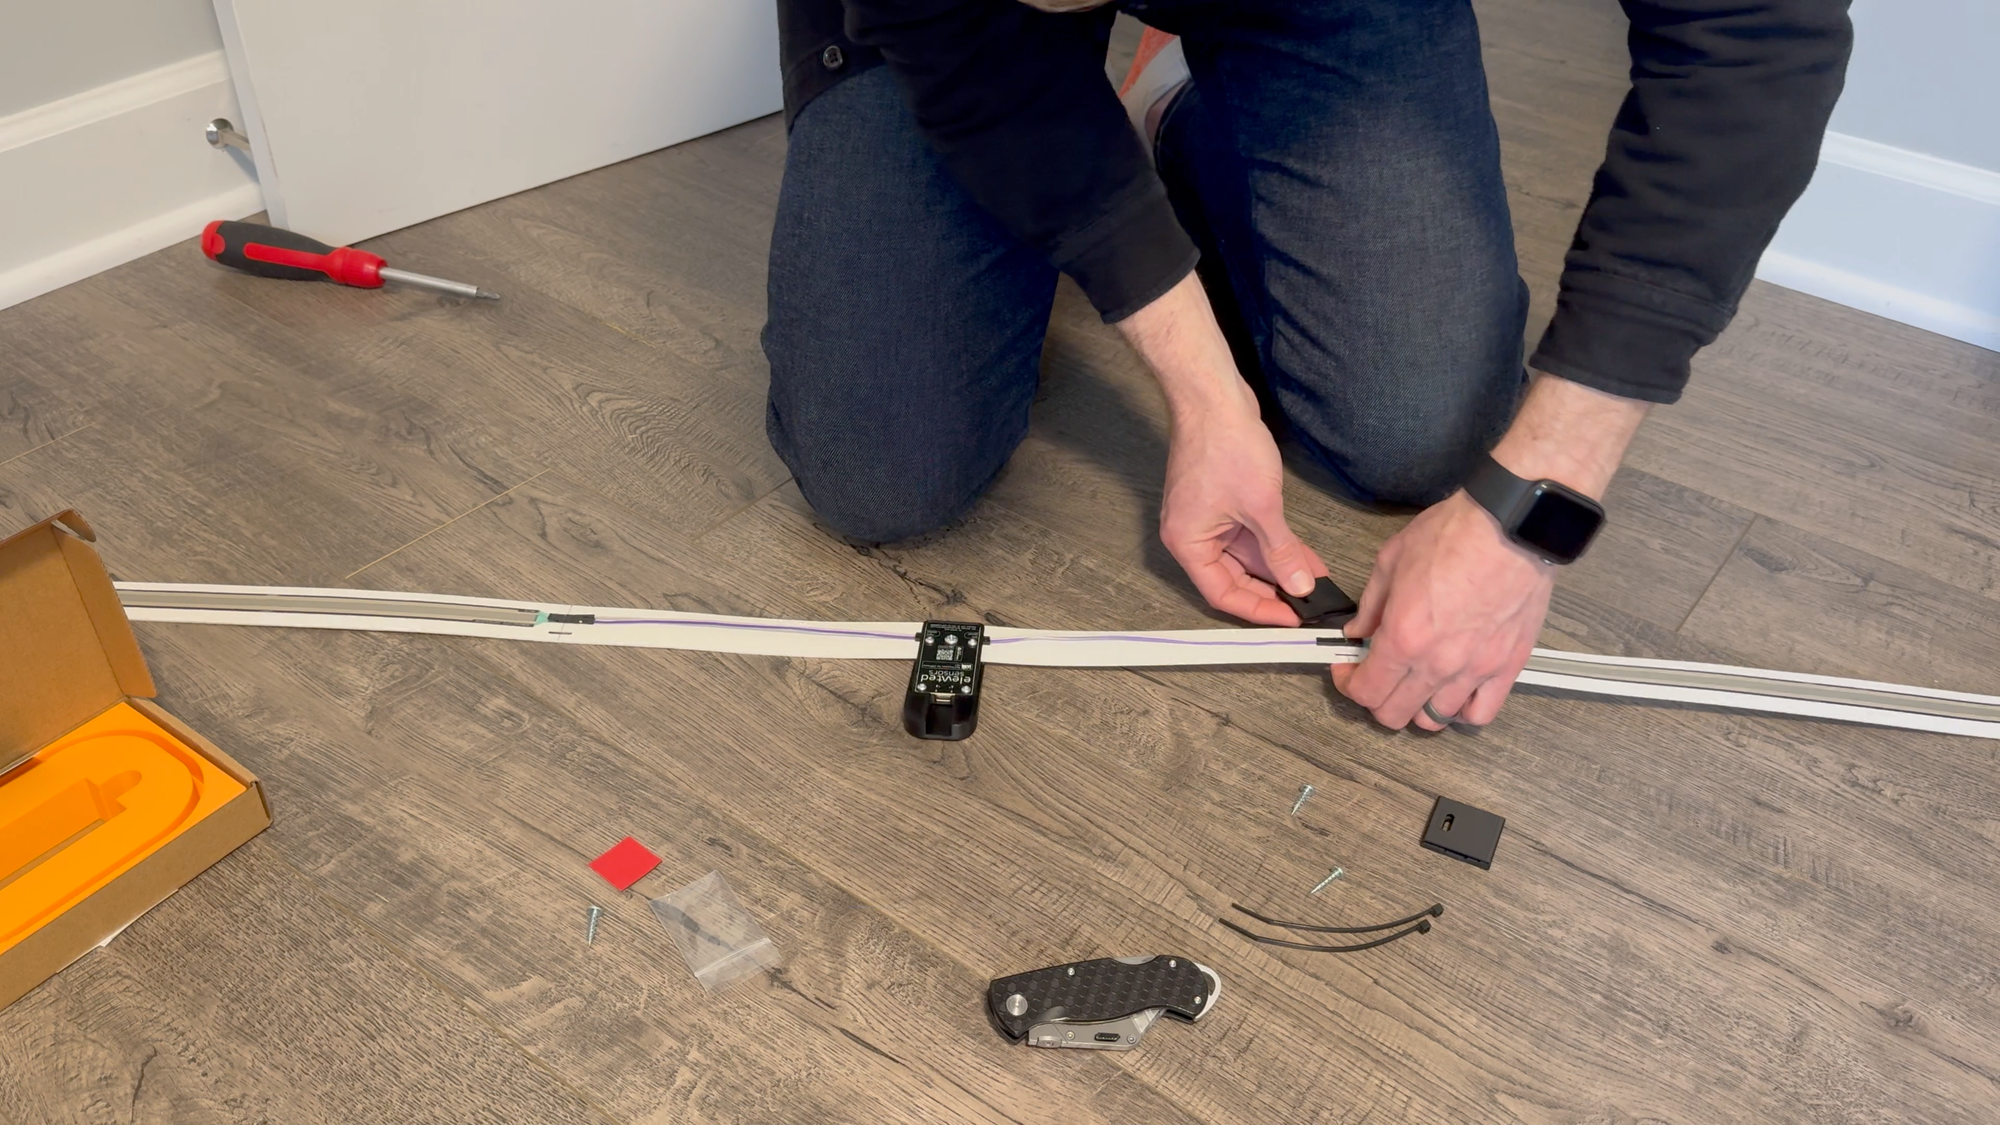
Elevated Sensors Bed Presence MK1: Hardware Setup
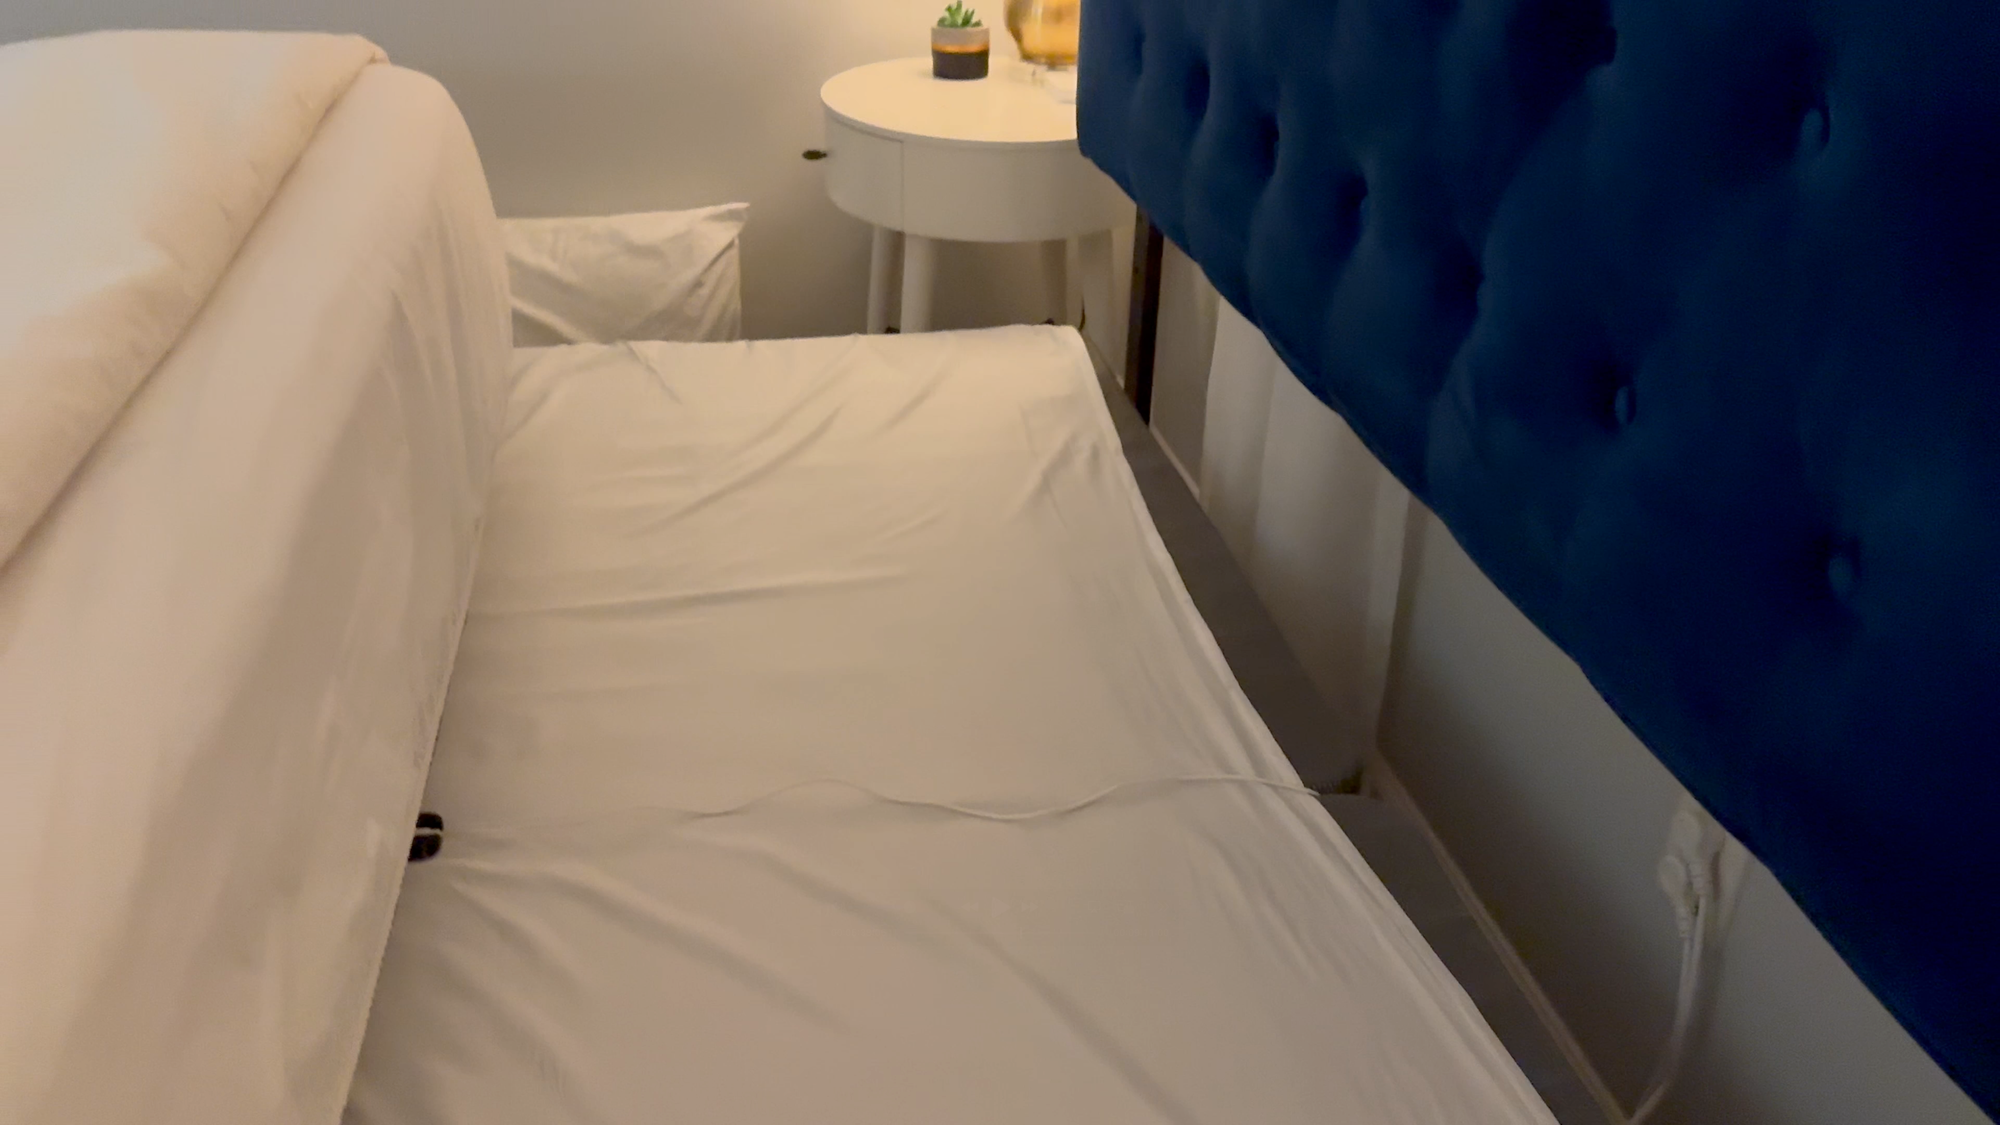
Bed Installation
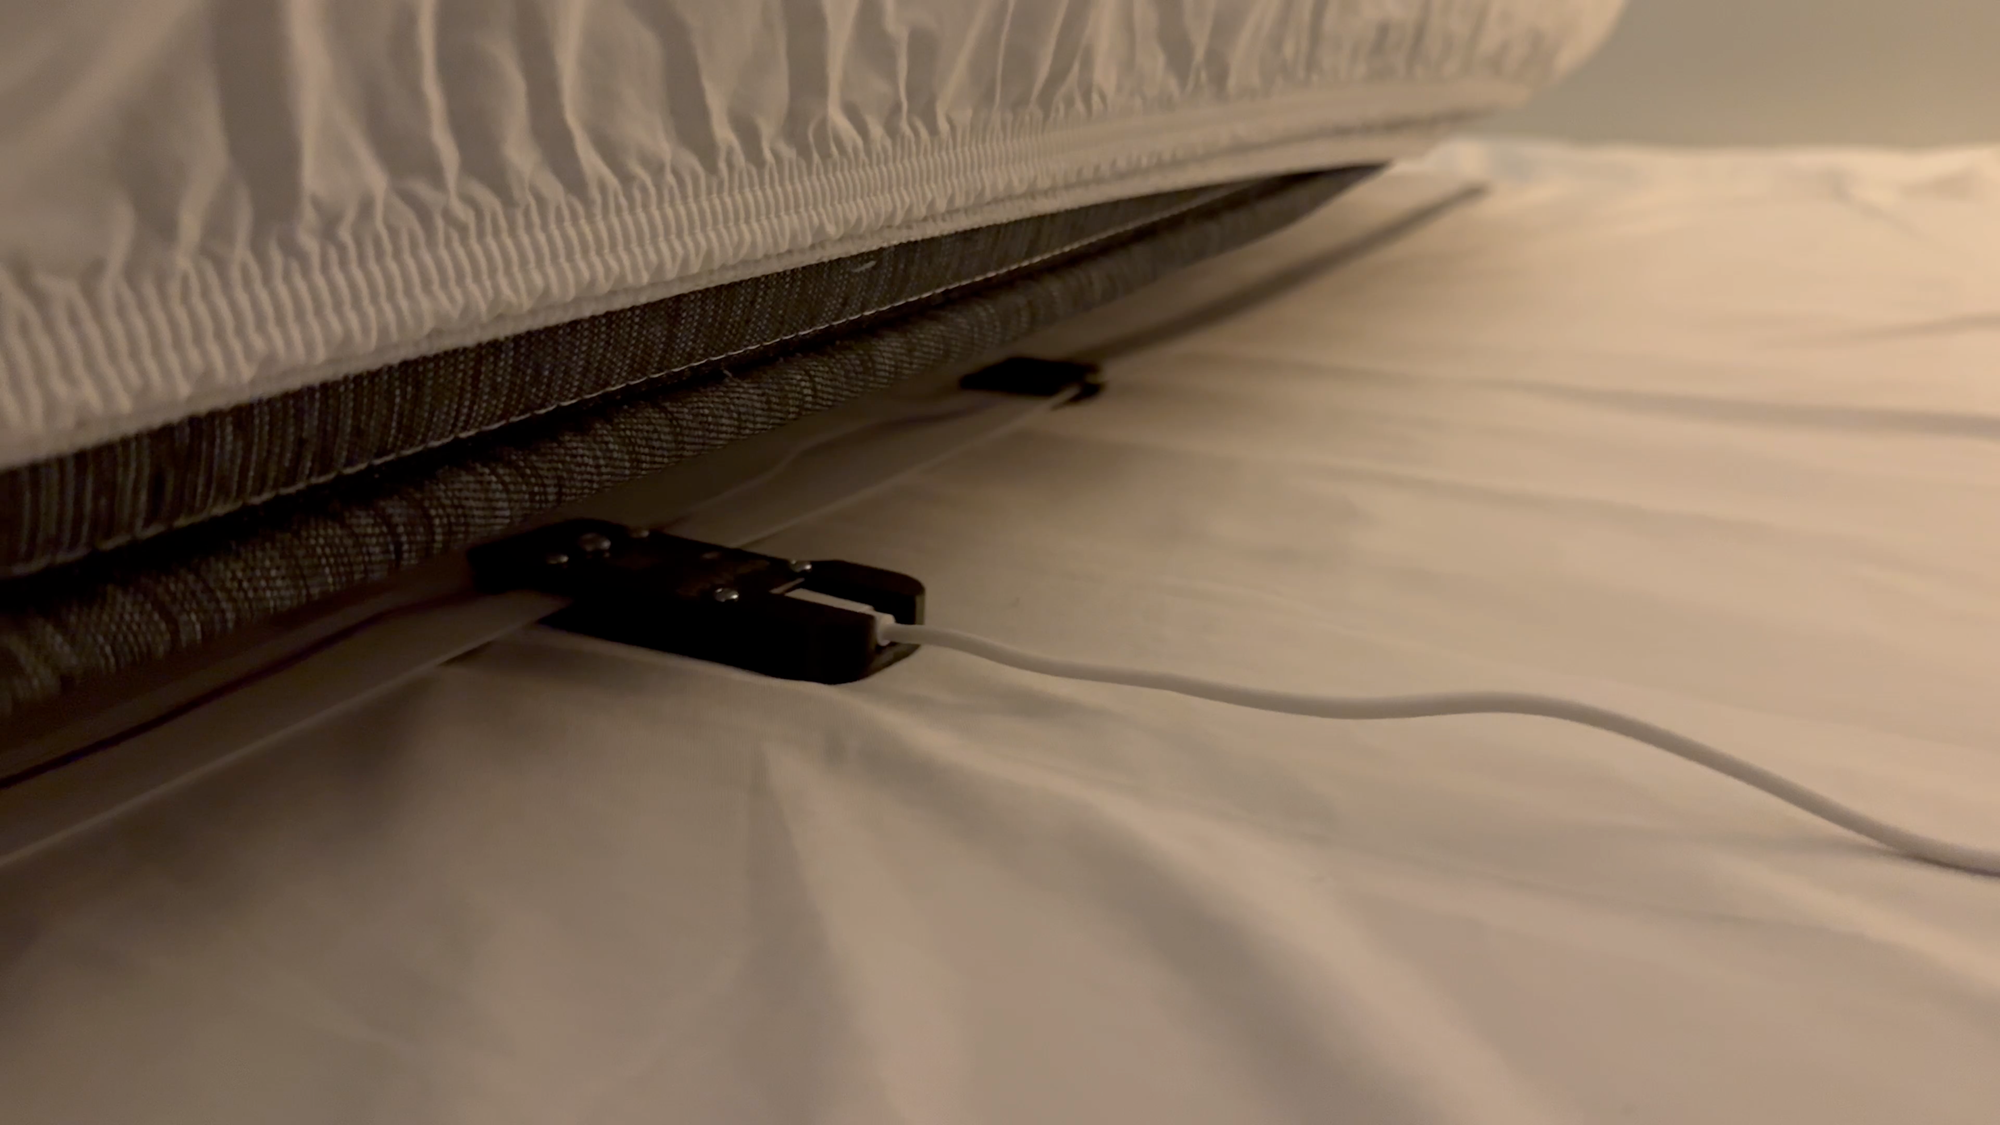
To install on your bed, first connect the sensor to USB-C power. Don’t forget this step like I did since removing the bed mattress is challenging. The sensor can be installed on top of a box spring, upholstered base, solid platform, or foundation. I chose to install mine on top of the box spring.
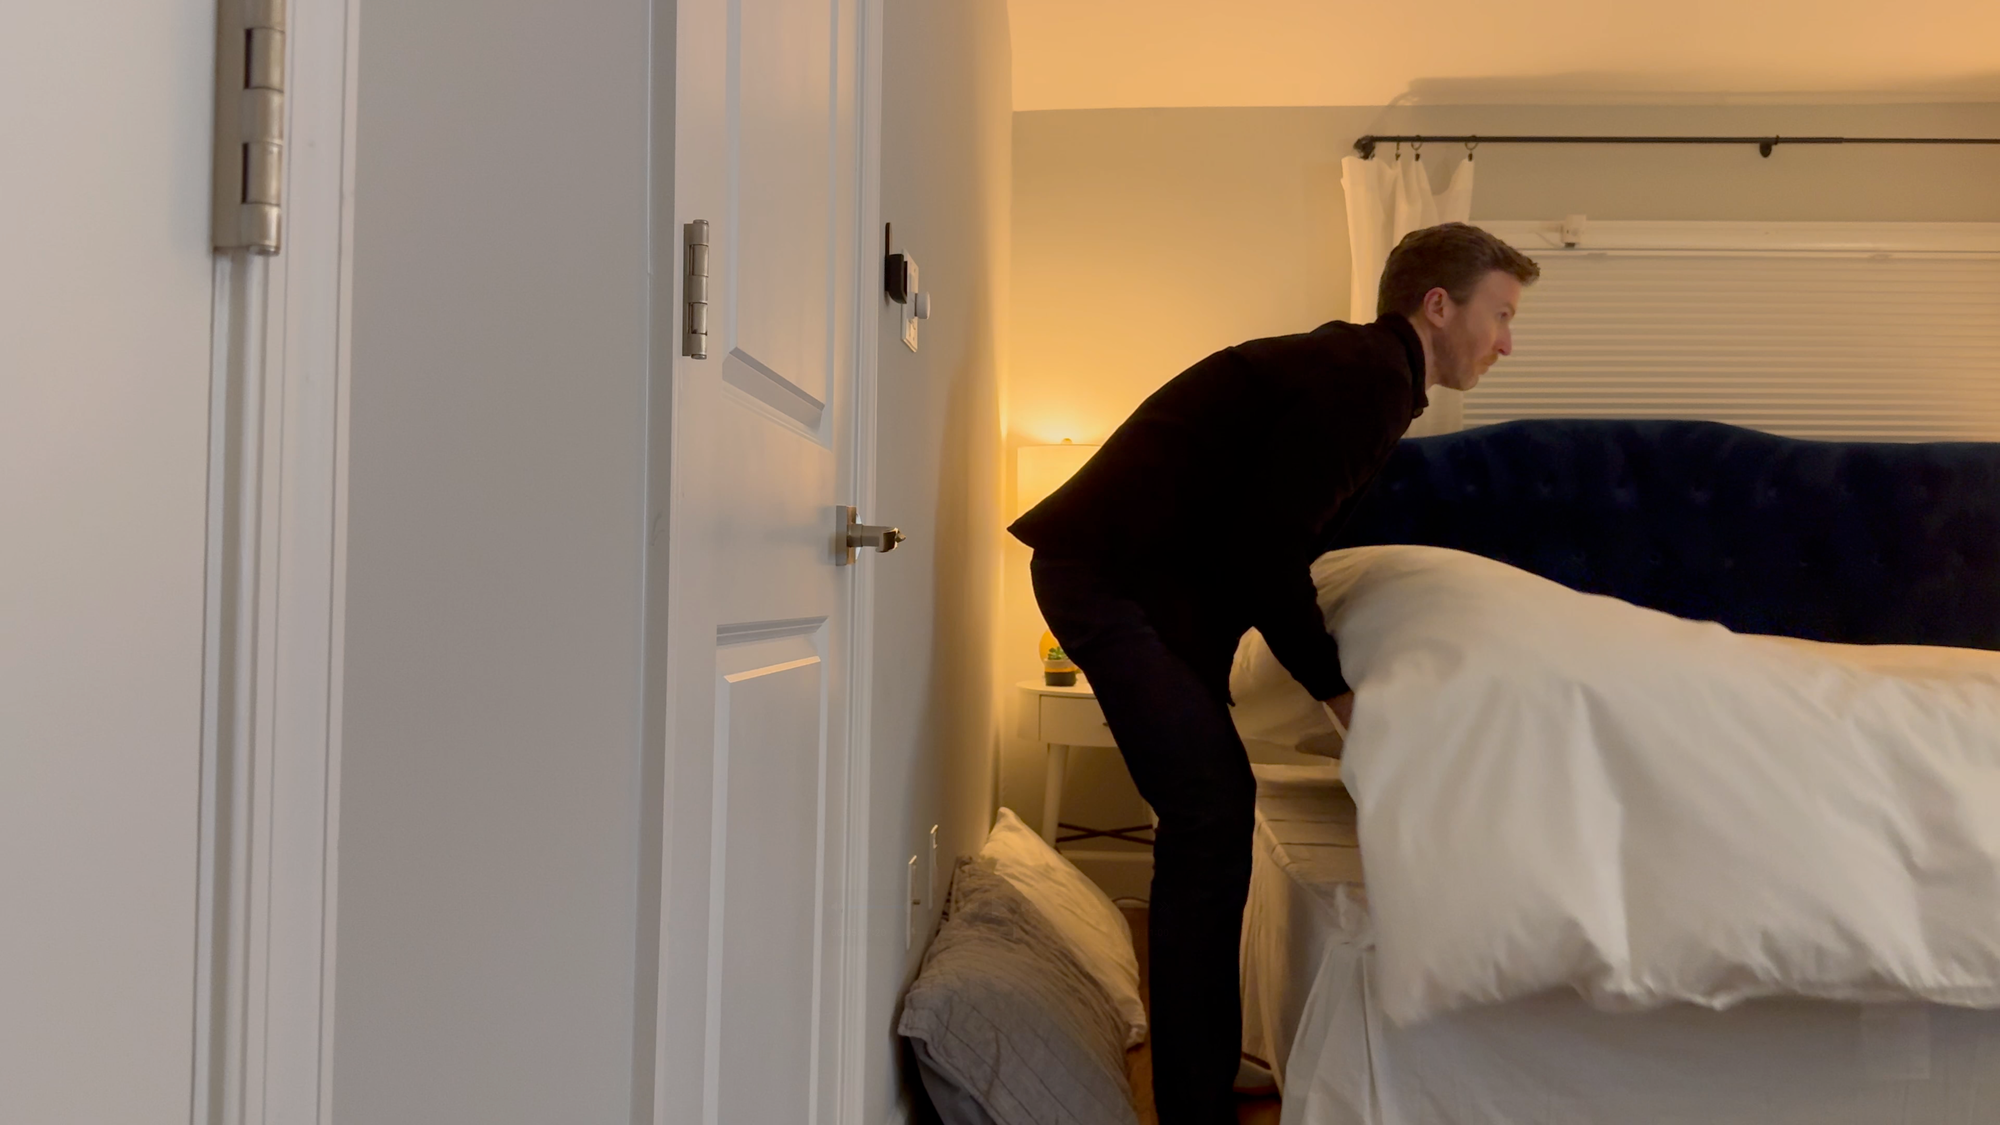
You’ll first remove the mattress from the bed frame. It may be good to have someone help you, especially if you are moving a King size mattress. No matter how strong you may be, moving a King size mattress is just awkward, and was the hardest part of the entire setup and installation.
Select a position in the torso region where most of your weight will be applied on the bed. If your bed has wooden slats or platforms, you have the option to use the provided wood screws to secure the ends of the flexible slat into place. If installing on metal slats, you can use the provided double-sided mounting square to secure it.
Once in place, carefully put the mattress back in place. Again, it’s recommended to have a second person help with this to avoid dislodging the sensor from dragging the mattress.
Elevated Sensors Bed Presence MK1: Bed Installation
Sensor Calibration
For the device to function as expected, you’ll want to calibrate it, which requires you and whomever you share a bed with to get in and out of bed. This will record the sensor readings while the bed is occupied and unoccupied, and calculate the optimal trigger pressure for both sides of the bed.
To do this, go to the device page in Home Assistant. Have the person you are calibrating for gently lay on their side of the bed. Give the sensor a few seconds to settle, and then press “Calibrate Occupied” for the correct side of the bed.
Then, have them get out of bed, allow the bed to sit unoccupied for a couple of minutes, and then press “Calibrate Unoccupied” for that same side of the bed.
Repeat these steps for the other side of the bed with the other person you are calibrating for.
If you find that you are getting false triggers, or want to adjust the sensitivity, you can manually set the trigger pressure.


Elevated Sensors Bed Presence MK1: Sensor Calibration
Home Automation
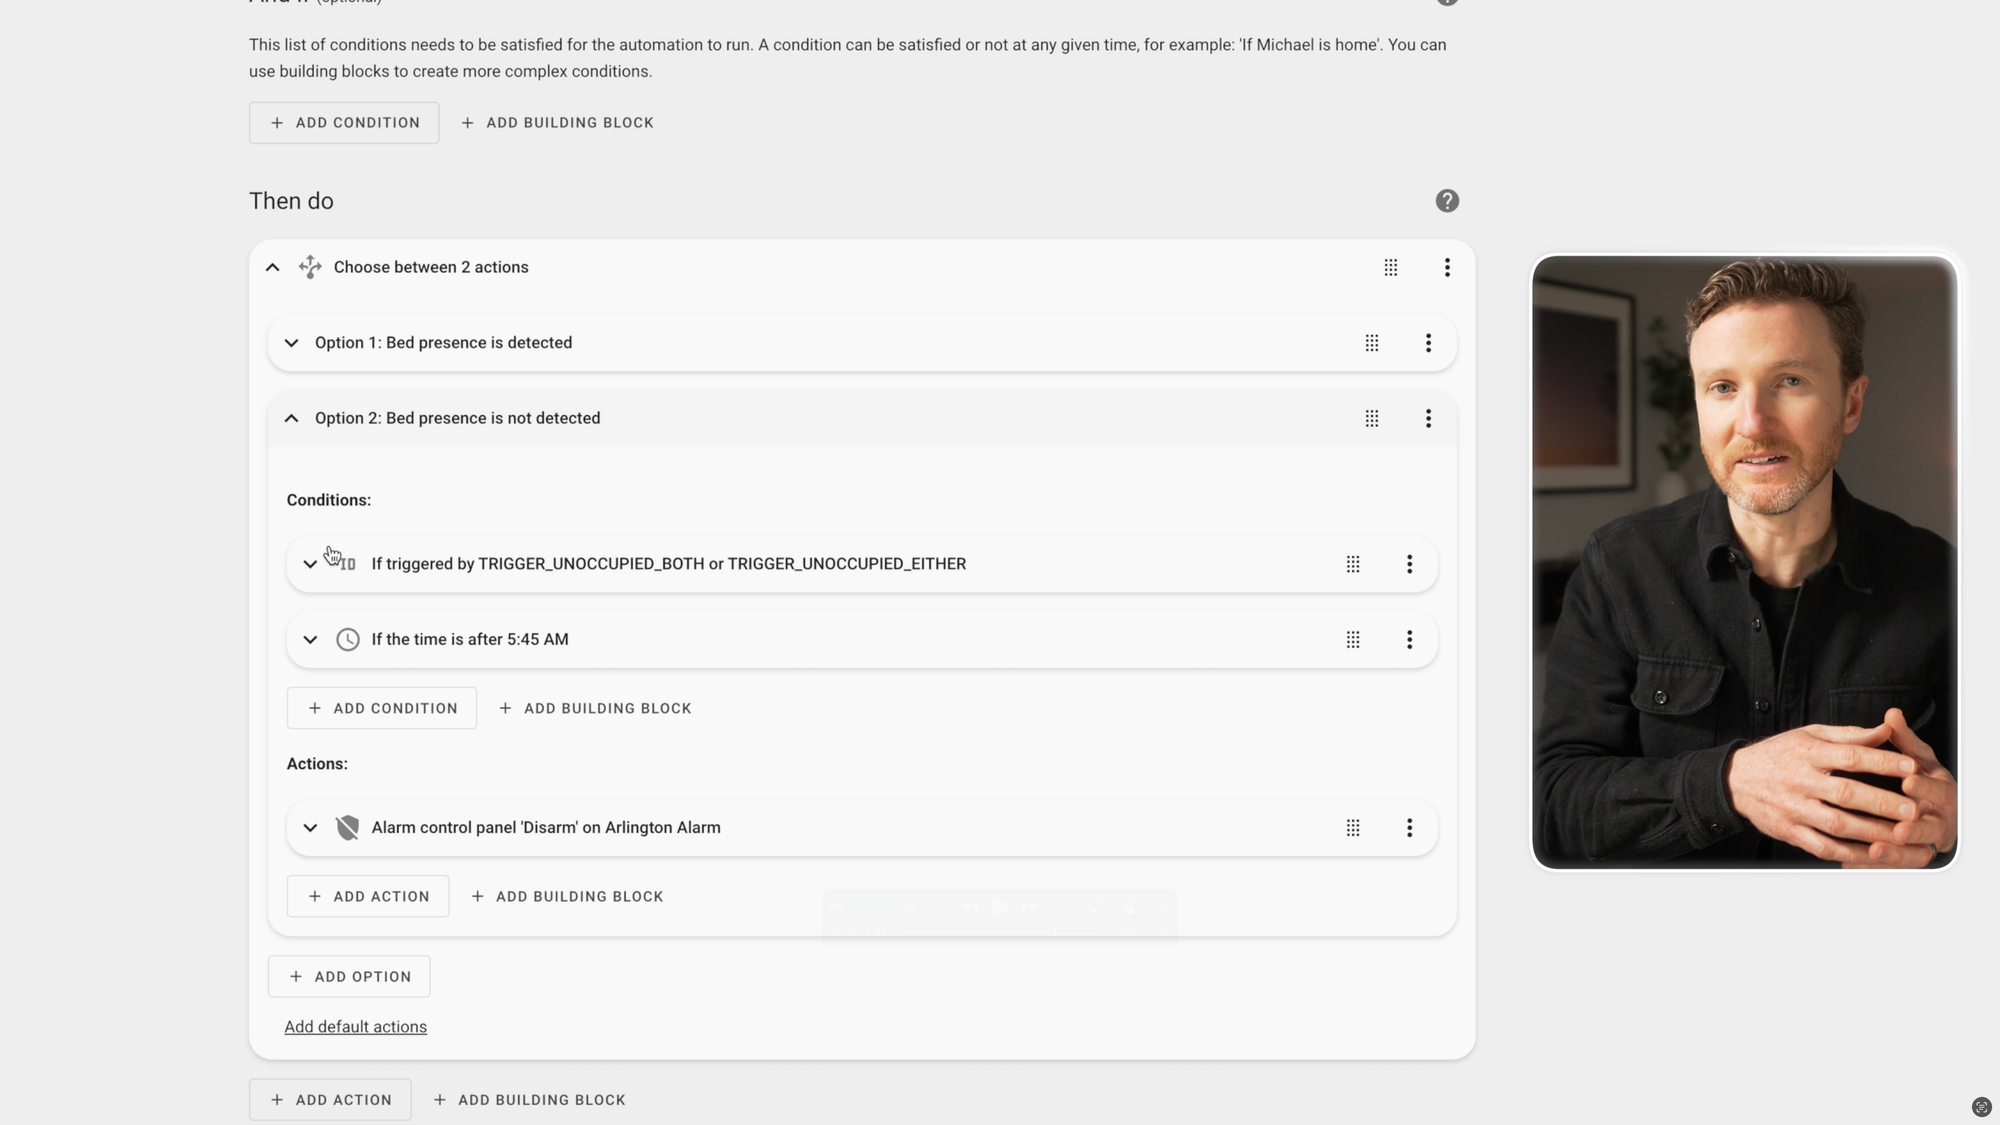
A bed sensor like this can unlock all new home automation possibilities, like arming or disarming the alarm, turning on or off lights, opening and closing motorized shades, adjusting the thermostat, and much more all based on bed presence detection.
And since it has separate sensors for both sides of a Queen or King bed, you can tailor these automations to the specific person getting in or out of bed, or only when both people are in or out of bed. I’ll walkthrough one automation example for arming and disarming the home alarm.
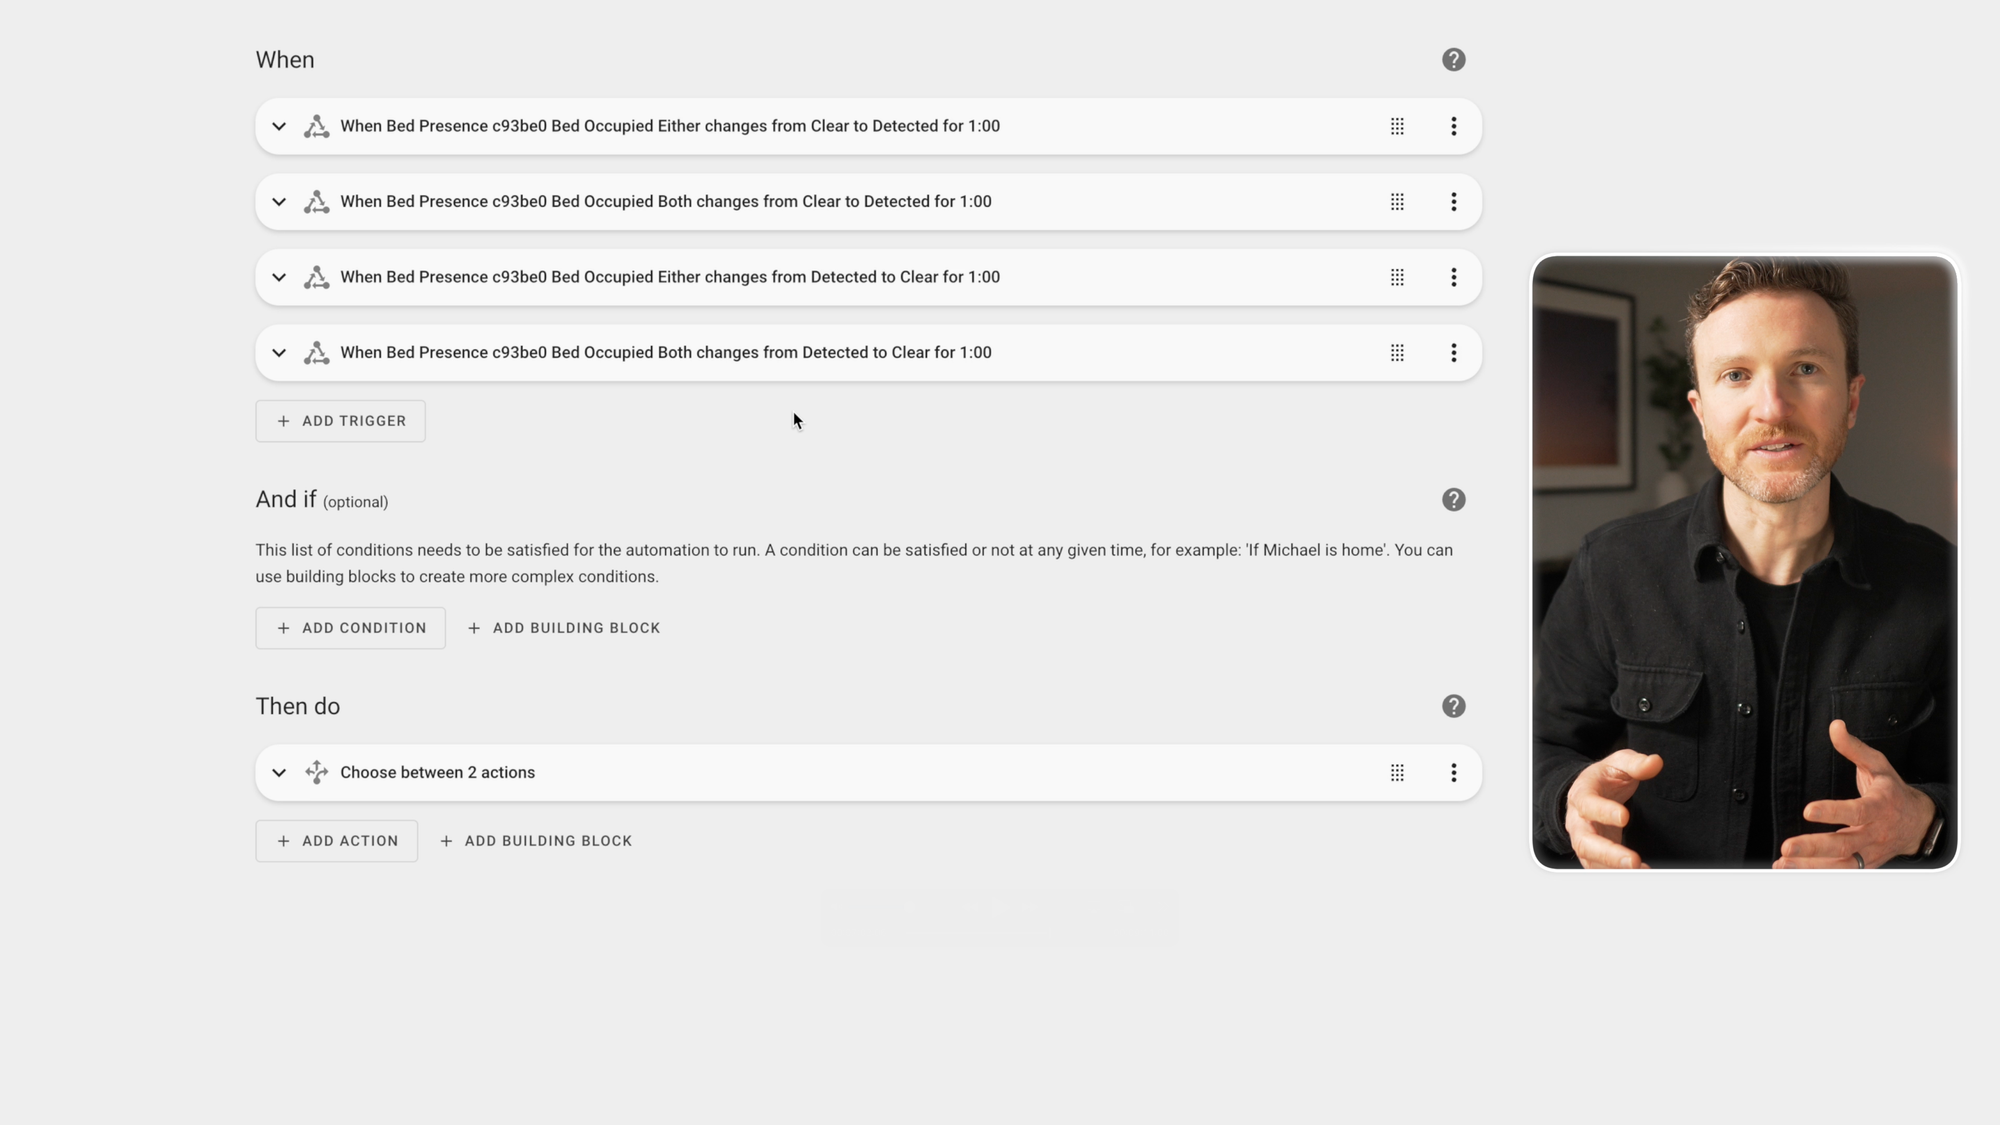
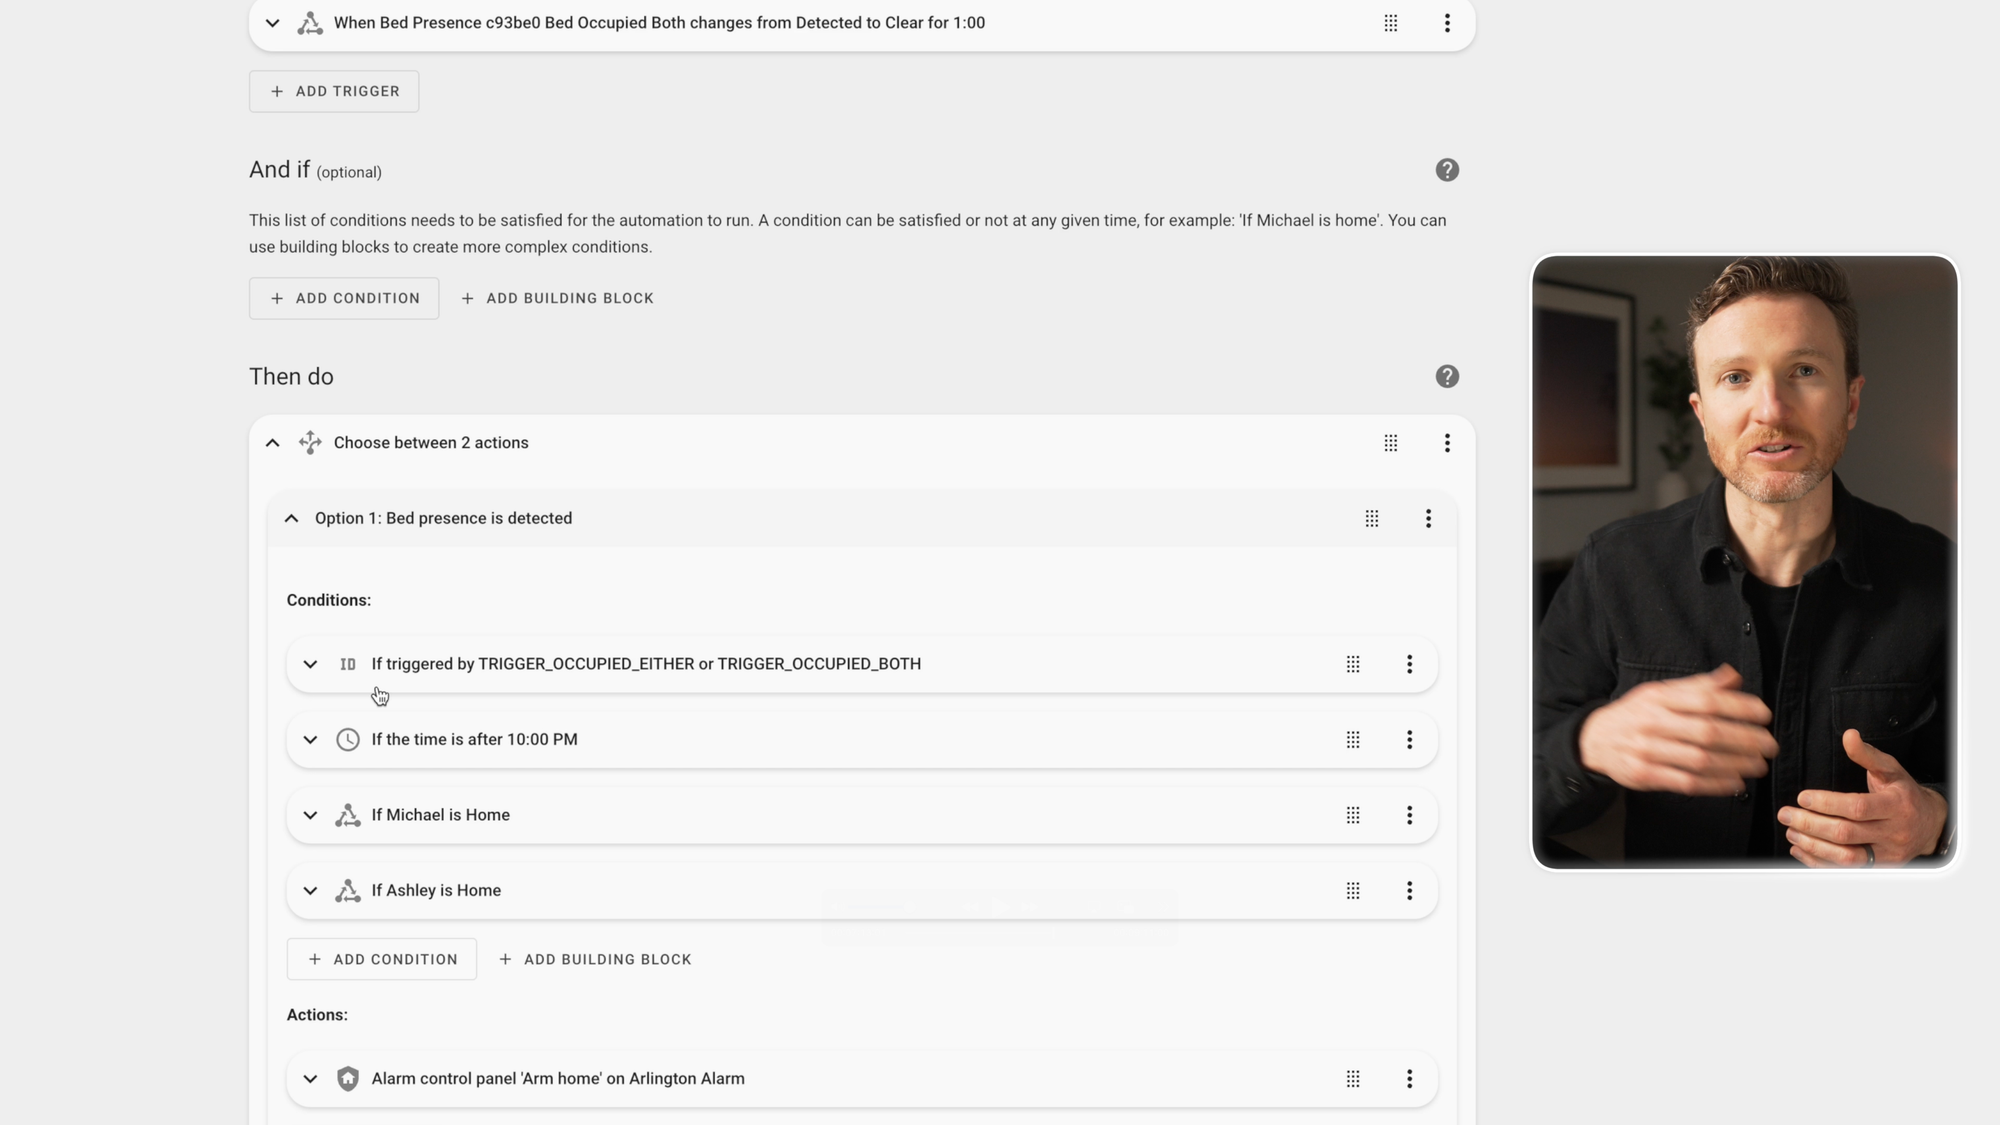
I created four triggers: two for occupancy, and two for no occupancy. In both cases, the detected or clear state must be true for one minute to avoid a temporary false trigger.
I then specify the actions based on which triggers were triggered. If bed presence changes to detected and it’s after 10 pm and my wife and I are both home, then it will set the alarm to home mode. If bed presence changes to not detected and it’s after 5:45 am, then it will disarm the alarm.
I have a separate automation that notifies my phone whenever the alarm changes states, so I always know what’s going on with our home’s security.
I also have separate automations for opening and closing the shades, turning lights and ceiling fans on and off, and adjusting the thermostat, but those might be additional actions that you want to include in your bed presence automation.
Another idea is to add LED light strips under each side of the bed, and create an automation to turn them on to a low brightness if someone gets out of bed in the middle of the night to use the bathroom.
Or, to play an announcement on a smart speaker when you get out of bed in the morning.

Elevated Sensors Bed Presence MK1: Home Automation
What I Like
I really like how quick and easy it was to add this device to Home Assistant using ESPHome. In fact, it’s about as easy as it gets.
I also like that it is flexible for different bed sizes and installation types, making it widely compatible with most types of beds.
And I really like how it has dedicated occupancy entities for different sides of the bed, either side, or both sides.
I also appreciate how the calibration process is largely automated, and that you also have the option to manually calibrate.
What to Improve
In terms of what to improve, well, I honestly don’t have much to say. I suppose it would be nice if it came entirely plug-and-play out-of-the-box without the need for assembly, but thankfully assembly was fairly straight forward.
Elevated Sensors Bed Presence MK1: In the Box
Final Thoughts
The King/Queen/Full size bed presence sensor is $69.99, or $54.99 for a twin.
I already have mmWave presence sensors in our bedrooms, but this sensor allows me to create automations based on if someone is definitively in bed or not. I suppose you could try to replicate this with a multi-target, multi-zone mmWave radar, but those tend to struggle more with still presence detection. That’s not an issue with the Bed Presence MK1 . I’ll leave a link in the description if you’d like to check it out.
Let me know in the comments how you automate your morning or evening routines.
Watch on YouTube
Featured Tech
Bed Presence MK1: https://go.michaelsleen.com/bed-presence-mk1
Thanks to Zooz for sponsoring this video. Grab the Zooz ZEN55 DC Signal Sensor to make your existing smoke and CO detectors smart:
Amazon: https://amzn.to/3yOAQz1
Webstore: https://go.michaelsleen.com/zooz-sensor-zen55